


As we’ve discussed in previous posts After Effects is a very powerful tool for animation and compositing. It can also be scary for new users. Depending on your experience, you may have heard words like template, preset, script, and expression threw around, but you may not know exactly what they are.
In this post, we’ll explain what each of these things is how they are different, and how to use them to make your After Effects experience easier and your projects better.
Templates

Definition
Let’s start with After Effects templates as they are probably the easiest to understand and make use of. First off, an After Effects template isn’t a piece of code or program in itself. A template is simply an After Effects project that has been built for the purpose of being easily updated and customized by users.
It’s a bit like the paint by numbers canvas. Rather than starting from scratch, a template gives you everything you need to make a great video, you just have to fill in the spaces.
In order to use an After Effects template, you need a few things. First off, you need a copy of Adobe After Effects. Perhaps this goes without saying, but we want to be super clear. Just because the project has been pre-made, you still need to open it up in After Effects to make any changes to it, and render out the final video.
When you purchase or acquire an After Effects template, you also need to be aware of what version of After Effects it was created in. You
must be using a version of AE that is as current or newer than the version that the template was created in. So, if a template was created in version CS5, you need to have CS5, CS6, or CC (Creative Cloud).
As an example, let’s take a look at this Free After Effects Template from Motion Array, available for download below.
Download the Free After Effects Template
Working With A Template
Once you have your template project opened, it should be fairly simple to update with your content. Many templates include placeholders for text, images, and/or video clips. These placeholders will be layers inside of compositions or empty compositions in the project.
You’ll want to look at the project tab to find the compositions for making replacements. These should be clearly labeled. For instance, in our Motion Array templates, text replacement compositions will be inside of the Text folder and images will be in the Images folder.
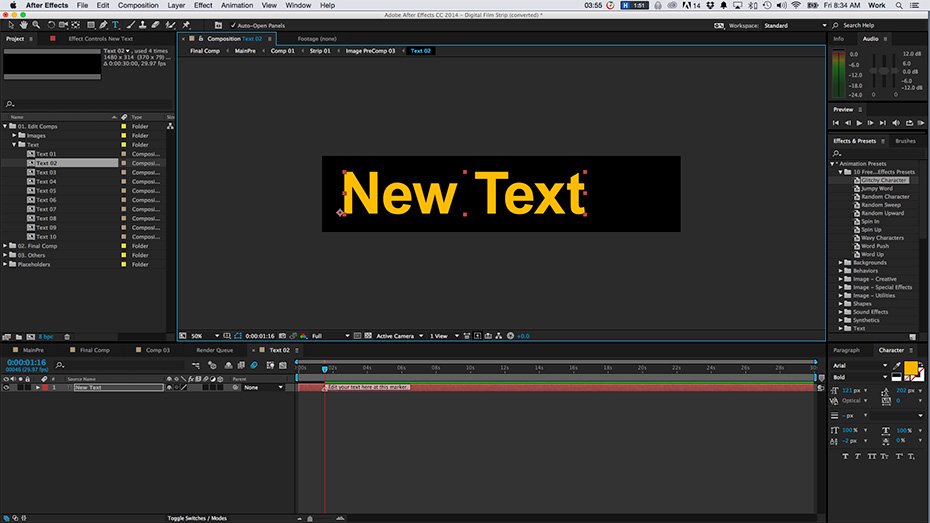
To replace text, you simply open the text replacement comp and highlight the text layer. Select your text tool, then highlight the text in the comp window and type the new copy.
Note that text that extends outside of the composition window will not be seen in the main composition. So you may need to resize your text to fit in the text comp window.
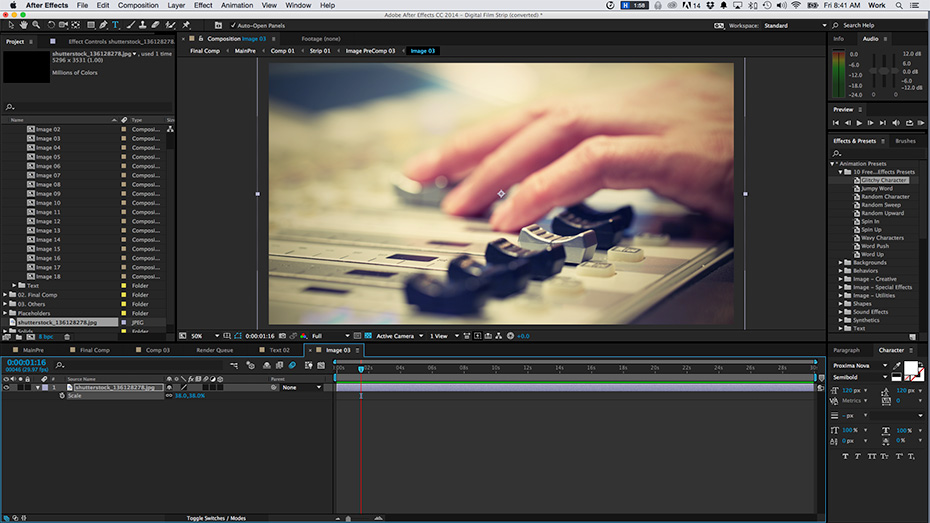
When it comes to replacing an image or video, you’ll generally open the image comp and place a layer in it with your image or video. You’ll want to make sure that you fill the comp completely so as to not have black space in your frame. Again, anything that extends outside of the comp window will not be seen in the final composition.
Some templates will be set up with other customizable features like color controls for instance. In these cases, you can simply open the controls for the applicable feature and adjust.
After Effects templates are a great way to create a beautiful project without a lot of work. They are a great way to add value to existing photos or videos, and they can be a great way to get a jumpstart on a new project you are working on.
Presets
Definition
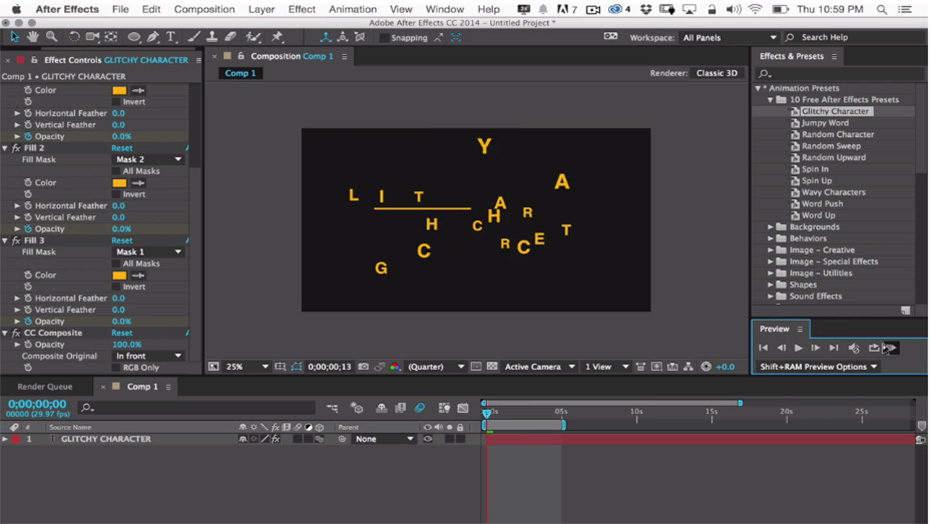
Unlike templates, After Effects presets are bits of animation data saved for you to drop on a layer so you don’t have to hand animate certain things. As an example, we’ll look at some text presets. Motion Array has a set of 10 free presets that you can download below.
DOWNLOAD FREE AFTER EFFECTS PRESETS
Loading A Preset
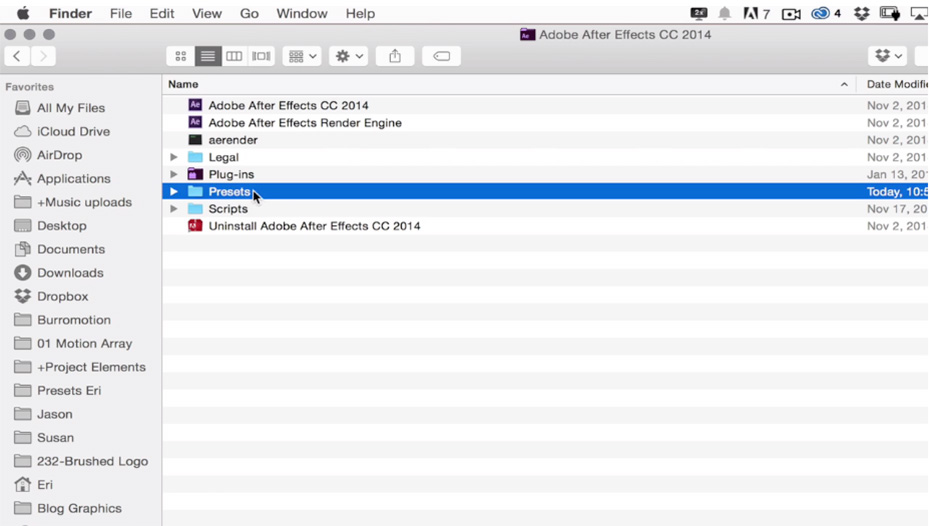
Once an After Effects preset is downloaded, you’ll need to move it into the appropriate folder. You can either move the .ffx file for the preset, or if you have several presets, you can move the entire folder. You’ll want to navigate to the After Effects application folder. Make sure you are looking at the current version of AE if you have multiple loaded on your machine. Then look for the Presets folder and drop your files or folder in there.
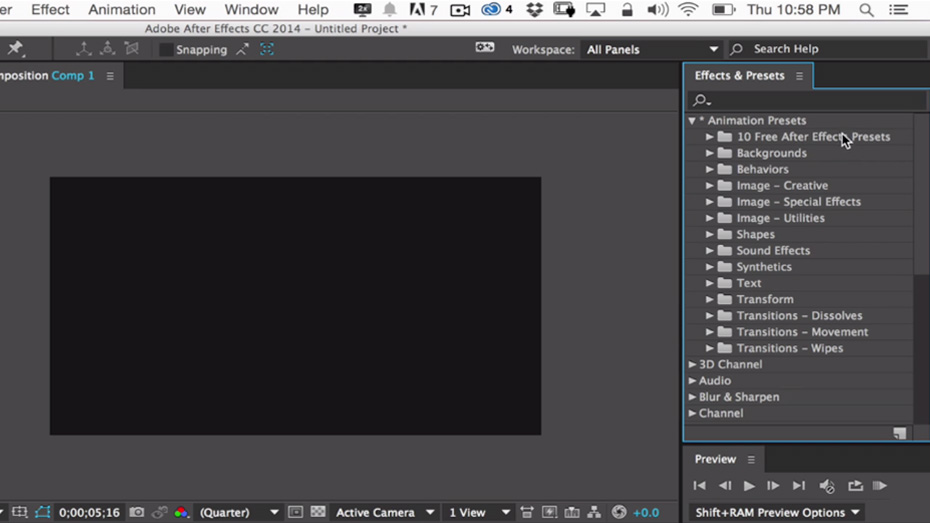
If you have After Effects open when you do this, you’ll need to refresh your presets in the application. First, open the Effects & Presets tab. This can be done by clicking View in the navigation bar, then Effects & Presets. Once the panel is open if you don’t see your new presets, click the menu options button. Then click Refresh List. Your new presets should show up.
Using A Preset
In order for you to use the preset, you can simply double-click on it to create a layer with that preset loaded, or you can highlight a layer in your composition and double click to apply the preset.
Presets are a great starting point for certain aspects of animation, but sometimes they need customization. The beauty of a preset is that all of the keyframe and effect data is visible and customizable.
For example, if you have a text preset that animates letters onto the screen from the bottom and you need it to move faster, you will simply look at the keyframes and move them in the timeline accordingly.
Creating A Preset
You can also create your own presets or save ones that you have customized. To do this, simply select all of the elements that you want to save in a preset from the appropriate layer in your composition. These can be keyframes, effects, etc. Then hit the Create New Animation Preset button (which looks like a sticky note) at the bottom of the Effects & Presets panel. Give it a name and be sure to save it into the After Effects presets folder. Refresh the list and you’ll be all set.
Presets can be really helpful if you do the same type of animations over and over again, especially with text layers when animating text in and out.
For quick future reference, check out our previous blog post and tutorial video on Installing & Using After Effects Presets.
Scripts

Definition
Scripts are also code-based ways to help you work more efficiently inside of After Effects. One way to think of them is like plug-ins or mini-applications that work inside AE. In their CS6 Scripting Guide, Adobe describes it this way. “A script is a series of commands that tells an application to perform a series of operations. You can use scripts in most Adobe applications to automate repetitive tasks, perform complex calculations, and even use some functionality not directly exposed through the graphical user interface. For example, you can direct After Effects to reorder the layers in a composition, find and replace source text in text layers, or send an email message when rendering is complete.”
Anyone with the knowledge can write a distribute a script. Let’s use a free script from Motion Array as our example.
Download the Free After Effects Script Here
You can also go back and review that particular script tutorial
here.
Loading A Script
Like presets, scripts need to be dropped into a specific folder on your computer. Once you’ve downloaded your script and unzipped it, take the file and move it to the Scripts folder that is located in the After Effects folder along with the Presets folder. Remember to make sure you are in the current version’s folder. If you use multiple versions of After Effects, you’ll need to copy the file into the Scripts folder for each one.
If you want to be able to dock your script interfaces within your After Effects layout and have it open whenever you open AE, then place the script in the Scripts UI Panels folder which is inside of the Scripts folder.
Once you have your script installed, you’ll access it in one of two ways. If it’s not in the Scripts UI Panels folder, you’ll need to load it by going to File and then Scripts in the upper navigation. Here you’ll see scripts that were loaded directly into the Scripts folder. They will load in a separate popup that floats on top of your After Effects layout, and you’ll have to reload the script if you close the app or open a new project.
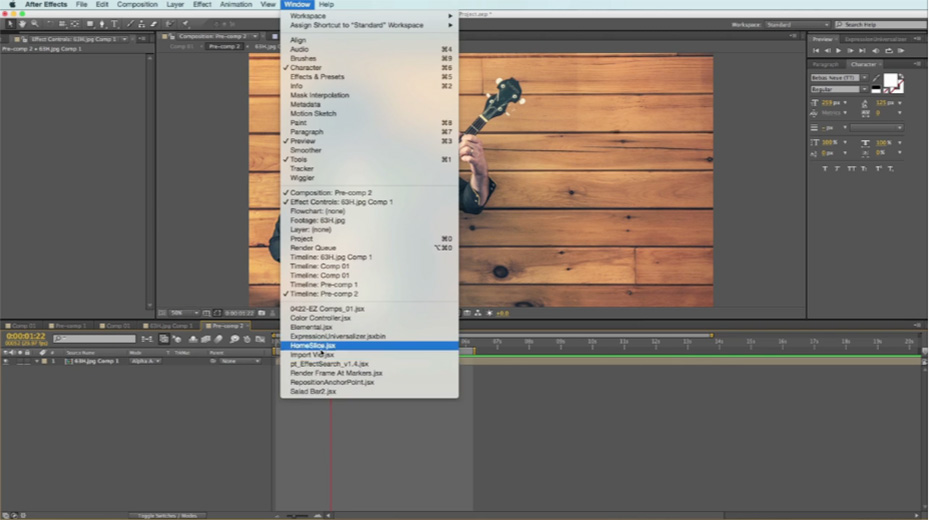
If you loaded it into the ScriptsUI Panels folder, you’ll load the script by clicking Window in the upper navigation. All of these scripts will be at the bottom of the drop-down menu. Once opened, you can drag the panel wherever you want and dock it in the layout. These scripts will open every time you open a project until you decide to turn them off from your layout.
Using A Script
Once your script panel is open, it’s up to you on how to use it. Each script has a different function. Sometimes a script will apply to keyframe data, so you’ll need to highlight certain keyframes before activating the script. Other times it may affect a layer, so you’ll want that layer highlighted. In the case of Adobe’s built-in “Render and Email” script, you just need to have something in your render queue in order to activate it.
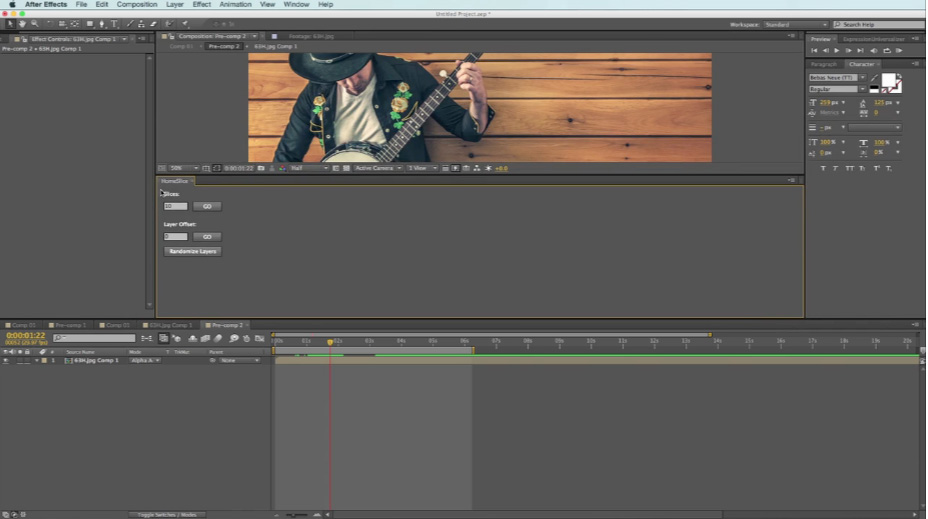
The example of the free Home Slice script from Motion Array is layer-based. So, to use this script, you would first choose a layer that you want to slice up. Once selected, you’d set the number of slices and hit GO to activate. Then to offset the layers, you’d select all of the new layers, set the offset amount, and hit GO.
Once you get used to using scripts, they can go a long way to making your After Effects experience much more efficient and also help out with advanced animation techniques.
Expressions
Definition
A good way to look at expressions is like mini versions of scripts. In truth, it’s much more complex than this, but on the most basic level that gives you a picture. Adobe in their Expression Basics help page explains it this way. “An expression is a little piece of software—much like a script—that evaluates to a single value for a single layer property at a specific point in time. Whereas scripts tell an application to do something, an expression says that a property is something.”
For this reason, they are generally much simpler in nature than scripts. With a little practice, you can even write your own scripts. But many After Effects users just keep a document of expressions that they can easily copy and paste as needed.
There is no need to install an expression. Instead, when you want to use an expression, you will simply open up the expression controls on the layer that you want to affect and either write or paste the expression in.
Using An Expression
To open the expression controls, pick the layer property you want to affect and hold Option on Mac or Alt on PC while clicking on the keyframe (stopwatch) icon. You’ll then see the expression options including a place to write or paste your expression. You can also use the pick whip tool to reference another layer for your expression. And you can enable or disable your expression here without having to delete it.
Let’s look at an example of a common and simple expression known as wiggle. Let’s say you want a layer to change positions randomly over time. You could go into the position and set keyframes for different positions over the course of the timeline, or you could simply paste this code into the expression field.
wiggle(2,12)
The numbers can be set to whatever you’d like. The first number represents how many wiggles happen per second, while the second number represents the value of the wiggle or the number of pixels of movement. So, setting both numbers higher will result in a quicker and larger movement.
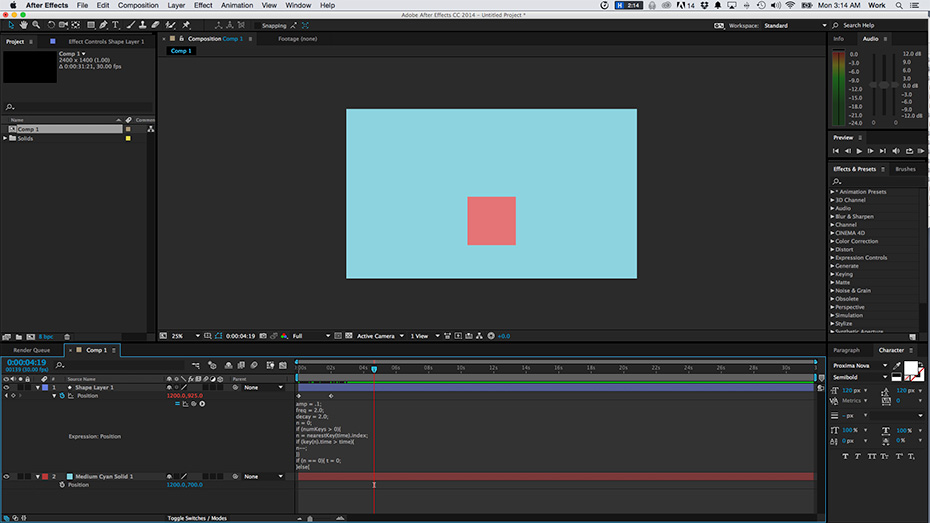
Wiggle is a good example of a very simple expression. For another example, let’s take a look at the popular “Inertial Bounce” expression.
amp = .1;
freq = 2.0;
decay = 2.0;
n = 0;
if (numKeys > 0){
n = nearestKey(time).index;
if (key(n).time > time){
n–;
}}
if (n == 0){ t = 0;
}else{
t = time – key(n).time;
}
if (n > 0 && t < 1){
v = velocityAtTime(key(n).time – thisComp.frameDuration/10);
value + v*amp*Math.sin(freq*t*2*Math.PI)/Math.exp(decay*t);
}else{value}
This might look like a jumbled mess, but when applied to a position parameter, it will allow for a layer to fall into place and then bounce with a natural decay until it comes to rest. This would take a lot of effort to get right with individual keyframes, but with this expression, it is much simpler, while giving you controls for things like the amplitude of the bounce, the number of bounces, and the decay in between each bounce.
Although expressions might be a lot to look at for the uninitiated, they are generally quite easy to apply and tweak, making much of your animation work way more efficient. Because they often employ complex math to simulate physics, you can generally get much more realistic looking results than you would with hand animation.
Ultimately, templates, presets, scripts, and expressions can all save you loads of time and help make your animations look more professional. Now that you have an understanding of how each one works, go out there and try some for yourself. Let us know in the comments what you find helps you the most with your After Effects projects.


