


Adjustment layers are a powerful tool in After Effects, but it is often ignored or misused by Editors. They can be used for a massive variety of effects and can save you time and energy applying effects to multiple clips. To optimize your workflow using After Effects adjustment layers, follow through our top tips and handy ways to create cool effects.
Summary
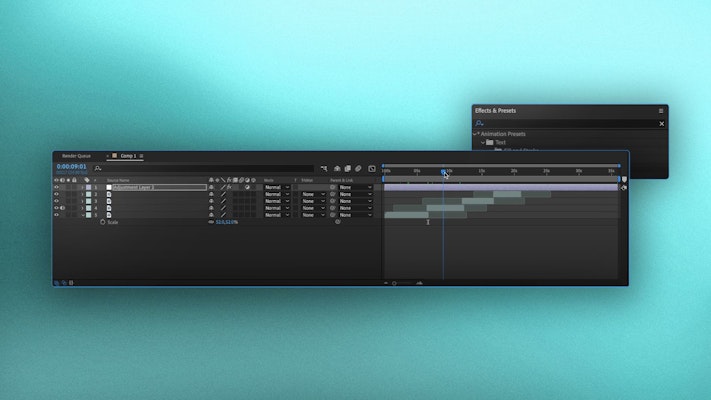
Part 1: How to Use Adjustment Layers in After Effects
Adjustment layers can be added to your timeline and do not affect your compositions because they are invisible until you start adding effects. Once an effect is applied to the adjustment layer, it will displace the effect on every clip beneath it.
A fun way to think about an adjustment layer is as a sheet of glass that sits in front of or between your other layers. If you add a tint to the glass, everything ‘behind’ it will show the tint.
Adjustment layers are used when you want to apply effects to multiple layers without adding the effect to each clip individually. You might use it across your whole timeline for adding general effects such as color grading or film grain or across shorter sections of your composition to create transitional effects.
Adding & Using Adjustment Layers
Let’s have a quiet look at the basics of adding and positioning an adjustment layer to your timeline.
- Edit your clips in the timeline as usual.
- Right-click on the timeline and choose New > Adjustment Layer.
- Move the adjustment layer up or down your stack depending on the clips you want the adjustment layer to affect. Remember, your adjustment layer effects will only be viewable on the layers below it in the timeline stack.
- Drag the ends of the adjustment layer to change its duration.
- You can also highlight it in the timeline and use ALT+[ or ALT+] to trim the layer to the playhead.
Troubleshooting Adjustment Layers
Adjustment Layers are pretty straightforward to use, but there are a few instances where they can behave in unexpected ways.
Check the Position
If you can’t see the effects you are adding to your adjustment layer, it is likely it is in the wrong position in the stack. Try moving the adjustment layer to the very top of your stack to see the effects.
Check Effects are not Off
A second reason you might not be able to see a particular effect is if it is toggled off in either the Effects Control panel or on the timeline.
- Check the eye icon is on in the timeline Layers panel.
- Select the adjustment layer and check the effects are turned on in the Effects Control panel.

Don’t Use for Just a Single Clip
One of the biggest misuses of adjustment layers is using them on single clips. Adding an adjustment layer can speed up the rendering, but only when using the effects over multiple clips. If you only need to add effects to a single clip, add it directly to the layer.
Don’t Use the Solids Adjustment Layer
When you create an adjustment layer for your timeline, a solid associated with it is made in the Project browser. This is not your Adjustment Layer! Dragging this solid to your timeline will create a white rectangle on your screen that doesn’t work in the same way. If you delete your adjustment layer, create a new one using the method above.

Part 2: Most Popular Effects Editors Use with Adjustment Layers
1. The Tint Effect
The tint effect is beneficial for creating unique looks and styles using color options. The tint effect initially changes your layers to black and white, but you can then use a color picker to map the blacks and whites to other colors. Finally, you can use the Amount setting to adjust how strong the tint is, allowing you to create some cool, desaturated looks.

2. The Change to Color Effect
The Change To Color Effect is another tool for adjusting the color tones in your Layers, and only this one allows you to select single colors for Adjustment.
- Add the Change to Color effect to your adjustment layer.
- Select the layer, and in the Effects Control panel, select the From Picker. Choose the color in your shot you wish to change.
- Go to the To color options and select your new color.
- In the drop-down menu alongside Change, you can choose from various options for After Effects to calculate the change from, choose the one that best fits your shot.
3. The Distortion Effect
Adding distortion to your adjustment layers can create some fantastic and otherworldly style effects, which can be great for transitional effects.
- Go to the Effect panel and search for Warp. Add it to your adjustment layer.
- In the Effects Controls panel, scroll through the Warp Style options to find a look you like. We’re using Fisheye to create an incredible bending at the edge of the frame.
- Adjust the Bend Amount, so your clips still fill the screen.
4. The Hue and Saturation Effect
Adjustment Layers can also be used with masks, allowing you to add effects to portions of the screen throughout your composition. Let’s look at using the Hue and Saturation Effect with a mask to create a vignette.
- Select your adjustment layer in the timeline and go to the Shape or Pen tool.
- Draw a shape on the screen (we’re using an Oval to create a vignette look).
- Go to the Effect panel and search for Hue and Saturation.
- Drag the effect to your adjustment layer.
- Adjust the settings in the Effects Control panel, so you can see the effects.
- In the Layers panel, go to the mask options.
- Adjust the Feathering and Expansion of your mask until you are happy with the mask’s shape, size, and position.
- If your mask adds the effect to the opposite area of your clips, choose Subtract from the mask drop down menu.
- Finally, go to the Effects Control panel and adjust the Hue and Saturation until you are happy with the look.
Pro Tip: You can use the Opacity setting on an adjustment layer to change to overall effect it has on the Layers below.
After Effects adjustment layers are single layers that can contain many effects for multiple clips. This makes using adjustment layers a considerable advantage when you want to change your effects at any point, you only need to do it once. Remember, adjustment layers are only worth using when you have multiple clips to effect.
Now you know all about After Effect adjustment layers, why not check out this awesome tutorial on blending modes to create the double exposure effect in After Effects.


