


In Adobe After Effects, masks are one of the tools you will likely use the most. They either hide or reveal elements of a layer, and can be used in conjunction with animation to create fun, stylish wipes. They’re an incredibly versatile tool but can be a little confusing to get your head around at first. That’s why we put together this After Effects masks tutorial, so read on, boot up After Effects, and you’ll be an expert in no time.
Summary
Part 1: What is a Mask?
A mask is an invisible shape that tells After Effects to only pay attention to a specific section of your composition. You can use it to hide or reveal part of a layer or object. Regular masks are attached to and exist within the layer they are affecting, while Shape Layers exist as separate objects which can work in a similar way to masks.
Masks are very versatile tools but generally can be used for hiding and revealing text, or cropping out a frame. Animations can begin with a mask over an object, such as text, and then slide out to reveal the object. Alternatively, they can remain static on the frame to crop out any unwanted elements.
Part 2: How to Create and Manage Masks
So how exactly do you create masks in Adobe After Effects? Well, after reading this section you’ll be using masks like a pro.
There are two ways you can do this. The first, Reveal Masking.
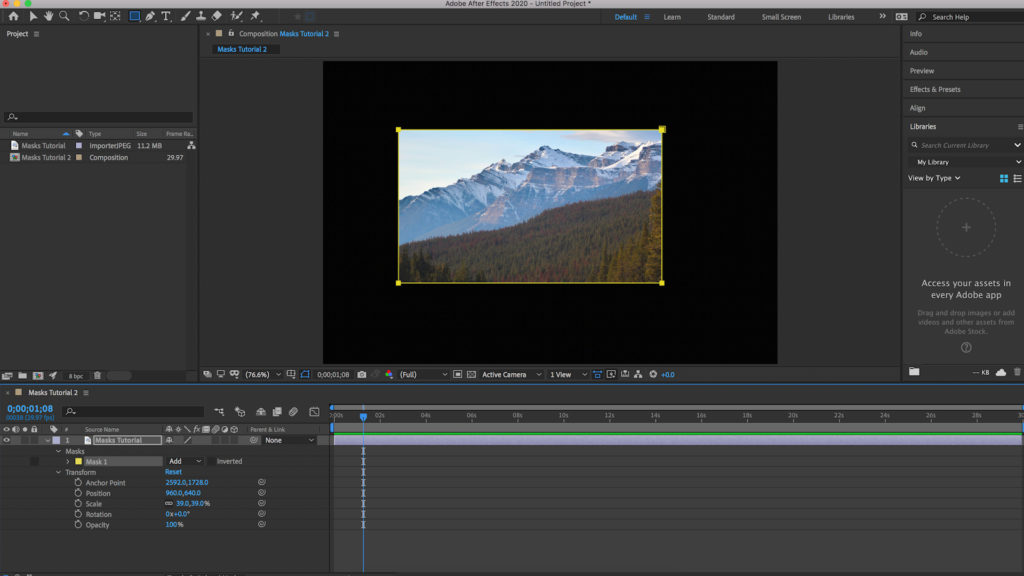
Step 1: Select the layer you’d like to mask.
Step 2: Hit the Q button to bring up the rectangle shape tool.
Step 3: Click and drag on the frame to draw a mask around the object you’d like to reveal. This will hide everything else in the frame that isn’t beneath the mask.
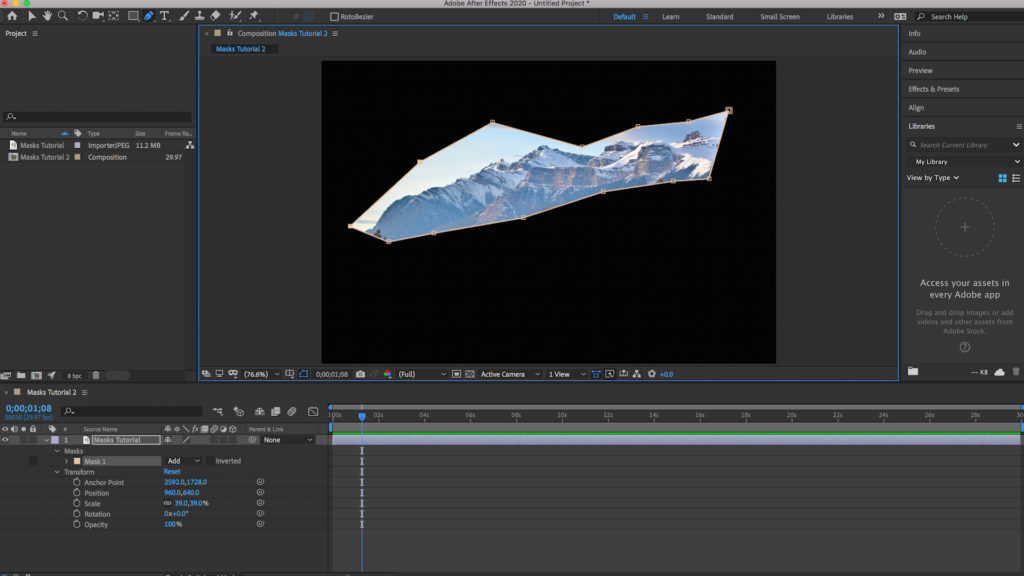
The second way of using masks in After Effects is using the pen tool to create a custom shape mask.
Step 1: Select the pen tool or hit G on the keyboard.
Step 2: Click different points around the frame to draw a custom shape. Try outlining an object that you’d like to remove from the frame if the shot is static.
Step 3: To do this, create the mask then go to Time > Freeze Frame. Anything that isn’t masked will play as usual, but the mask will freeze in time, letting you be creative with making things disappear.
Additional Tip: How to work with Multiple Masks
It’s unlikely you will create a composition that uses just one mask. Often your projects will require having multiple masks across multiple layers. They can get confusing to keep track of, but there’s a handy tool in After Effects to help with this.
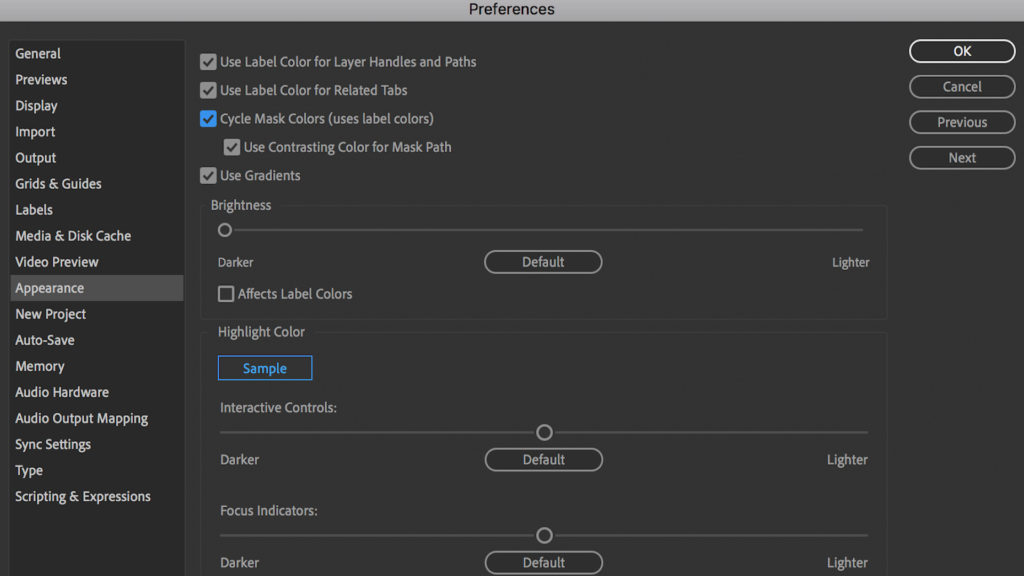
By default, After Effects uses yellow for all masks, but to separate them to make it easier to work with you can tell After Effects to cycle through mask colors for new masks. To do this:
Step 1: Go to Edit > Preferences > Appearance.
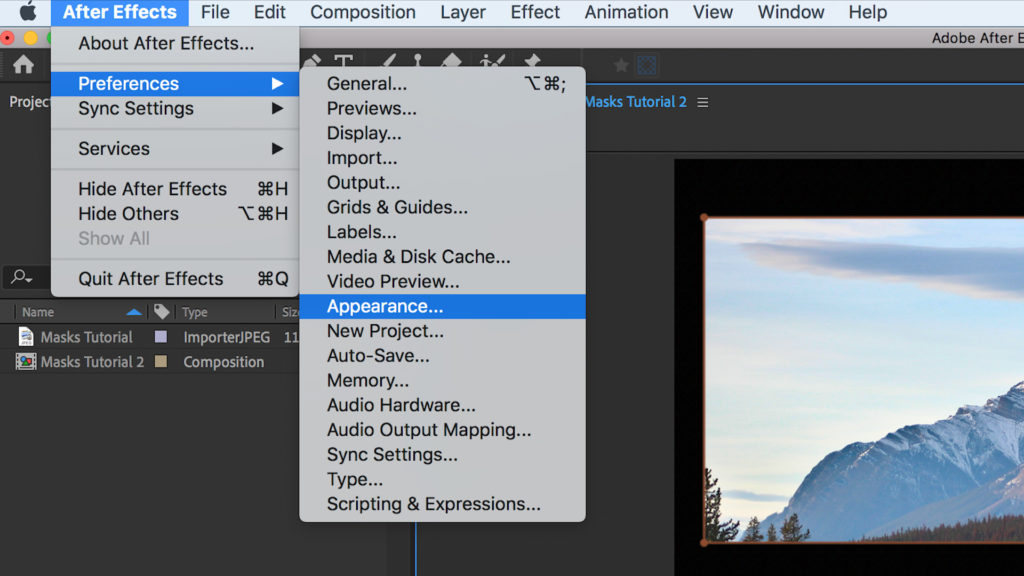
Step 2: Select Cycle Mask Colors.
Whenever you create a new mask the color will change, helping you keep track.
If you don’t want to make any more changes to a mask, you can lock the layer to prevent anything from accidentally affecting it.
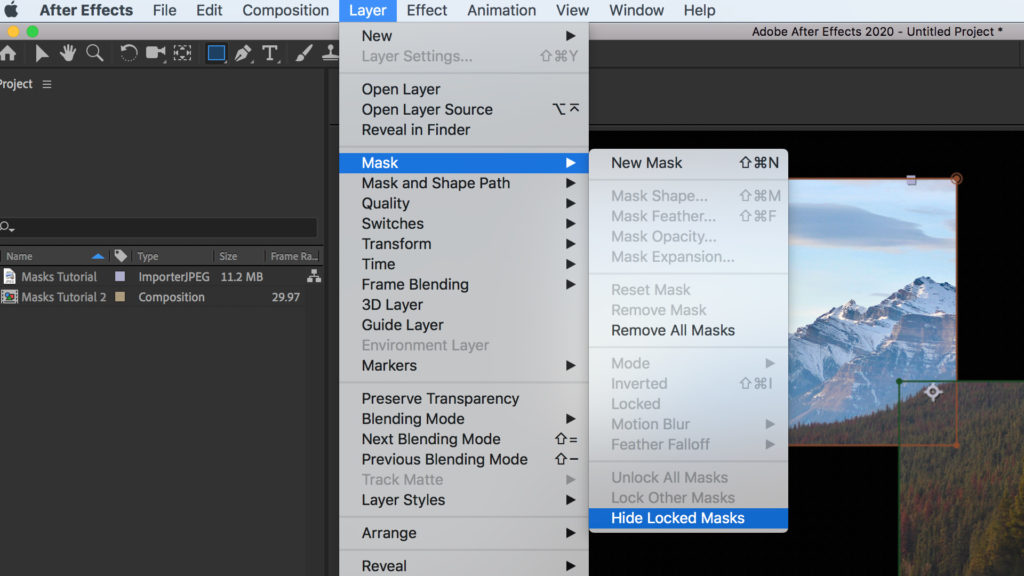
On the left of a layer, you can toggle the Padlock icon to fix the layer in one position and prevent any further changes. To be doubly sure, you can hide this by going to Layer > Mask > Hide Locked Masks which will disappear from the project view entirely. Just to be safe!
For more information on masks, check out our video tutorial on How to Add Masks and Basic Shapes in After Effects.
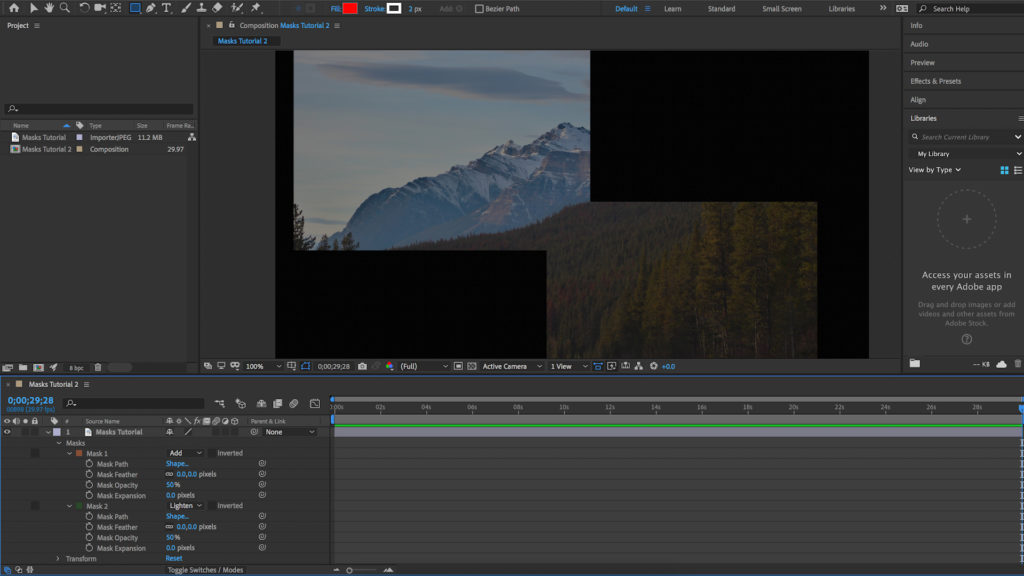
When you create a mask within a layer you can amend the mask mode to one of seven options, all of which do different things. Beside the name of the mask, click the dropdown. By default, it should be set to Add.
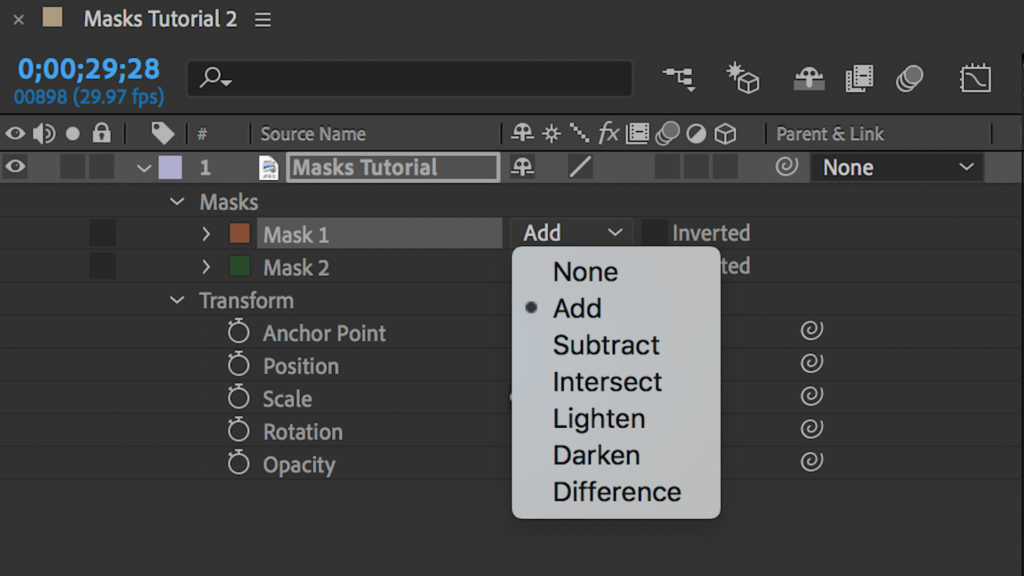
Add – Select Add for the most commonly used and default mask mode. It simply creates a mask, and if you lay multiple masks together it will sit one on top of the other.
None – This deactivates the mask.

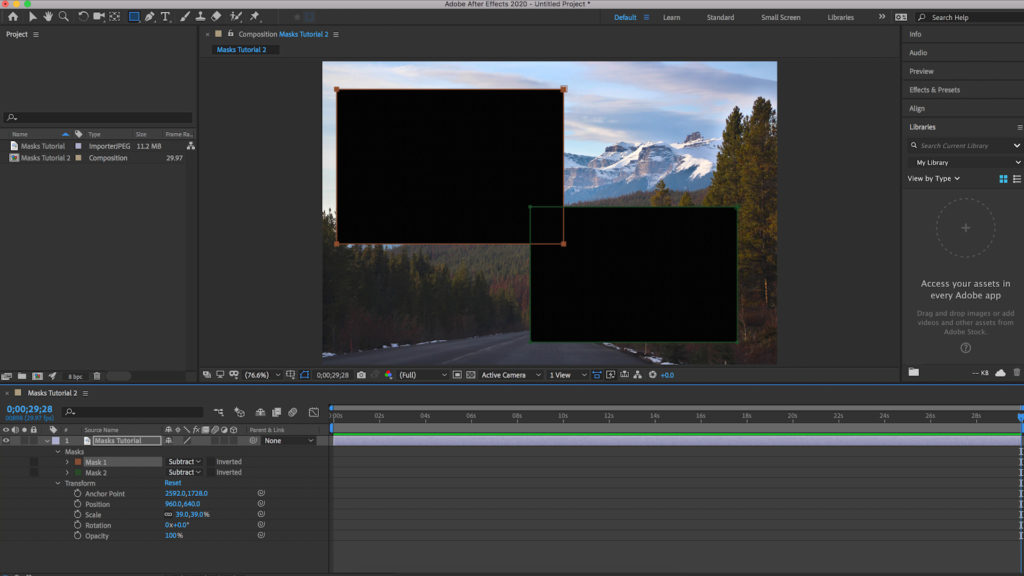
Subtract – This mask mode shows the difference between a mask and anything beneath it, negating the one beneath it but unaffecting the mask above it.
Intersect – If you have more than one masks that overlap, the Intersect mask mode will reveal only the sections of the masks which overlap.

Difference – Difference is basically the opposite of Intersect. Selecting the Difference mask mode will reveal all of the mask, except for the section which is overlapping another mask.

Lighten – When two masks that have less than 100% opacity overlap, the color of the intersection will be darker than the opacity of the rest of the masks. Selecting Lighten will make the opacity even across the masks.
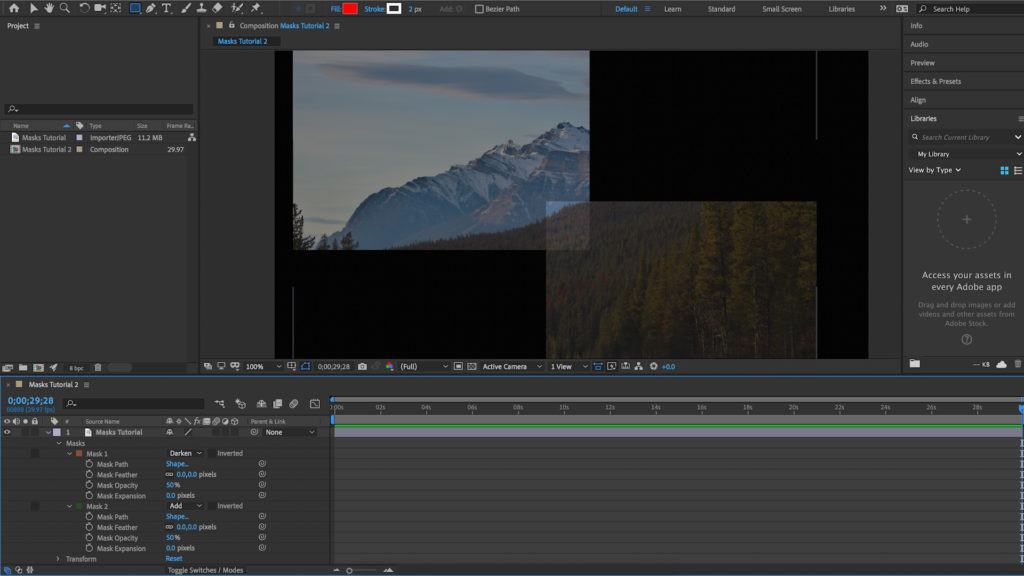
Darken – Darken works the opposite way of Lighten, increasing the opacity of two masks that are intersecting.
Part 3: How to Add Animation and Movement
Masks don’t just have to be stationary objects that cover up or reveal individual things in a frame. You can animate them just like other assets in After Effects to create cool, seamless transitions and reveals. To animate a mask:
Step 1: Select the mask you want to animate within the layer it is sitting in.
Step 2: Collapse the drop-down and click the stopwatch beside Mask Path. This will create a keyframe and set the mask’s first position.
Step 3: Move the playhead forward in time.
Step 4: Adjust the mask to its final position.
Step 5: Click the stopwatch again. The mask will then move from the starting position to the final position in the time you have moved the playhead to.
You can continue to add keyframes throughout the mask path to slow it down, speed it up, smooth out the animation and generally move the mask in different ways. Simply move the playhead to when you want the particular stage of animation to finish by, adjust the mask position or size, and hit the stopwatch again to create a keyframe.
Part 4: Common Uses of After Effects Masks
Wondering about just how useful masking can be in you After Effects composition? Once you’ve created your After Effects mask, you’ll find it has many nifty and helpful applications. Exploring these multiple uses will get you well on your way to becoming an expert motion graphics artist, as masks are an integral part to creating digital art in After Effects.
Mask Tracking
Tracking a mask can help your creative workflow by consistently applying effects to certain areas of your footage throughout the duration of the video.
1. When using the pen tool, make sure RotoBezier is checked.
2. Duplicate the layer you’re creating the mask on.
3. Create the desired mask shape using the pen tool, and RotoBezier will automatically curve the connecting points.
4. From the Window menu, select Tracker.
5. Selecting the mask will bring up new tracking options in the tracker window.
6. These options include different methods for tracking. The optimal selections are Position and Rotation or Position, Scale, and Rotation.
7. You can manually adjust tracking points if they slip, and these tracking points will create keyframes.
8. For an idea of the creative uses with mask tracking, go to the Effects panel and select Color Correction.
9. You’ll find that any effect you select will only be applied to the mask, and will be tracked throughout the footage.
10. Use this tool for digital makeup, changing eye color, or selective color correction.
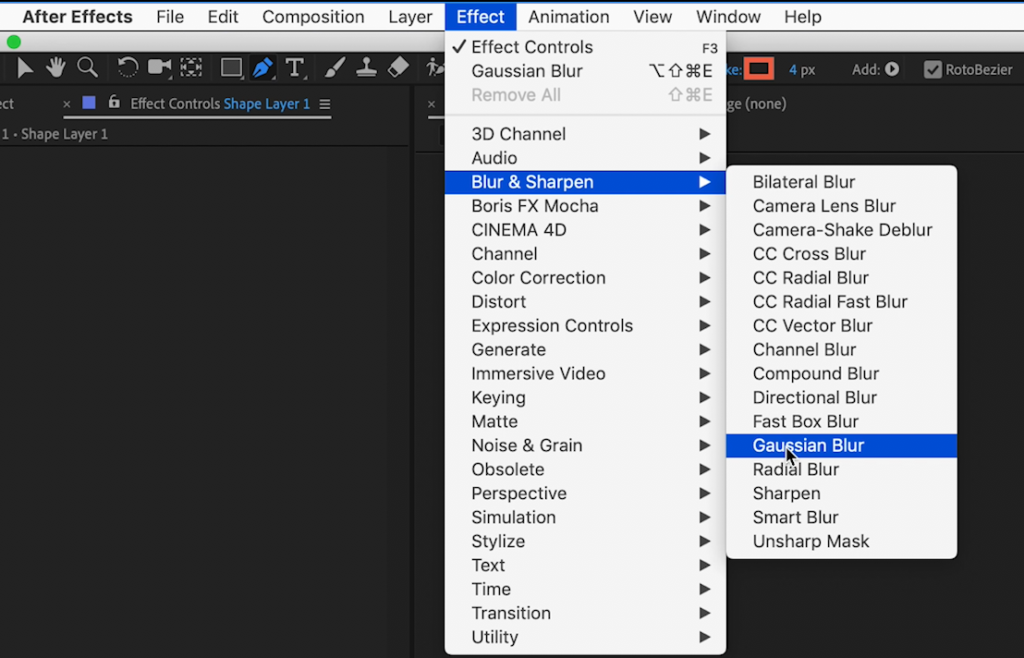
11. For example, to blur a face (simple digital makeup), follow the above steps but from the Effect menu, select Blur and Sharpen, and play around with Gaussian blur.
Clipping Masks
A clipping mask creates a crop shape around multiple layers above it. To create a clipping mask, first determine what shape you’d like to cut out another shape with.
1. Align your desired layers. Select Track Matte. Sometimes, the track matte option will be hidden. If you can’t find it, select the Toggle Section/Modes.

2. The first option, Alpha Matte, will cut the bottom layer.
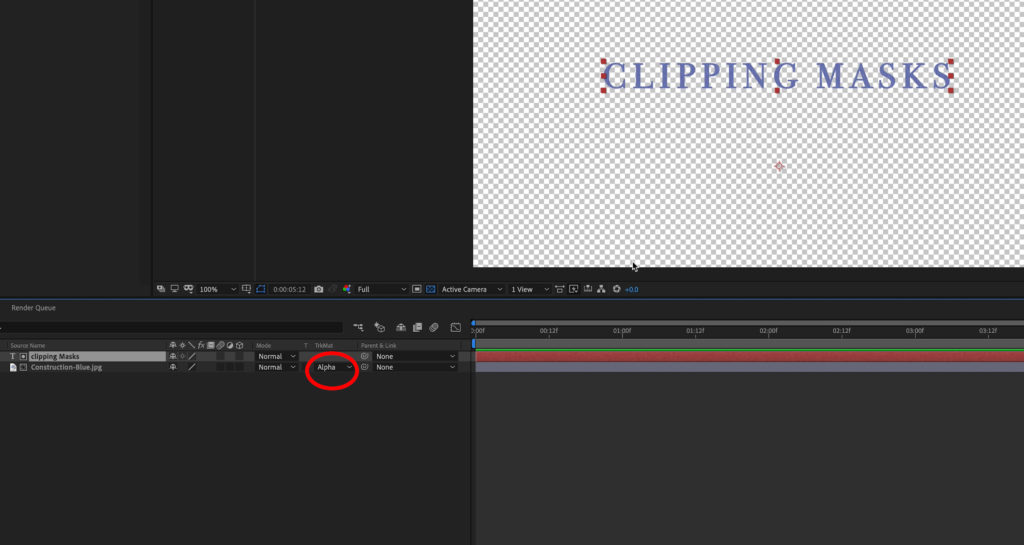
3. The second option, Alpha Inverted Matte, will cut the top layer.

Curved Masks
Curved masks (similar to the one created with the RotoBezier tool mentioned above) are helpful for masking round or curved objects in footage. Curved masks can be created by using the Convert Vortex tool from the Tools panel.
Feathering Mask Edges
You can soften the harshness of a mask’s edge by hitting the F key. You can adjust the Mask Feather to make it softer and softer.
Creating a Reflection
1. Duplicate your working layer.
2. Right click the duplicated layer. Select Transform > Flip Vertical.
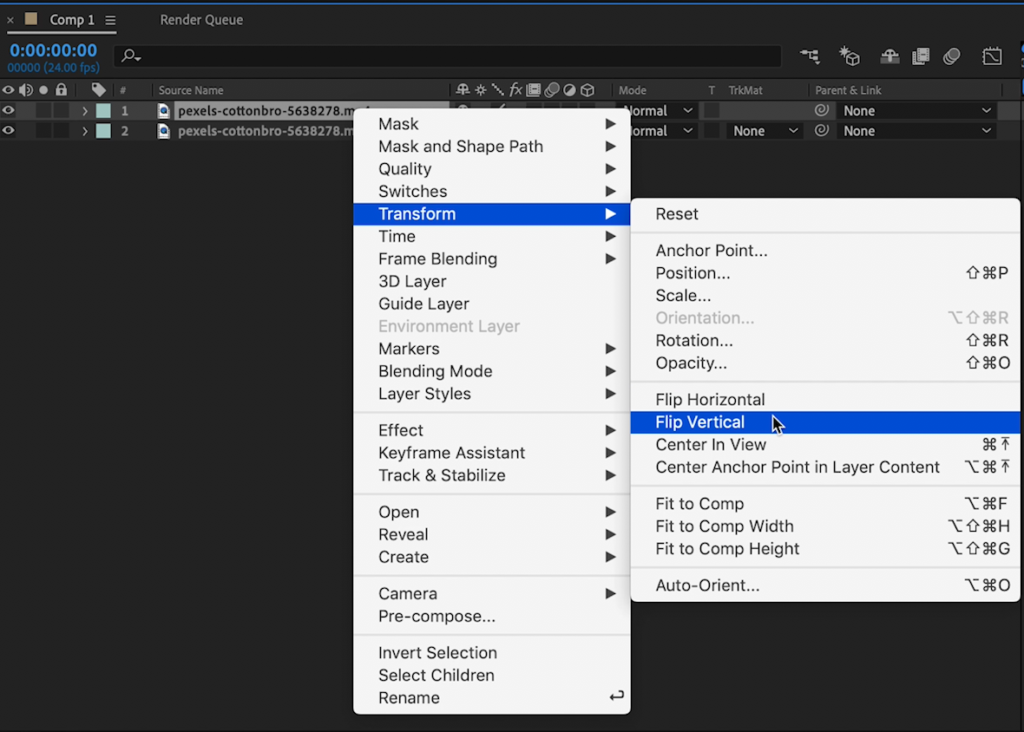
3. Adjust the position of your desired reflection.
4. Add another mask to the bottom of your layer.
5. Change the mode of this mask to Subtract.
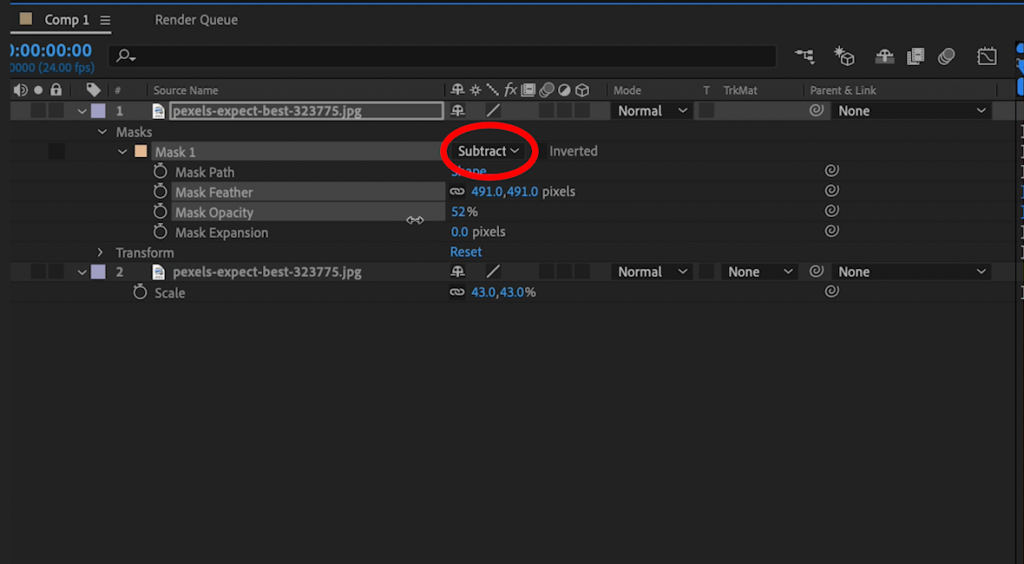
6. Adjust the desired opacity, feather, and expansion properties of this mask.
7. To further sell the effect, let’s blur it a bit. Go to the Effect menu, select Blur & Sharpen, then select Gaussian Blur.
8. Increase the blur, and switch it to Horizontal mode.
Creating Vignettes
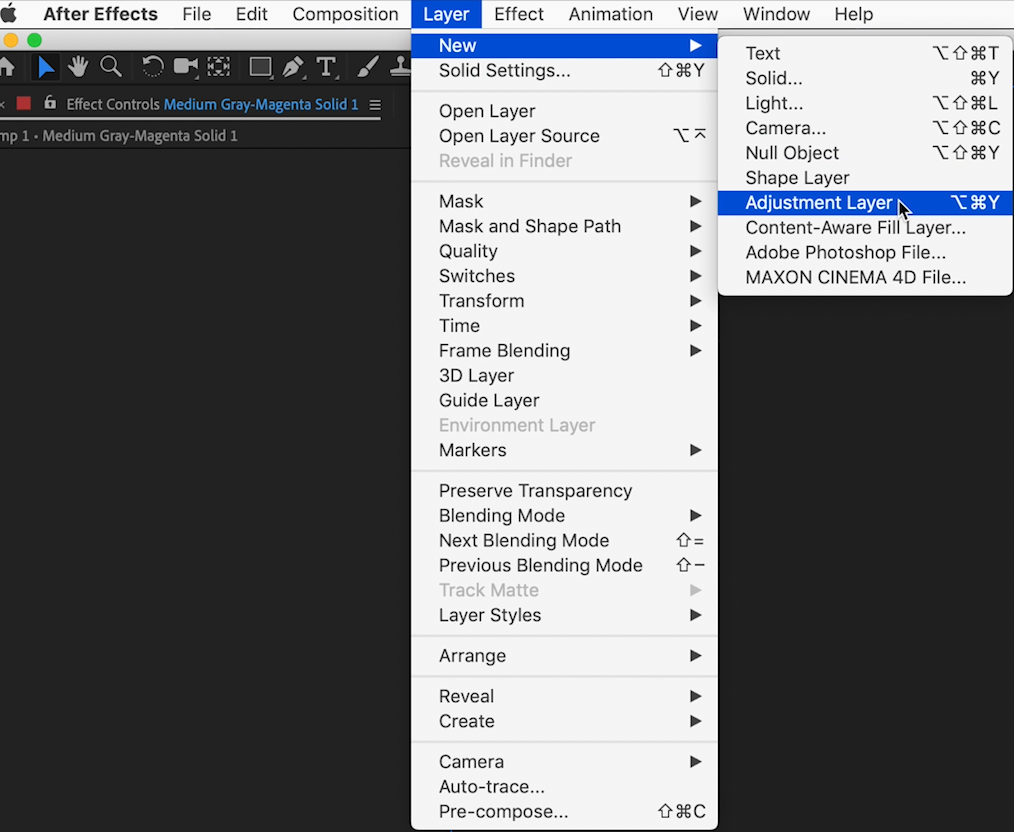
1. Create an adjustment layer by going to the Layer menu, selecting New, and then selecting Adjustment Layer.
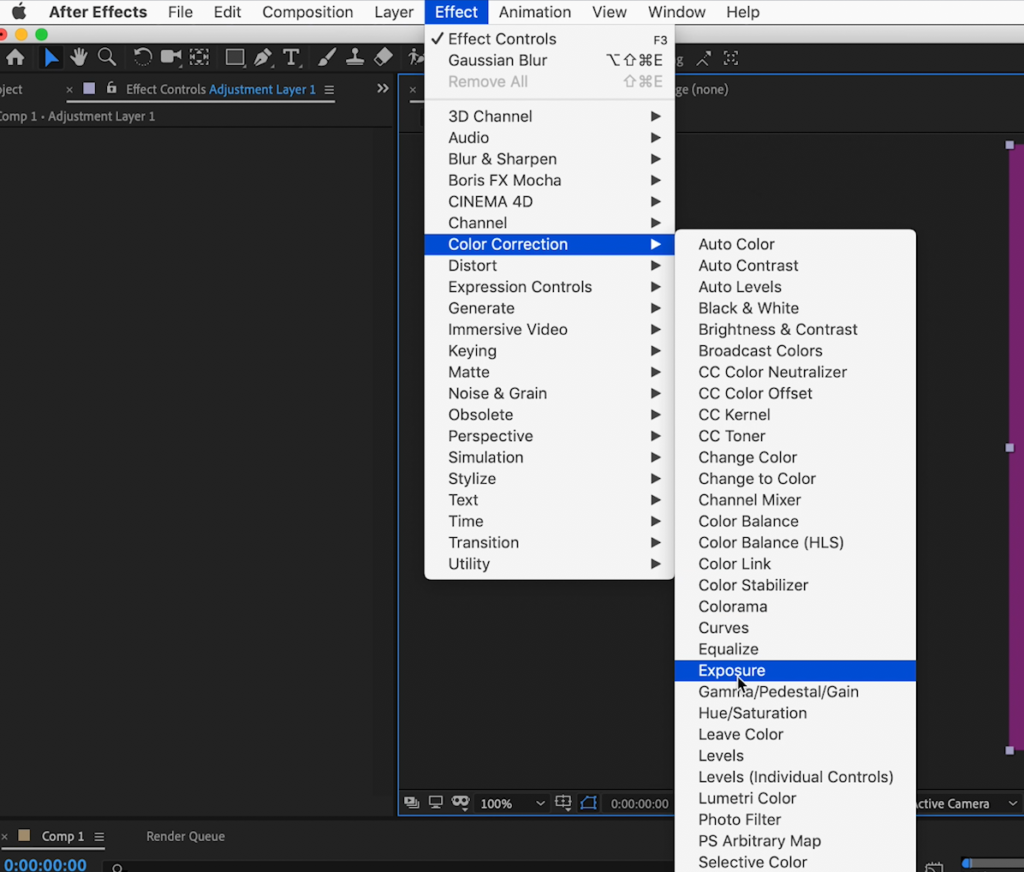
2. Lower layer’s exposure by going to the Effect menu, select Color Correction and then Exposure.
3. Use the Ellipse tool to create a mask.
4. Be sure to Invert the mask.
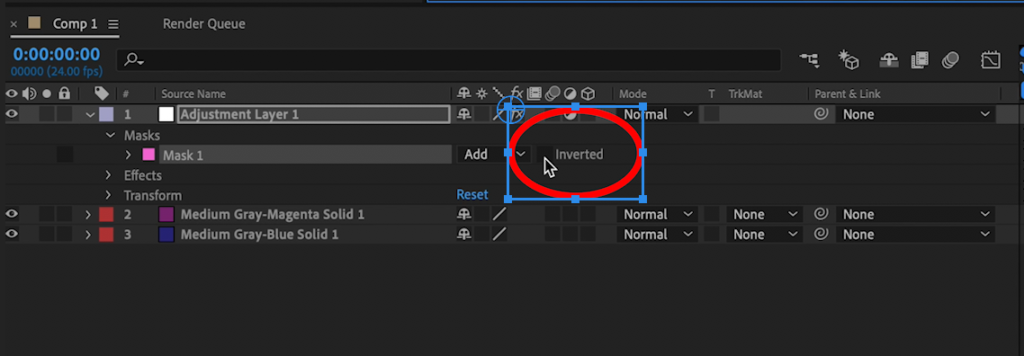
5. Hit the F key to adjust the feathering of the mask.
Masks make up some of the fundamentals of After Effects, and mastering them will set you on the way to creating great motion graphics very quickly. Once you’ve got to grips with the different ways of creating a mask, create several within one composition and change the mask modes to affect how the masks interact with each other. Finally, use keyframes in the Mask Path tool to animate your masks, creating slick and seamless transitions.


