You may not have heard about motion tracking, but you will have seen the results in movies, TV, and commercials. Whenever you see a superimposed graphic, image, or title moving in sync with live-action footage, you witness motion tracking in action. It might seem like a complicated process, but motion tracking in After Effects is incredibly straightforward and much quicker than you might expect.
Summary
Part 1: Motion Tracking in After Effects
Motion tracking is essentially adding a point, or points to your video footage, to which you can attach another layer. After Effects has four different types of motion tracking depending on what you need to do. Let’s run through them before we jump into creating our title effects.
Single Point Tracking
A Single Tracking Point is used when you have one element in your footage that you want to track the Position of. You would use this tracking method to add call-outs to your footage, where the element only needs to change Position.
Two Point Tracking
Two Point Tracking allows you to track your video’s Position, Scale, and Rotation and gives you two tracking points to play with. You would use the Two Point Tracking option for adding text to your footage that you want to scale and rotate accordingly.
Four Point Tracking
Four Point Tracking is mainly used when you want to replace 2D elements in 3D objects; the most common example is replacing what is on a TV or laptop screen. The four points can be placed at the screen’s corners in your shot, and new footage is applied to cover the screen.
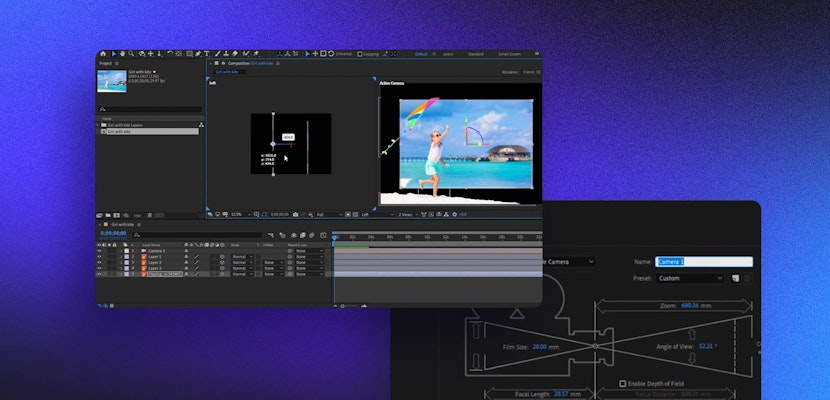
3D Camera Tracking
3D Camera Tracking is a different technique entirely and involves using layers to create a 3D environment and tracking your After Effects Camera to create movement. 3D Camera Tracking is an excellent technique that can be used to create stunning parallax 3D photos. Check out this tutorial.
Part 2: How to Track and Add Titles and Call Outs to Moving Objects
We’re going to show you how to add a call-out and a title to a clip using the Single Point and Two Point Tracking Options. Call-outs and titles are a popular and common use for this technique, but once you’ve got the hang of it, you can find many other benefits for Motion Tracking Tools.
Adding a Call Out
First up, we’re going to look at adding a callout using a Single Tracking Point. Remember, if you want the element to track the scale and rotation, you’ll need to use the Two Point method below.
- Add your footage to your comp, along with your call-out comp.
- Make sure the playhead is at the point you want to start tracking from and select your timeline clip.
- Go to Window > Tracker. In the Tracker Panel, click the Track Motion button. A small square will appear on your screen.
- Position the square, so the center point sits on the point in the footage you want to track; remember to choose something distinct.
- When you are happy with the position of the box, click Play in the Tracker Panel. After Effects will now go through and add keyframes to your clip.
- When complete, click on Edit Target and check that the relevant Call Outbox is chosen.
- Finally, click the Apply button and choose to Apply to the X and Y-axis. All the keyframes will now be on your call-out layer.
- However, your call-out might not be in the exact place you want it. You can’t simply move it as that will mess up the motion-tracked keyframes.
- Instead, go to the Effect Control Panel and search for Transform; add the effect to your call-out layer.
- In the Effect Control Panel, use the new Position settings to change your call-out’s Position and Size.
- To add further call-outs to the same clip, simply repeat the process. Each time you do, After Effects will add a new Single Tracker Point and label them in the Tracker Panel.
Adding a Title
Adding a title might require 2 tracking points so that you can match the scale and rotation of your clips. This means if your clip zooms in, you can enlarge the title with it.
- Add your clip to the timeline and create your title using the Text tool.
- Place your playhead on the timeline where you want the animation to begin and hit the Track Motion button in the Tracker Panel.
- Below the Track Motion button, check the Scale and Rotation boxes. A second tracker box will be added to your screen.
- Place the 2 tracker boxes on the points you wish to track, thinking about how your text might sit in the frame.
- Hit the Play button in the Tracker Panel to create your keyframes, and wait for After Effects to do its work.
- In the Tracker Panel, make sure you have selected the correct target layer and click Apply.
- To adjust your text layer once the tracking is complete, add a Transform effect from the Effects Control Panel.
Part 3: Troubleshooting Your Motion Tracking
The results of tracking your footage will depend on your clip’s quality, so we put together a few troubleshooting methods if you are having problems.
Clean, Clear Clips
After Effects looks at each frame of your video clip and will base the point it chooses on the RGB, luminance, and saturation of your image. Precise distinctive shapes with good contrast in light or color can help After Effects better identify your mark.
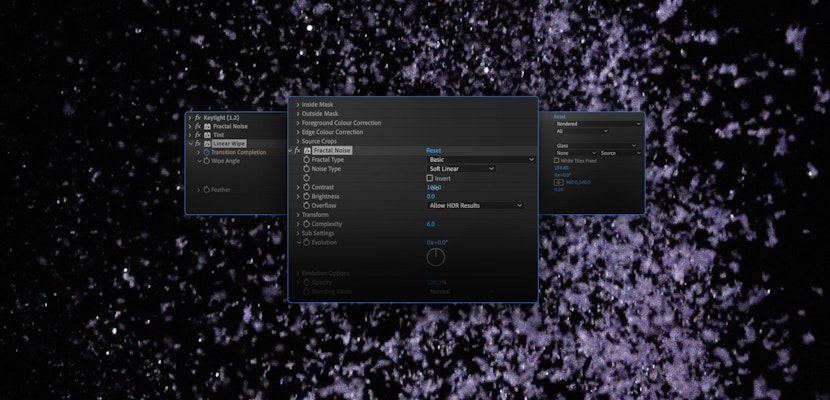
Enhance before Tracking
If you are having problems tracking your clip because there is no clear marker in your image, you can adjust the clip’s saturation, brightness, and contrast to better help After Effects track the Motion. You can turn these effects off after the motion has been tracked, and the keyframes applied.
Change the Anchor Point
It’s worth remembering that you don’t need to track the exact point at which the title or call-out needs to sit. If the motion is the same, you can track another, clearer part of the image and adjust the anchor point of your call-out element to sit in the correct position.
Frame By Frame
Of course, it’s fantastic when After Effects motion tracks your clip perfectly, first time, but this isn’t always the case. For high-quality motion tracking, it is worth taking the time to make sure every detail is perfect. This might mean going through parts of your clip frame by frame, but the results will speak for themselves.
Hopefully, we have proved that motion tracking in After Effects is a straightforward and fun process that can be applied in various creative ways. Now that you know how to add Single Point and Two Point motion tracking effects, why not give the Four Point Tracking a try! Also, for a great list of excellent After Effects Call Out templates to use in your next project, check out this link.