


Particle effects are the most expansive After Effects tool available and can create everything from snow and fireworks to sci-fi style data streams. Particle systems are not particularly user-friendly, and it can take a little while to understand how to use them correctly. That’s why we thought we’d take you through four efficient uses for After Effects particle systems.
Summary
Part 1: Learn the Basics of Particle Effects in After Effects
A particle effect is a system for creating lots and lots of particle elements with one single layer. A particle system will work with emitters (the thing that produces the particles).
An excellent way to think of particle effects is to think of snow! To create snow on a set, you need a snow machine (the emitter) and an environment (the particle system). You can change the settings on the snow machine to produce more or less snow (the birth rate) and create larger or more delicate flakes (the birth size), and you can also change the environment, such as adding wind (the physics).
After Effects has several main Particle Systems:
- CC Particle World is the only 3D Particle System, which allows you to use the Emitters in a 3D environment or with After Effects Cameras.
- CC Particle Systems II is essentially the same as Particle World; only there are no 3D functions.
- Particle Playground is also a 2D effect, but this one has different settings to control how the particles react with one another.
Part 2: Learn 3 Popular Great Particle Effects in After Effects
You can create 3 popular and effortless Particle effects in After Effects: the Space, Snow, and Rain FX. Whether you’re looking to produce cartoonish snowfall for an animation, or realistic rain for a film, these effects can be fine-tuned to suit your needs.
1. Space Particles
Ideal for sci-fi projects, the space-style particle effect looks striking in logo indents, title sequences, and transitional effects.
- Right-click in the timeline and select New > Solid.
- In the Solid settings, set the color to White.
- Go to the Effect panel and search for CC Starburst. Apply it to the Solid layer.
- Create a second Solid but this time, change the color to Black.
- Place the black solid layer below the white solid layer. You should be able to see your Star effect.
- Select the white solid layer in the timeline, go to the Effects Control panel, adjust the settings to get the look you need.
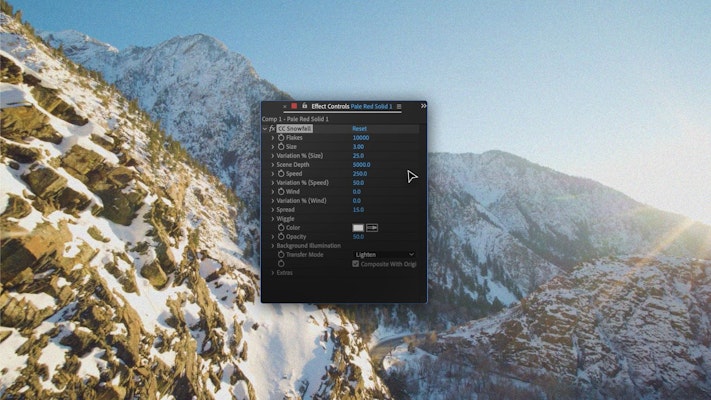
2. Snow Particles
The Snowfall Particle effect has an incredible range of styles you can create, from adjusting the settings; you can make realistically floating Snow to cartoon-style blizzards.
- Edit your footage in the timeline.
- Right-click in the timeline and select New > Solid. Choose White for your solid color.
- In the Effects panel, search for CC Snowfall and add it to your Solid layer.
- Select the layer in your timeline and go to the Effects Control panel.
- Uncheck the Composite With Original box to see your snow on top of the layer.
- Adjust the settings to create the look you want.
3. Rain Particles
Rain Particles are a great way of adding depth to a composite scene, which lays special effects compositions over the video footage.
- With your footage in the timeline, right-click on the timeline and choose New > Solid.
- Search for CC Rainfall in the Effects Control panel and add it to your Solid layer.
- Select the layer and go to the Effects Control panel; uncheck the Composite With Original box.
- Go through the settings to create the look you need. Pay close attention to the Wind speed and direction, and match your footage.
Part 3: Create a Particle Background from Scratch
You’ve probably seen impressive title and logo sequences containing strings of stunning particles. You may have assumed that to create these stunning effects, you need a costly plugin, but we’re here to show you how to make these beautiful videos from scratch, with no plugins required.
Creating a Path
The first step is to create the Path your effect will follow; you can use any Shape Tool to create the Path, but the Pen tool allows you to go freehand and create unique movements of your own.
- Right-Click on the timeline and choose New > Null.
- With the Null layer selected in the timeline, grab the Pen tool and draw your path; you can edit the path later, but spend a bit of time getting it as close to perfect as you can.
- In the Layer panel, drop down to see the Mask section; select the mask in the panel and press Ctrl+C or Cmd+C to copy it.
- Drop-down the Transform settings and select Position; press Ctrl+V or Cmd+V to paste the mask to the Position controls.
- Select the mask and hit delete to remove it; your Null layer will now follow your path.
Adding a Particle System to the Path
The next step is to add the Particle System Effect we want to use and follow the Path. The effect won’t look great at this stage but don’t get too caught up in your Particle design just yet.
- Add a New Solid to your timeline.
- In the Effects Control panel, search CC Particle World and add it to your Particle Solid.
- Select the Particle Solid in the timeline, go to the Effects Control panel, and locate the Position settings.
- Hold Alt on your keyboard and click the X-Axis Stopwatch; a box will appear on your timeline. Copy and paste the following code into the box:
target = thisComp.layer(“Null 1”);(target.position[0]-(thisComp.width/2))/thisComp.width
- Press Alt and click on the Y-Axis Stopwatch, paste the following code into the box:
target = thisComp.layer(“Null 1”);(target.position[1]-(thisComp.height/2))/thisComp.width
- Finally, do the same for the Z-Axis with this code:
target = thisComp.layer(“Null 1”);target.position[2]/thisComp.width
- Check through each of the codes to make sure the Null number matches the Null in your timeline.
- Finally, check the 3D box for your layer.
Designing Your Particle
Finally, you can design how you want your Particle System to look. Each design will be different, so play around with the settings to find out how best to use them. We’ve added details of the settings we’ve used in case you want to reproduce this look.
- Select the Particle layer in the timeline and go to the Effects Control panel.
- Set the Birth Rate to 1.8 and the Longevity to 0.60.
- Open the Physics settings and select Twirl under the Animation setting.
- Change the Velocity to 0.30 and the Gravity to 0.
- Drop down the Particle menu and set the Particle Type to Faded Sphere.
- Set the Birth Size to 0.1 and the Death Size to 0.3.
- Set the Size Variation to 100%.
- Finally, choose your Birth Color and Death Color.
Particle effects can be frustrating and complex to use, especially if you’ve never tried them before. Once you get the hang of it, however, creating these beautiful compositions can be a lot of fun. After Effects offers amazing particle effects built straight into the platform, so before you look at buying costly plugins, give it a go and see what you can create.


