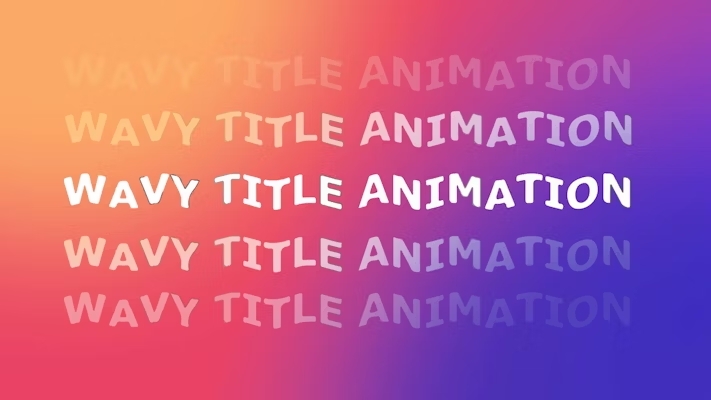
Whether creating movie title sequences or simple Instagram stories, keeping your title animations exciting and unique can be challenging. The Wave Warp effect in After Effects is a fantastic tool for creating subtle and not-so-subtle wave motions to your titles. In this tutorial, we’ll walk you through the steps to create a stunning glowing wave text animation to freshen up your text styles.
Part 1: How to Create Wavy Text Effect in AE (with videos)
Creating the basic wave animation is easy, but as with most methods in After Effects, it is the additional effects that create the overall look.
Step 1: Create a Basic Wavy Motion
Creating a basic wavy motion to your title is super easy and uses just one effect; the Wave Warp. The Wave Warp is a fantastic effect, and once you know how it works, you’ll find plenty of uses for it with text, backgrounds, and shape animations.
- Create a New Comp the size you need by going to Composition > New Composition or hitting Command/Control + N on your keyboard.
- Hit the Text icon at the top of the screen (Command/Control + T on your keyboard)
- Click in the middle of the viewer and type your title.
- Select the layer in the Layers panel, and go to the Character menu; if you can’t find it, go to Window > Character.
- Change the font, size, and weight to suit the look you want to create.
- Next, go to the Effects Controls panel and search for Wave Warp; add it to your Title Layer.
- In the Effects Controls panel, ensure your Type is set to Sine.
- Change the Height to 3 and the Width to 105.
- Adjust the Wave Speed to between 0.1 and 1, depending on how fast you want the motion.
Top Tip: Try using other Wave Types to change the look of your animation.
Step 2: Create a Cool Wavy Color Effect
Now you have the basic Wave motion, you can easily add a color effect to highlight the edges of your title. You can add as many background color elements as you want; for this example, we’re using 3.
- Select the Text layer and hit Command/Control D on your keyboard to duplicate it 3 times.
- Go through each of the bottom layers and change the color of your title, so you have 3 different colors with a white one on top. It can help to make the layer invisible to see what you are changing below.
- In the Effects Controls panel, search for Liquify and add it to the bottom layer.
- In the Effects Controls panel, select the first icon under Liquify; it looks like a finger poking something.
- In the Warp Tool option, choose the Size and Strength of your brush.
- Use the tool to drag the edges of your text, creating cool exaggerations behind the white layer; be as creative as you want.
- Add the Liquify layer to your other colored text layers and drag the edges in different directions. You should be able to see bits of all your title layers behind the white.
- Finally, select all 3 color background titles and hit T on your keyboard.
- Reduce the Opacity of each layer to about 50%.
Step 3: Add Some Glow
Adding a Glow Effect will create a neon style to your titles, ideal for events and music videos. This method can add as much or as little glow as you like.
- In the Effects panel, search for the Glow Effect and add it to one of your colored text layers.
- In the Effects Controls panel, adjust the Threshold, Radius, and Intensity until you are happy with the amount of glow.
- Select the Glow Effect in the Effects Controls panel and hit Command/Control + C to copy it.
- Select the other 2 colored text layers and hit Command/Control + P to paste the glow effect.
Step 4: Create a Cut-Out Title Effect
While the title looks awesome on its own, if you add footage in the background, you can create even more effects. For the best results, the colors used in your footage should differ from those used in your titles.
- Select your white text layer and change the color to black in the Character panel.
- Select all your Title layers and hit Command/Control + Shift + C to turn them into a compound clip.
- Place your footage below the compound clip in the timeline.
- In the Layers panel, change the compound clip’s Mode to Screen.
- To increase the intensity of the title, select it and hit Command/Control + D to duplicate; create as many copies as you want until you are happy with the strength of the title.
Part 2: Best Wavy Text Templates
If you don’t have the time to create your own wavy title animations, there are plenty of templates you can download. These handy title packs give you plenty of choice for your projects and are fully customizable.
Abstract Glitch Titles
The Abstract Glitch titles include 9 stunning title templates with a cool, hi-tech look. The titles mix wave effects with glitch and warp to transition your titles on screen, followed by colorful smeared ribbon shapes.
Download Abstract Glitch Titles Now
Wavy Fashion Titles
The Wavy Fashion Titles pack includes 9 versatile animations, ideal for any project needing a colorful, modern look. Each title waves on screen while the text splashes with gradient-colored shapes.
Download Wavy Fashion Titles Now
Wavy Iridescent Titles
The Wavy Iridescent Titles pack includes 9 full-screen title cards with a unique gradient animation. The titles appear as if cut from the background and replaced with lava-lamp-style moving blobs for a striking look.
Download Wavy Iridescent Titles Now
Liquid Typography Stories
The Liquid Typography stories pack includes 5 stunning designs, ideal for event promotions and quick sales messages. The titles smear across the screen and wave gently, giving an aurora borealis look to the stories.
Download Liquid Typography Stories Now
Liquid Wavy Glitch Titles
The Liquid Wavy Glitch Titles includes a massive 22 title cards, ideal for lower thirds or full-screen titles. The warping wave of text floats across the screen with a beautiful rainbow prism-style glitch.
Download Liquid Wavy Glitch Titles Now
Instagram Vertical Wavy Glitch Titles
The Instagram Vertical Wavy Glitch Titles pack includes 9 eye-catching portrait title screens. The layered, colorful text is scattered across the screen before waving into a uniform position.
Download Instagram Vertical Wavy Glitch Titles Now
Wavy Glitch Titles Animation
Ideal for music and events promos, as well as sci-fi title sequences, the Wavy Glitch Titles animation pack is sure to grab your viewer’s attention. A stunning gradient glow highlights the wavy text effect for a trendy neon look.
Download Wavy Glitch Titles Animation Now
Wavy Chromatics Titles
The Wavy Chromatics Titles set includes 7 fantastic titles, ideal for fullscreen title cards or unique typography videos. The animation uses the traditional glitch look, adding a unique wavy distortion with Chromatic color split flourishes.
Download Wavy Chromatics Titles Now
Trippy Glitch Logo
The Trippy Glitch Logo template is a fun, retro-feeling animation with easy drag-and-drop customization. The ident uses Scanlines and Noise to highlight the wavy text effect, giving the feeling of an old rolling TV screen.
Download Trippy Glitch Logo Now
Now you’ve got the method to create a basic wavy text effect in AE, you can combine it with other effects to create unique looks and styles. Producing title animations takes time, but with the fun and easy-to-use Wave Warp, you can create exciting text effects with just a few clicks.