


Color grading is the icing on the cake of any video production. DaVinci Resolve is a powerful piece of software that is well-suited to color grading. If we went into fine detail about every tool within DaVinci Resolve you could use for coloring, this tutorial would be the length of a novel. Instead, here is a simple workflow you can use to color grade your footage and elevate the quality of your videos. Let’s get started!
Summary
Part 1: DaVinci Resolve Color Grading Workflows
Color grading doesn’t have to be as intimidating as it sounds, especially when using a straightforward application like DaVinci Resolve. A lot of the process is founded in color theory, but before we dive into color grading too deeply, it’s important to color correct your image first.
Color Correction
Color correction is the process of adjusting any strange tints or hues that might have been picked up during the shoot, to make a flat image you can then apply a grade to. It should re-introduce the contrast and highlights that sometimes get lost when shooting with a flat image. This is in comparison with color grading, which involves applying a creative hue to the image to convey a specific mood or emotion.
The first step before you begin grading is to remove any errors from the image and bring back the contrast from the flat color profile. This might have happened if the cameras were not white balanced correctly, or if a colored surface was making the image a different color tint accidentally.
- Head to the Color Page and make your Scopes visible, which gives you a visual representation of your image’s color. If you have a large monitor you can right-click on the image and select Show Scopes, which opens the scopes in a new window.
- Or you can right-click on the Scopes icon in the far right belt toolbar, next to the ‘i’. This opens the Scopes at the bottom of the screen.
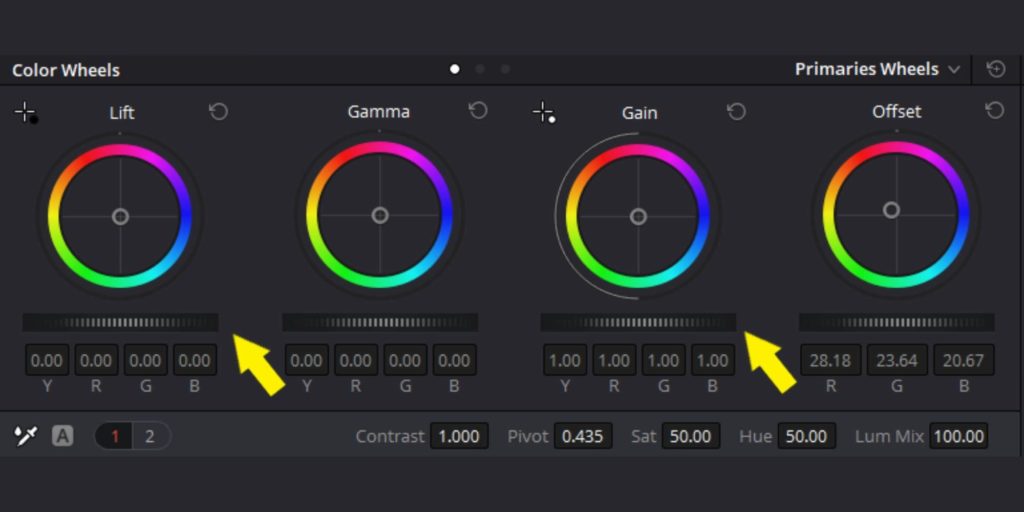
There are multiple ways to adjust contrast, and one of the ways is to adjust Lift and Gain.
- Click the Lift slider in the bottom left of the screen and drag it to lower the shadows.
- Click the Gain slider in the bottom left and drag it to raise the highlights. Together this will adjust the contrast, emphasizing the difference between dark and light in the image.
- Use the Color Wheels to adjust any hues. Try dragging the slider in the wheel towards blue and see how the image reacts. If the image is feeling particularly yellow, pull the slider in the direction opposite yellow to even the image out.
Once you’ve corrected the image, so it’s looking pretty good and fixed any unintentional tints, you can grade it. You’ll want to apply the grade to a separate node on top of the color corrected node.
Color Tools Overview & Node Editor
Once you’ve color corrected your image, you can apply a grade, and there are a multitude of tools available in DaVinci Resolve for you to do this.
1. Use Nodes
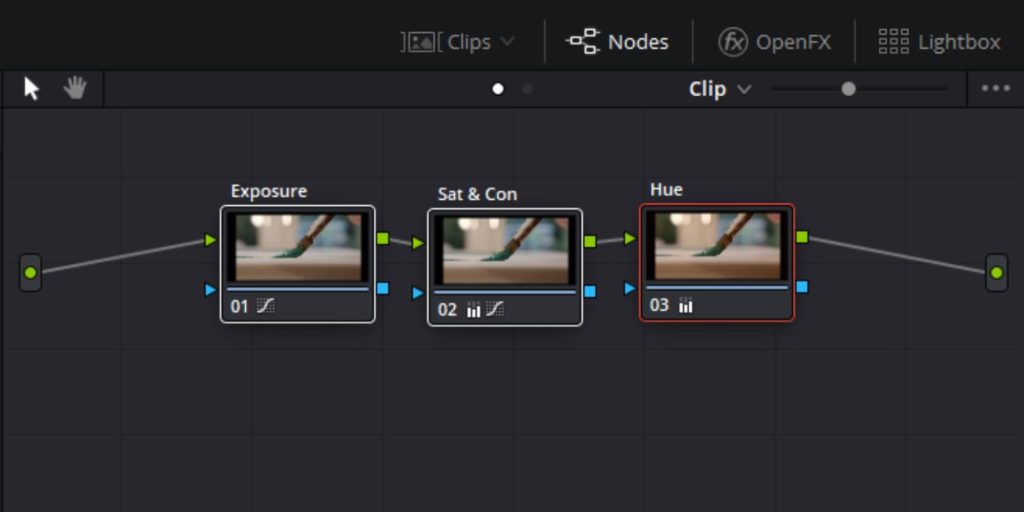
Nodes are the way color grades can be organized in DaVinci Resolve. Your raw image will automatically be assigned to a single node. You can add subsequent nodes and apply different color adjustments to each one. This will instruct DaVinci to grade your image in that specific order.
- Hit ALT+S on the keyboard to add a new node.
- Right-click on each new node, select Label Node, then name them to make it easy to organize how you grade your images.
- Try applying changes to Exposure in the first node, Contrast and Saturation changes to the second node, and Hues to the third.
2. Make Adjustments With Color Wheels
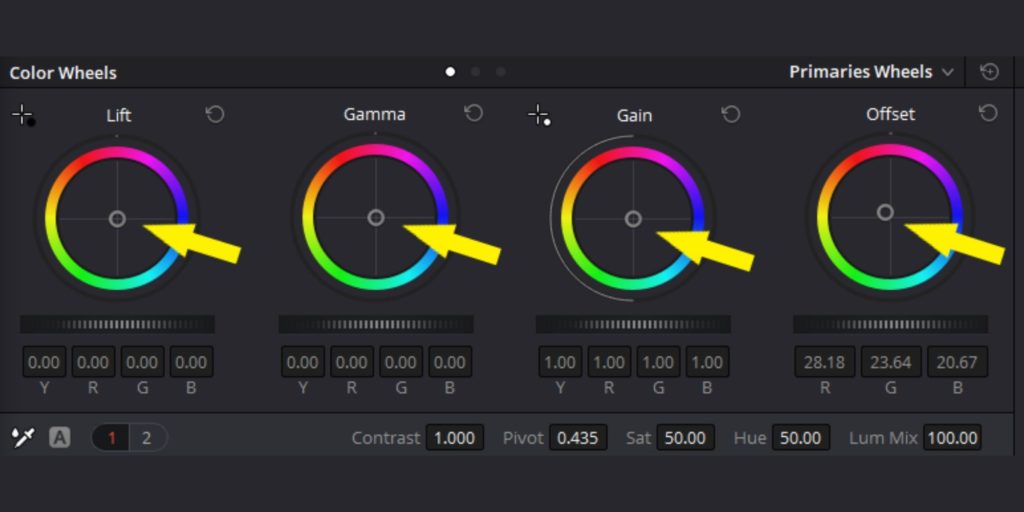
Color wheels are in the lower left of the screen. There are several color wheels: Lift controls the shadows, Gamma refers to highlights, Gain affects highlights, and Offset is an overall adjustment. To make amendments to these:
- Select the node you want to apply changes to.
- In the Color Wheels window in the lower left, adjust the numbers manually or click and pull the wheels left and right.
- If the image has a certain hue, click the center of the Color Wheels and drag them in the opposite direction to that color to even it out.
To compare your before and after, simply hit Shift + D to see what the image looks like without any adjustments. To switch off an individual node, hit Control or Command + D with that node selected.
3. Stylize The Color With Curves
Much like the Color Wheels, you can adjust the contrast of an image using the Curves tool. But while the Color Wheels split the adjustments into groups, Curves allow you to affect the entire image.
- Adjust specific parts of the image’s details by clicking and dragging different parts of the curves.
- Click multiple points to create several keyframes and make more than one adjustment.
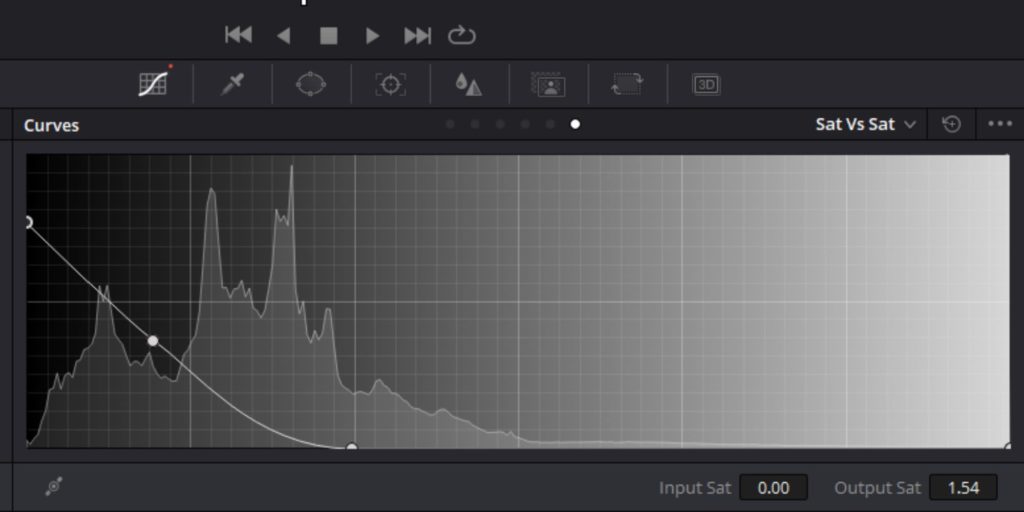
Or, if you want to affect a specific color within the image, try using a vs. Curve.
- Click on the Custom drop-down menu on the top right of the Curves panel. With all of the vs. Curves, begin by selecting the hue within the image you want to alter.
- Hue vs Hue allows you to deliberately shift one hue to another, letting you entirely change the color of objects.
- Hue vs Sat lets you change the saturation of a specific hue.
- Hue vs Lum affects a hue’s luminance.
4. Using LUTs in DaVinci Resolve
LUTs, or look up tables, are a tool to instantly apply a specific look to a piece of footage. By applying these color templates, you can match cameras and quickly give a consistent, professional look to all of your footage. To use a LUT in DaVinci Resolve:
- Download the LUT you want to use.
- Import the LUT into DaVinci Resolve by dragging and dropping the file into your main LUT directory.
- Add a node to your timeline and apply a color correction to the first node.
- In the bottom left of the screen, click the drop-down menu beside Color Space and select your chosen LUT.
Be sure to apply the LUT to the node after your color correction. If you do it the other way around, you will risk losing color information for your correction. By correcting the image first, you will ensure that the LUT is working with exactly the kind of image you want.
Part 2: Pro Tips & Troubleshooting
Color grading is not a straightforward process, and part of that comes from how subjective it is. It’s something of an art form, and minor adjustments, either way, can sway the emotional impact of your video. Put simply, there’s no right or wrong way to grade color. However, there are some things you can do to improve the overall quality of your footage, and one of them is color grading skin tones.
1. Color Grading Skin Tones
When grading your footage, skin is something you’ll want to keep constant throughout. As we’re very used to seeing what other people’s skin looks like, we’ll know if anything is off or unusual about the color. To properly color grade skin tones, try the following.
- Use the qualifying tool to highlight the skin on the face.
- In the Curves tool, select Hue vs Hue and adjust the overall hue of the skin area to create a color you are happy with.
- Turn down the Midtone Density slider in the Color tab to hide imperfections, or turn it up to create a more weathered look.
To isolate the skin against the rest of the image:
- Add another node.
- Hit Option+L and turn it into a layer mixer node.
- Drag the blue alpha arrow of the skin mask to the input on the lower of the two mixed nodes.
This will let you grade the rest of the footage to your liking while keeping the skin tones constant.
2. Copying Color Effects
So you’ve managed to perfectly color correct one of your clips. Great, but what about all the others? A challenge of color grading is keeping things consistent throughout your videos. Luckily, DaVinci Resolve makes it pretty easy to copy color effects.
- When you’ve color corrected an image to your satisfaction, select the first node in your project.
- Right-click on the preview window and select Grab Still. You should see the still appear in the Stills window.
- Click and drag the still into the Memories tab at the top of the screen.
- Select a new clip in your project. Notice that the nodes are no longer there.
- Hit Control or Command + 1 on your keyboard, and DaVinci Resolve will add the nodes from the clip you grabbed the still from.
- Repeat the process across all of your clips to quickly set a constant color correction across your project.
- Use the Color Wheels and Curves tools to create a grade you’re happy within one of your clips.
- Right-click on the preview window and click Grab Still, creating a second still – a LUT.
- Select an ungraded clip.
- Right-click on the LUT you have created and click Apply Grade.
The process of color grading isn’t something that can be done perfectly in a couple of minutes, but DaVinci Resolve comes equipped with all the tools you need to get it done efficiently and well.
By using a combination of color tools like Color Wheels, Curves, and LUTs, your content has the potential to look fantastic. Just pay close attention to maintaining consistent skin tones and use shortcuts to copy color effects to make the process of color grading in DaVinci Resolve much easier. It might seem a little overwhelming at first, but consider this an overview to get you on the right track to start!


