Look-up Tables, or LUTs for short, are color profiles that can immediately turn your image from source footage to having a certain look. LUTs generally come in two different flavors. The first is the Technical LUT which is designed to make your camera profile look proper on a display (typically called log to Rec709 LUTs). The second is the Creative LUT, which transforms your footage aesthetically – anything from a film print emulation look to a warm low contrast grade or a day-for-night adjustment.
Let’s look at how to install LUTs in DaVinci Resolve 17 and how to start using LUTs creatively to build a custom look.
Summary
Part 1: Install LUTs to a Custom Location
To start, you will need to install some LUTs on your system. Motion Array has a massive library of great content available to download. In this example, we’ll be using Horror Film Color Grades for some edgy looks to use on a music video. Any LUT pack will work with this tutorial so long as the LUTs are .cube formatted. For the custom location method, you need to know where you want to save the LUTs on your system. We’re using the Videos folder on Windows (or Movies folder on Mac), but you can also save these anywhere you’d like.
Step 1: Find and Install LUTs
- Find a LUT pack you want to install from Motion Array.
- Download and unzip the LUT pack. Create a folder called DaVinci_LUTs inside your Videos folder (Windows) or Movies folder (Mac), or any folder you would like, and move the LUT pack here.
- Launch DaVinci Resolve and open your project.
- On the menubar, select DaVinci Resolve > Preferences > General.
- In the General tab, within LUT Locations, click the Add button and navigate to where you saved your LUTs.
- Restart DaVinci Resolve for the LUTs directory to refresh.

Now your LUTs are installed and ready to use. There is an alternate way to install LUTs as well. Rather than using a custom directory location, you can use a preset location within DaVinci Resolve’s library.
Part 2: Apply and Blend LUTs
Step 1: Choose a Shot to Grade
Before we can get to work, create a new timeline in Resolve and load the footage you want to start working with. In order to see clips on the Color page, content must be on the Edit page first.
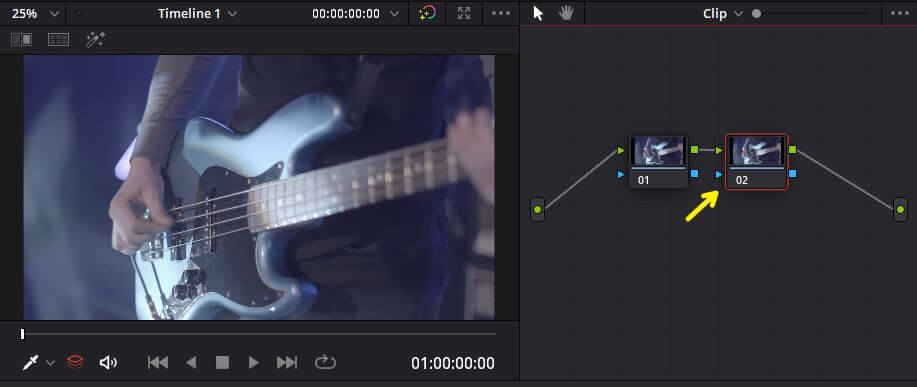
- In the Node panel, create a new node by going to the menu bar and selecting Color > Nodes > Add Serial Node. It’s a good idea to keep Node 1 reserved for any adjustments needed before a LUT and keep the desired LUT on Node 2.
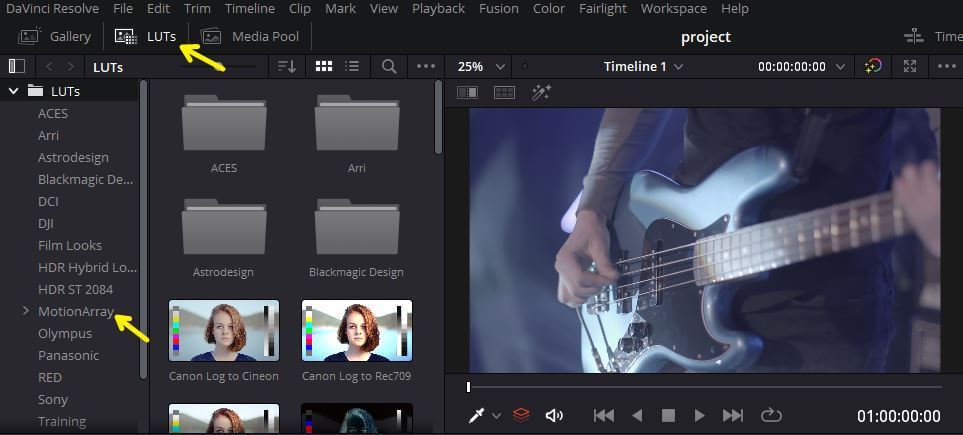
- Open the LUTs browser panel in the top-left of the Color page. Find the folder of the LUT pack you installed. In this demo, the folder is called Motion Array. This tutorial uses a LUT called Horror Film Grades but you can use any LUT you’d like.
Step 2: Blending LUTs
Sometimes you may love the look of a LUT, but the result is too intense and the results need to be blended. Other times you may like the look of multiple LUTs and want to blend them together. Read on to find out how to blend LUTs.
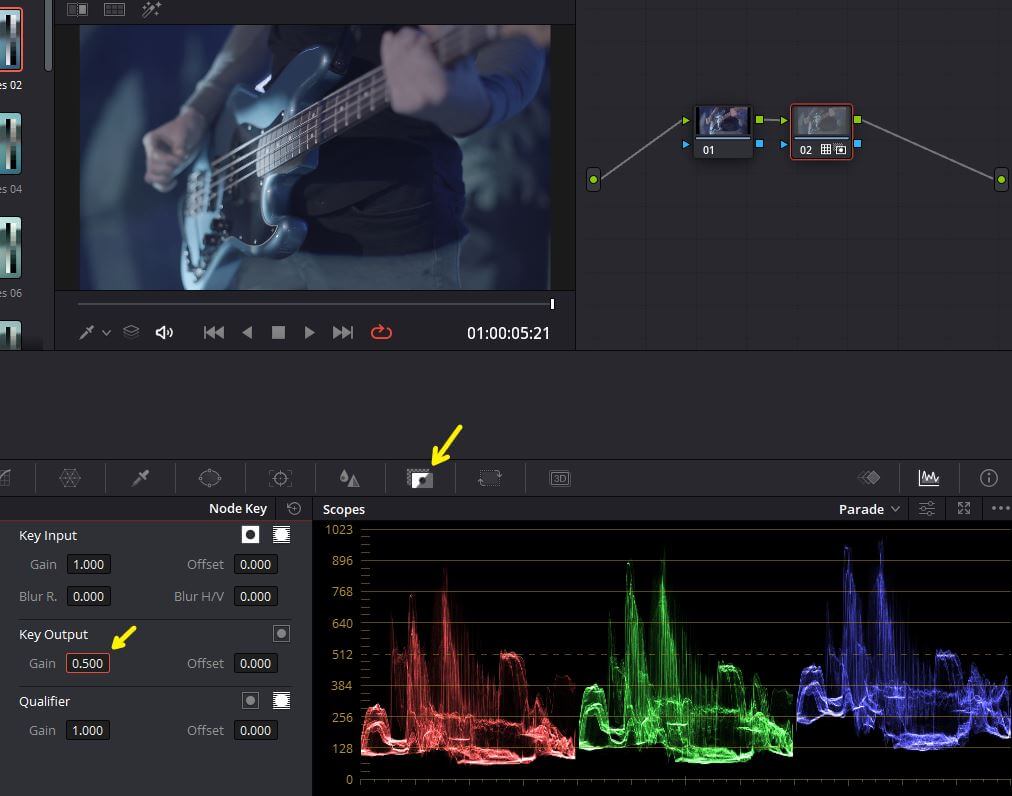
- In the Node panel, select the node containing your LUT.
- Open the Key tab from the tools bar.
- The Key Output slider works just like an opacity level. A value of 1.000 is the baseline, and moving closer to 0 makes the node transparent. Try a value of 0.500.
- Temporarily disable the LUT node by clicking the small “02” label on the node itself. You want to hide the LUT for the moment while you re-open the LUT browser and find the second LUT you want to blend with.
- Look for a different style of LUT. Horror Film Grades 02 works well because it’s brighter overall and is different enough to blend in an interesting way.
- Select Node 02 in the Node panel. We’re going to add a parallel node to blend at this point. To do this go to the menu bar and select Color > Nodes > Add Parallel Node.
- Drag the new LUT to Node 03.
- Adjust the Key Output of Node 03 to a value of 0.500.
And that’s how you can blend multiple LUTs together!
Bonus: Preview Multiple LUTs Simultaneously
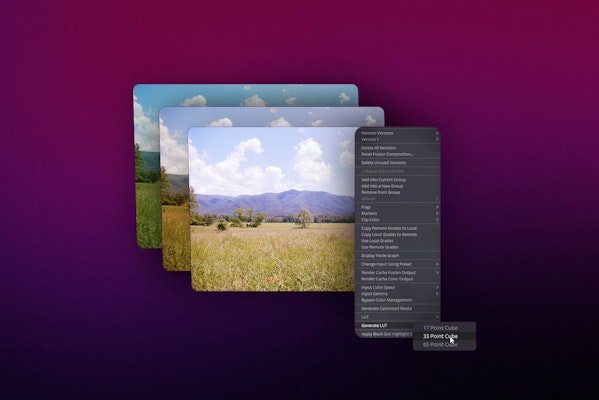
The Split Screen mode has been overhauled in DaVinci Resolve 17 to include the live preview of multiple LUTs simultaneously. Check out how to make a multi-screen split like this:
- Open the LUT browser.
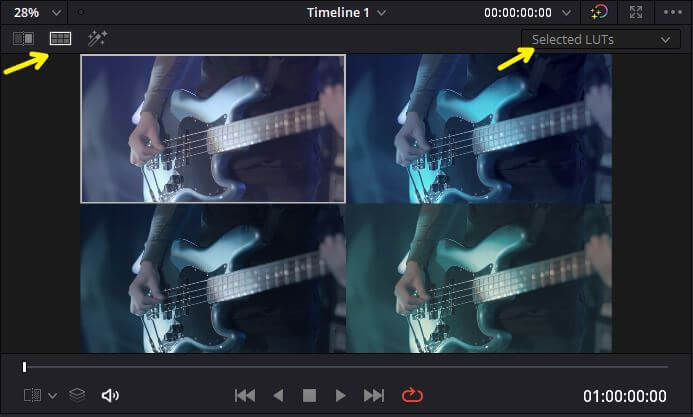
- Select multiple LUTs you would like to preview. 4, 9 and 12 work best in this mode. Select multiple LUTs by drag-selecting with the mouse or holding down Shift on the keyboard to select a range of items.
- Activate Split Screen mode, which is in the top left corner of the timeline viewer, next to Image Wipe and Highlight. Once on, change the selection to Selected LUTs.
And that’s pretty much it! A super-quick guide to installing and using LUTs in DaVinci Resolve. Pay attention to the proper LUT workflow to make the most out of the color information in your images and ensure your film is the best it can be. By utilizing the blending modes from the Key panel, you can blend as much or as little from a LUT as you’d like or blend multiple LUTs together to create your own remix on a look.