


DaVinci Resolve templates can be a game-changer when it comes to creating good content quickly and affordably. They are pre-made setups that can be adjusted and updated with your own footage to turn videos around quickly or establish a consistent style for a suite of videos.
In this tutorial, you’ll find out how to use templates and also how to update them with different frame rates and import an existing project into the template.
Summary
Part 1: How to Use DaVinci Resolve Templates
Let’s get started by learning how import templates and media into DaVinci Resolve and how to edit the template placeholders. If you’re looking for some awesome new ones to download, check out some of our favorites here.
Step 1: Add the Template to the Project Manager
When you’ve downloaded a DaVinci Resolve template, you need to open it up in the software. The best way to do that is through the Project Manager. Open up the DaVinci Resolve Project Manager, and then:
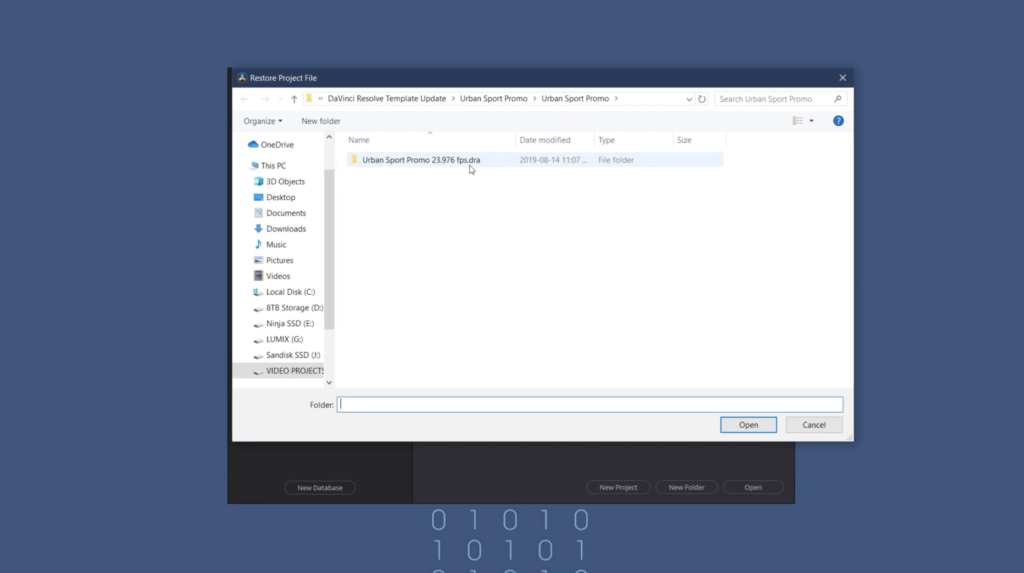
- Right-click anywhere, and select Restore Project Archive.
- Navigate to your template folder and click Open. Your project should now be available inside the Project Manager.
- Double-click it to open up the project.
Step 2: Edit the Media Placeholders
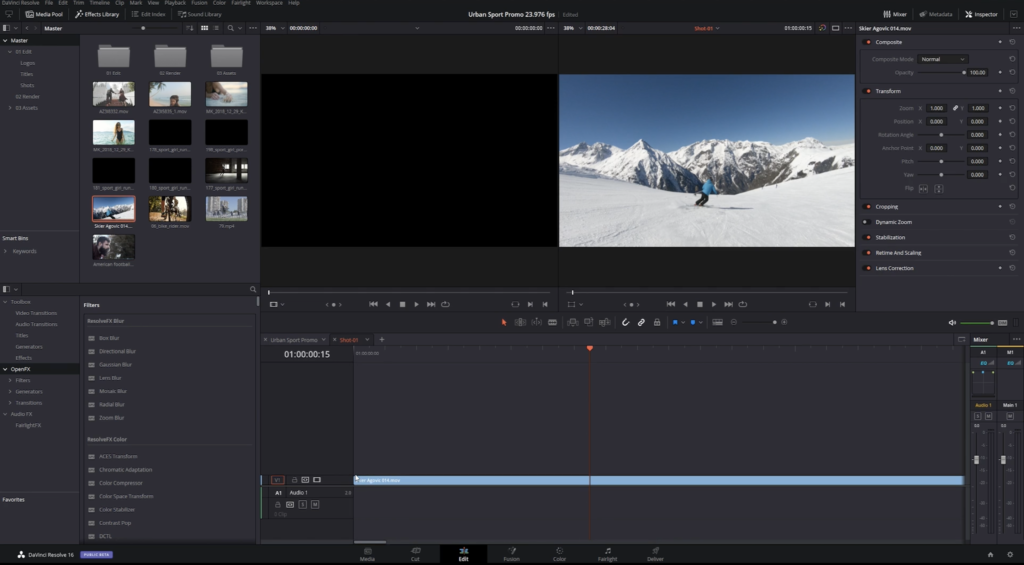
You’ll notice that instead of the media we want to use, the project consists of a series of placeholders. To use our own media, you’ll need to import it first.
- You can simply drag and drop media files from your computer into the Media Pool.
- Go to the Edit folder in your project. This is how you change assets within the project.
- Select the Shots folder.
- Double-click on a shot, and your timeline will be replaced by the one housing this placeholder.
- Simply delete the placeholder in the timeline and drop in your own image or footage.
- To go back to the main timeline, open the Render folder, and double-click on the timeline. Alternatively, switch between the two timelines by using the tabs at the top of the timeline.
- Now you can see the timeline has been updated with the footage you want. Repeat this same process with the different placeholders and other clips.
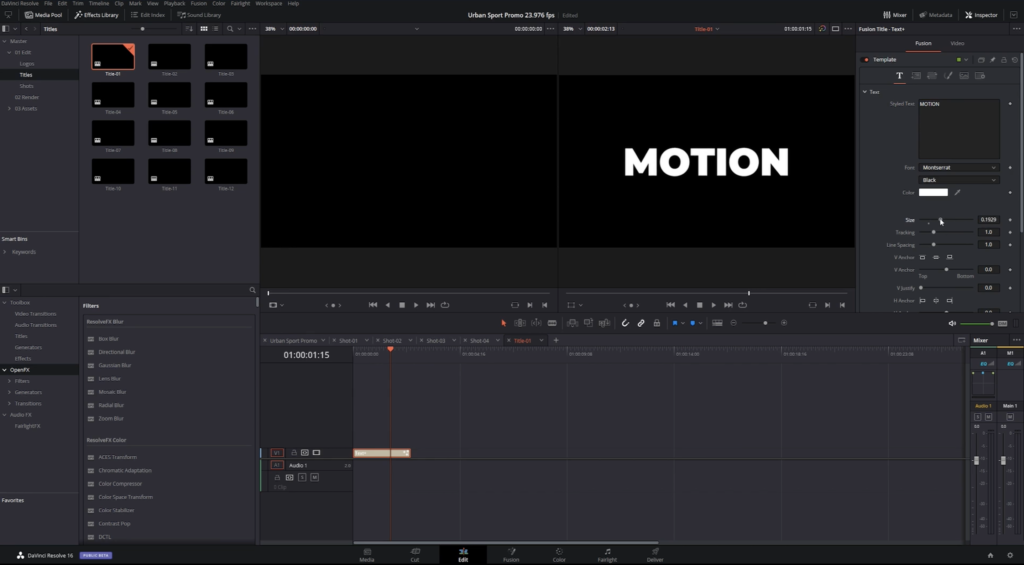
Step 3: Edit the Titles
Now your project should be taking shape. But the text should have some pretty generic placeholder text. To edit the text in your DaVinci Resolve template:
- Go to the Edit folder.
- Go to the Titles folder.
- Double-click on the title you want to change. Another timeline will pop up with the title you selected.
- Select the title on the timeline and go to Inspector on the right side of the screen.
- Here you can change the text, size, font, and more.
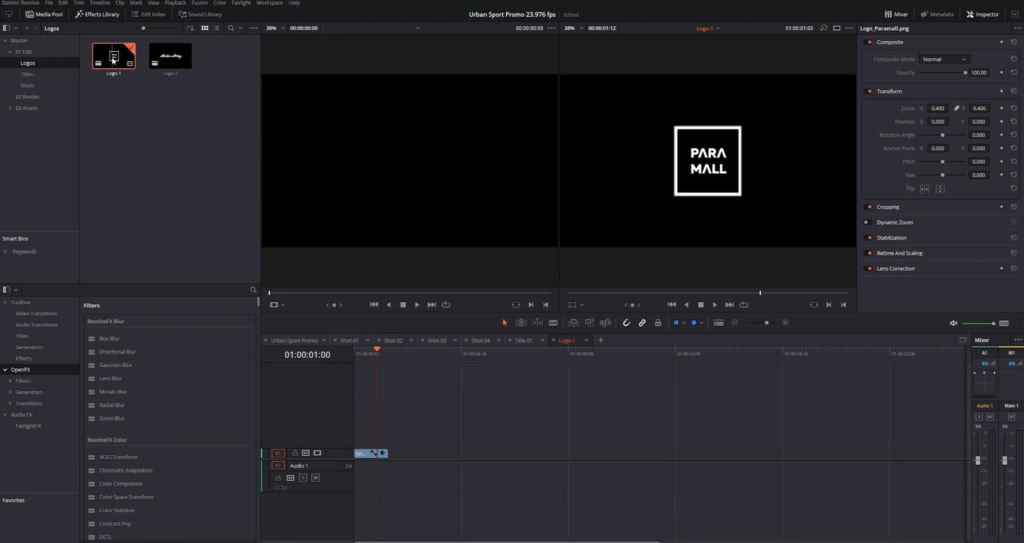
Step 4: Change the Logos
If you want to change any logos, it’s exactly the same process as above, but by going to the Logos folder within Edit instead.
The main thing to ensure is that any logo you use has a transparent background. Otherwise, it will obstruct the rest of the shot.
Part 2: Pro Tips & Troubleshooting
1. Different Project Frame Rates
So what happens if you run into a problem? Let’s say you started a project with a specific frame rate (23.976), and you want to import it into your template project, which has a different frame rate (25 or 30). If you paste the project materials into a new project, you will receive an error message that says project current frame rate does not match that of copied timelines from the media pool.
Here’s what you can do to get around this:
- Navigate out of your project and into the project that you want to integrate into the template by going to File > Project Manager.
- Highlight everything on the timeline using Control or Command + A.
- Copy everything by hitting Control or Command + C or by going to Edit > Copy.
- Navigate back to your template project.
- Create a new bin by going to the Media Pool, right-clicking, and selecting New Bin.
- Name it something that will help you remember what’s inside, such as Imported Materials.
- Within this new bin, right-click and go to Timelines > Create New Timeline.
To be clear: what we’re currently doing is specific to trying to import a project into another project of a different frame rate. If all you want to do is create a new timeline with a different frame rate, then you can open up the Create New Timeline window in the same way.
- Click on Use Custom Settings.
- Go to Format.
- Manually select the frame rate of your choosing.
- Go back to General.
- Name your timeline, and hit Create.
- Click anywhere in this new timeline and paste your copied content by hitting Control or Command +V.
The reason you’d paste it into this new timeline is so all the extra material appears in the new bin. You could paste it into the same Media Pool as the existing edit, but it’s a good habit to bin things up to keep your workflow tidy.
To continue pasting your assets into the template project:
- Move the playhead to the end of the timeline in your template project.
- Paste your copied content using Control or Command + V.
So now, you can see all of our assets successfully pasted into the timeline, but this doesn’t help us if we want the timeline to be a different frame rate. To confirm the frame rate of your a timeline:
- Go to the Renders folder.
- Right-click on the timeline and go Timelines > Timeline Settings.
So what you can do is copy the entire timeline, including your newly imported content and paste into the new timeline you have created.
2. Integrating Projects With Fusion
You can do this the other way round (import your template project into a different project), but Fusion is integrated into some of the Motion Array templates, so some materials and elements may become disconnected. So try and use the template as the base timeline and import other projects into that.
But if your own project has a lot of elements with Fusion, the reverse may be true. Essentially, if you are encountering problems, then import projects from the other direction. Bear in mind this isn’t a perfect solution, it’s a workaround, but hopefully, it helps when you import a project into another project of a different frame rate.
And that’s about it! DaVinci Resolve templates can really speed up projects through the use of a collection of pre-set titles and transitions. With just a bit of set-up time needed to import your own media, swap the placeholders, you will be able to speed through your editing and create great content in no time at all.


