Revealing your intro text with a write-on effect is a popular and great way to add some interest to text in your videos. In Davinci Resolve 17 it is remarkably simple to achieve, so we will be looking at the basics and then jump into some advanced options to make it even smoother.
Summary
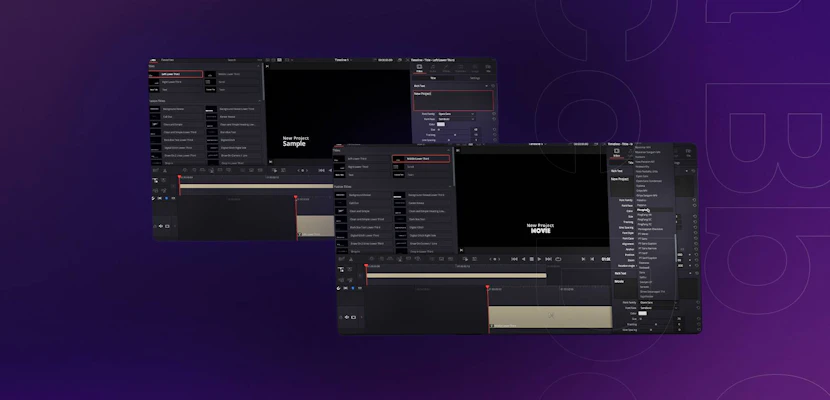
Part 1: Simple Write-On Text Effect Using Text+
We will start with a 1080p, 50 fps project, which is the same as our source footage in this case. Make sure you match your source footage.
- In the Edit page, drag your source clip onto the first track in the timeline. This can be any clip you would like to place a title on or you may already have some video edited.

- Now, from the Effects panel under Titles select Text+ and drag it onto the timeline above your source footage (Note: It must be Text+ not just Text since the write-on effect is only available with text plus.).
- Set the Duration for your clip and text. You can either drag the clips to the length you want and let them snap in place or you can right-click on the clip/text+ and select clip duration then type in the value you want. We chose 5 seconds.
- Once you are happy with your clip and title length, you can start working on the title by clicking on the Text+ title in the timeline.
- With the Text+ title selected go to the Inspector window
- Type in your title in the text box and select your font from the dropdown menu while using all the text controls like size, tracking, line spacing, etc. to make your text look like you want it.
- At the bottom of the text controls, there is a slider named Write-On with two handles for Start and End plus a little keyframe button to the right with small arrows on either side.
- We will use these to create keyframes to animate our text.

- Go to the first frame (start) of your Text+ title.
- Now drag the right handle (end) of the Write-On effect to the left or type 0.0 into the End box. You will see your text disappear on the screen from right to left.
Note: Click the keyframe button to make it turn red, indicating a keyframe has been created and activating the automatic keyframe function. You won’t need to do this again.
- Move forward to the point on your clip where you want your title fully revealed. 25 frames is a good spot if you are unsure. Note: You can measure this out by tapping your right arrow key 25 times.
- Now take the right handle (end) of the Write-On effect and drag it all the way to the right. You will see your text is revealed from left to right and another keyframe has been created.
- Playback your clip to see the text revealed with a write-on effect.
- Now to make this even better we will reverse the process so the title finishes with a Write–Off effect in the opposite direction.
- To do this is equally simple. Move to the end of the clip and repeat the process in reverse, this time grabbing the left handle (start) and dragging it to the right or type 1 in the Start box.
- Now move 25 frames back or to where you want your title to start writing off.
- Drag the Left handle (start) of the Write On effect to the left or type 0 in the Start box.
- You’ve done it, playback your sequence to see your title write on and write off.
Troubleshooting:
Start simple and practice. Focus on this one effect until you fully understand it before you try to combine multiple effects.
If you start getting weird behavior you can reset your entire title by clicking the reset button in the top right of the inspector window. Keep in mind this clears everything but it is often better to start from scratch if you have made a mistake somewhere.
Use the Render Cache function if your system is struggling to playback the animation in real-time, especially when using UHD or above footage.
Part 2: 3 Useful Write-On Text Effect Tips
1. Make your Title Transparent:
- Transparent titles can look nice and blend well with your background.
- With your Text+ title selected go to the Inspector and select Settings.
- Under Composite, you will see the Opacity slider. This slider controls how transparent your title is, simply slide it to your desired level, and for something more advanced you can even animate it in the same way as before by using keyframes.
2. Track Your Title to Your Clip
We won’t cover it here but tracking your title to move with the motion of your clip is a great way to add interest. This can be done in Fusion or the Color page but will take some advanced skills.
3. Use Title Templates
Motion Array has a wide range of title templates for Davinci Resolve. These templates come in packs with a bunch of useful titles that fit a certain style. They are a great way to get an advanced look for your project without the hassle of hours of extra animation work.
You still have the ability to customize the titles, like changing colors and fonts to match your project or maybe the style guide from your client. They are great for YouTube videos as well and save a ton of time.
The write-on text effect in Davinci Resolve 17 is actually reasonably simple to achieve by using the Text+ title and a few keyframes to animate the write-on and write-off effect. You may also add transparency to help your text blend well with your video.
As an advanced option, you could even track the text to the camera movement or an object in your video with the Fusion or Color page. However, for professionally made drag and drop titles, Motion Array has a wide range to choose from that can easily be customized to fit your project.
Have a look at this article for more ideas for animating titles with amazing templates that are available for DaVinci users.