


Replacing an undercast or overexposed sky is one of those techniques that, if your client sees you doing it once, they’ll want it every time! Utilizing a keyer, mask, and tracker together in tandem – it’s easy to isolate part of your image and replace it with something else. Luckily, there are plenty of tools built-in to DaVinci Resolve that make replacing a sky a breeze.
This tutorial works in the free version of DaVinci Resolve!
Learn Sky Replacement in DaVinci Resolve
First up, there are multiple ways that this can be done. A composite like this can be achieved in the Cut, Edit, Color, and Fusion pages – and each toolset offers its own strengths and weaknesses. Today, we are going to use the Color page because it’s the most straightforward way to pull out the sky and draw a garbage matte around the buildings. The Color page also features a very versatile tracker that can very quickly apply tracking data from the foreground against our new background.
Step 1: Prepare Your Clips
We’re going to assume you already know how to set essential project settings, and import media into a new DaVinci Resolve project.
- Drag and drop your footage from the Media Pool into the Timeline.
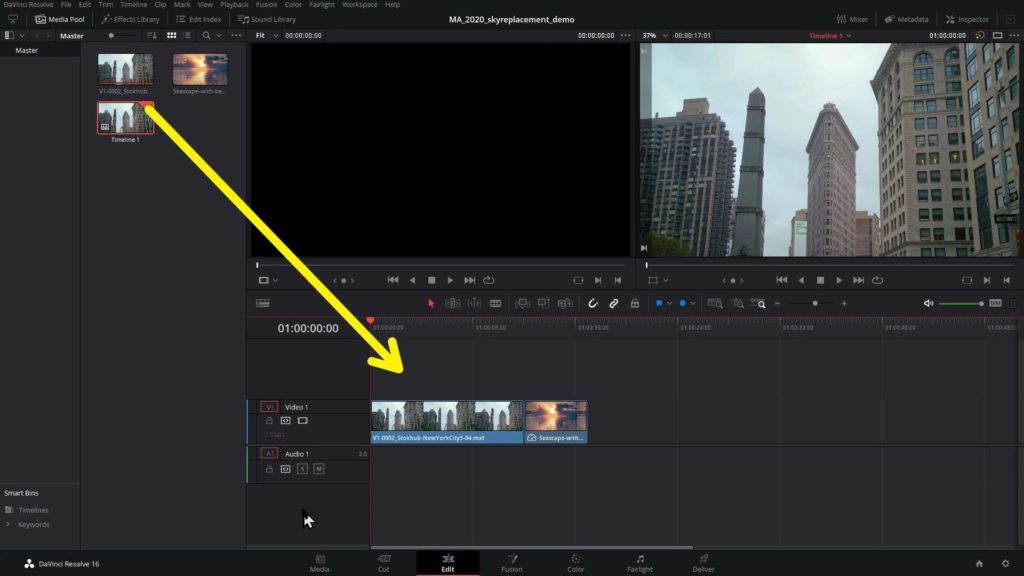
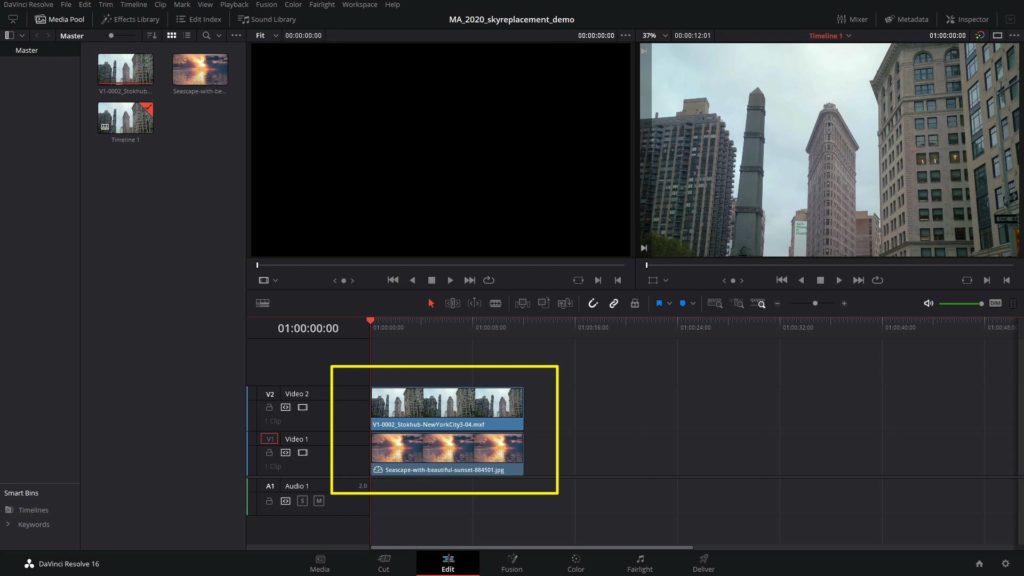
- Stack your clips so that your foreground object is on Video layer 2, and the desired sky is on Video layer 1.
- Enter the Color page by clicking Color on the navigation ribbon.
Step 2: Key the Sky
- Open the Qualifier Panel (eyedropper icon).
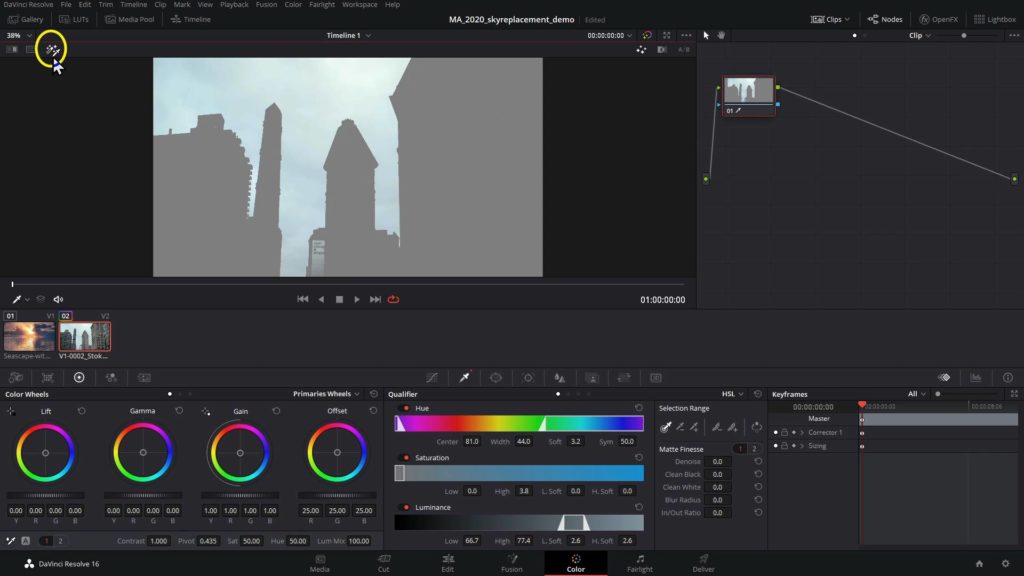
- Click and drag areas of the sky you would like to replace.
Note: Each time you click, you reset the tool and begin a new selection. - Click the Highlight tool (magic wand icon in the top left) or keyboard shortcut Shift + H to preview the area you have keyed.
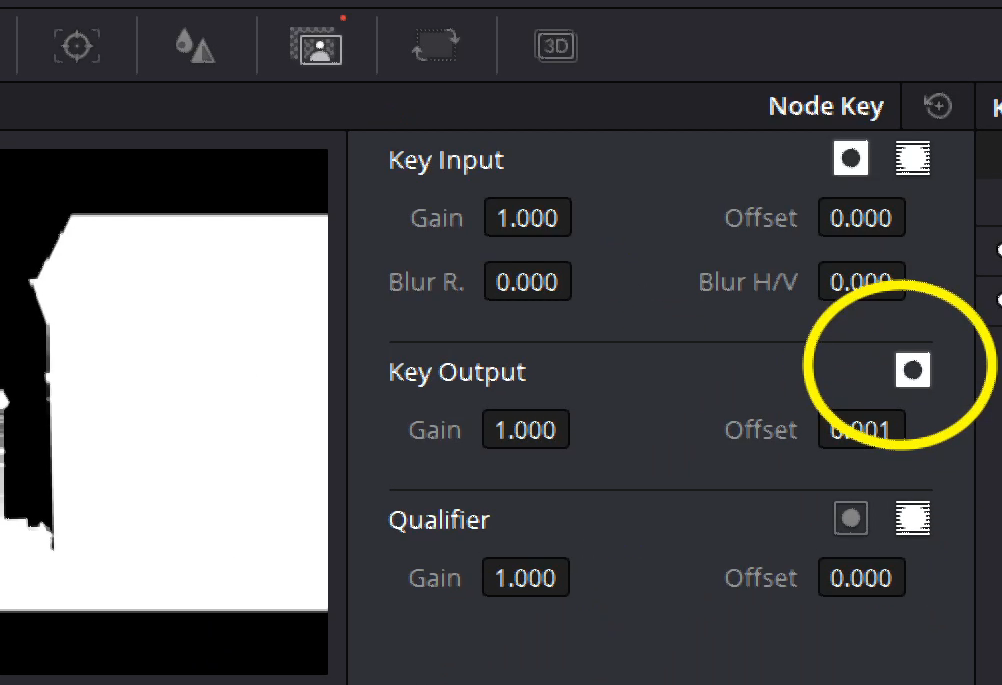
- We need to invert the key. Do this by stepping into the Key tab (icon has a human icon in a frame) and invert the Key Output.
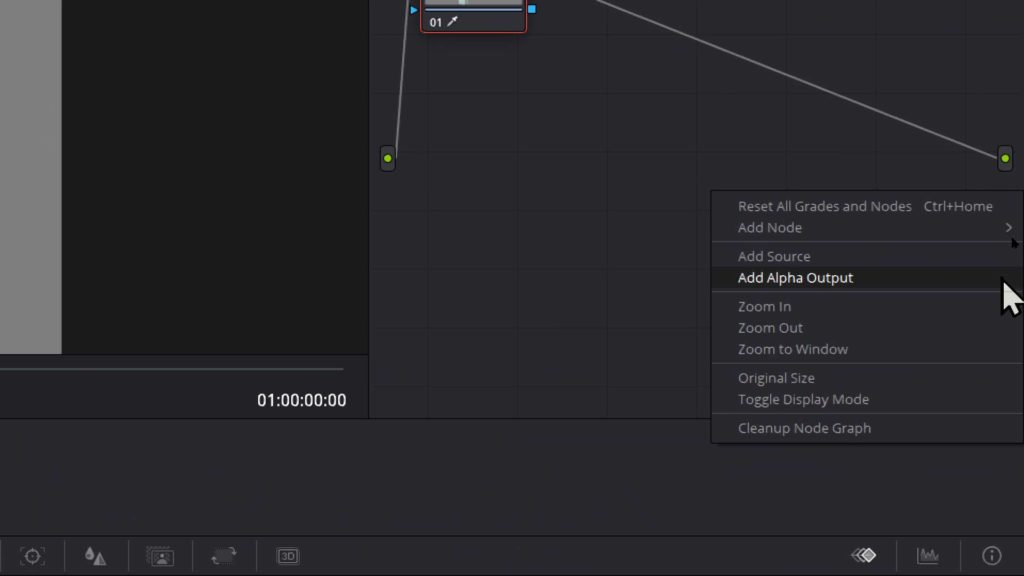
- Right-click in the Node Graph and add an Alpha Output.
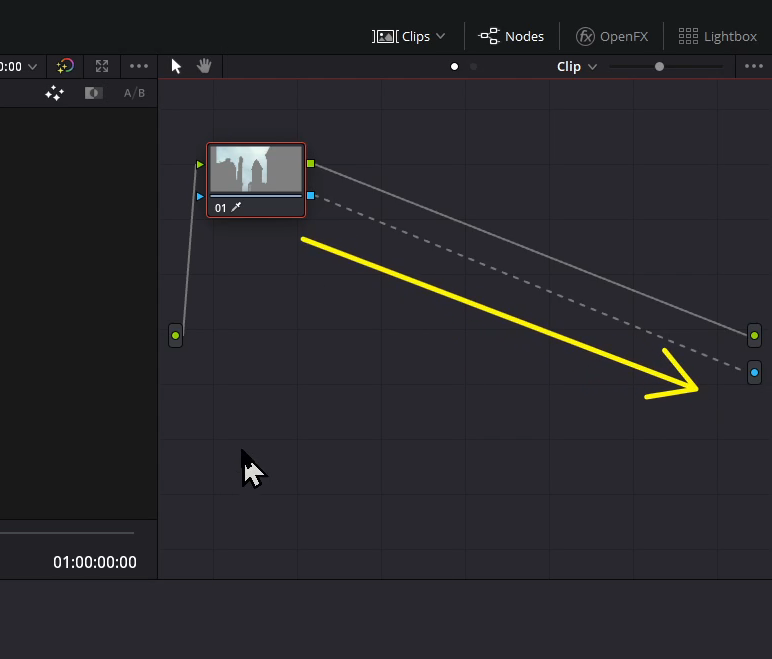
- Patch your node to the Alpha Output.
Step 3: Place the Background
- Step back into the Edit page.
- Move the position of the background by selecting the sky element in the timeline, and use the Inspector to reposition to your liking.
Note: Use an 8k sky element which will allow you to zoom in up to four times the size as we are working in 1920×1080 resolution.
Step 4: Refine the Key with a Power Window
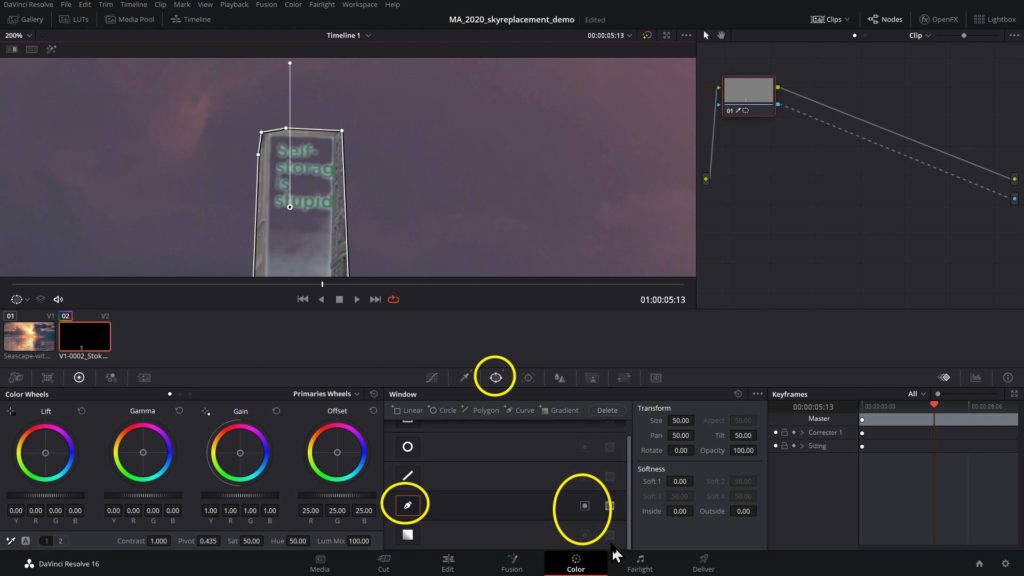
I am getting some artifacts around the billboard as the advertisement is the same luminance as the sky. By drawing a Power Window around this area, I can bypass the key just for this section.
- Step back into the Color page.
- Move into the Power Windows tab.
- Click the fountain pen icon, this is the Curve window.
- Draw a shape around the billboard or any area where a key is bleeding and needs to be bypassed.
- Now everything inside the shape is being keyed, which is the opposite of what I want. Click the invert window button to ensure everything outside the shape is keyed.
- Step into the Tracker panel. Ensure Window mode is selected.
- Track forwards and backwards from the point in time where you drew the shape
Step 5: Match the Elements with Color Correction
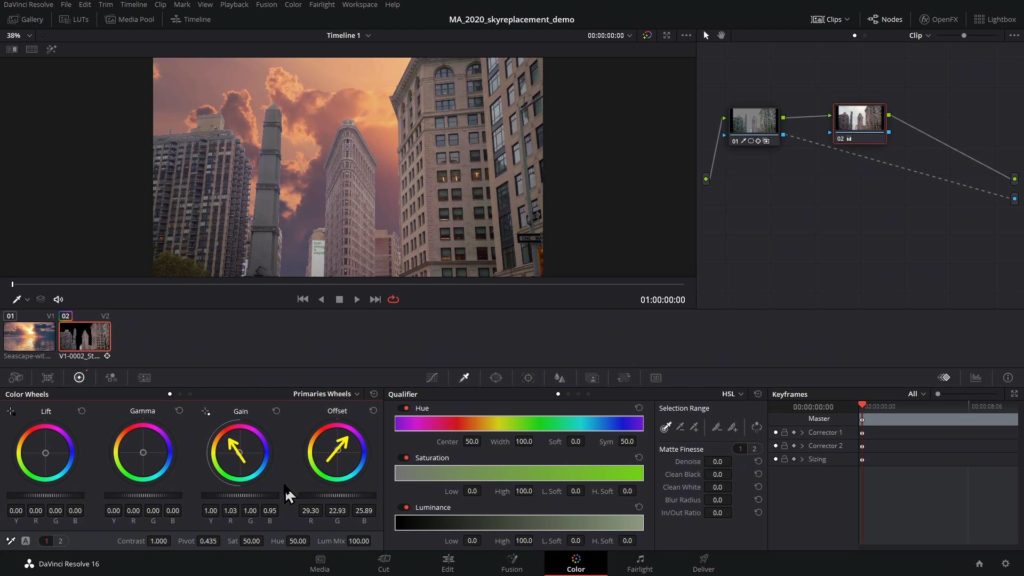
At this point, we have the sky in place. By adding some warmth to the buildings, it will better match the scene. Note that the builds are bluish and cool, where as the sky has a purple and orange tone.
- Add a new serial-node (keyboard shortcut Alt / Option + S)
- Move the Offset trackball in the direction of magenta.
- Move the Gain trackball in the direction of red/orange.
Step 6: Track an Object for the Sky
Look at your scene and decide where would be an ideal to track. Look for flat surfaces that are high in contrast. For this shot, the top right region with the two flat windows facing the camera look ideal because they are unobstructed, and the frame will give the tracker a lot of data to work with!
- Create a new serial-node (Alt / Option + S).
- Draw a Power Window Curve around the window or other high contrast area.
- Move into the Tracker panel, track window, and track forwards and backwards from the current position.
- Click the 3-dot context menu and select Copy Track Data.
Step 7: Apply the Track Data to the New Sky
Now that we have tracking data for our scene, we need to apply it to the new sky we’ve brought in. We can do this by using the Tracker.
- Click on the Sky shot on the thumbnail timeline
- Move into the Tracker panel.
- Select the Stabilizer (instead of Window).
- Use the 3-dot context menu and select Classic Stabilizer.
- Use the 3-dot context menu and paste the tracking data.
- Stabilize
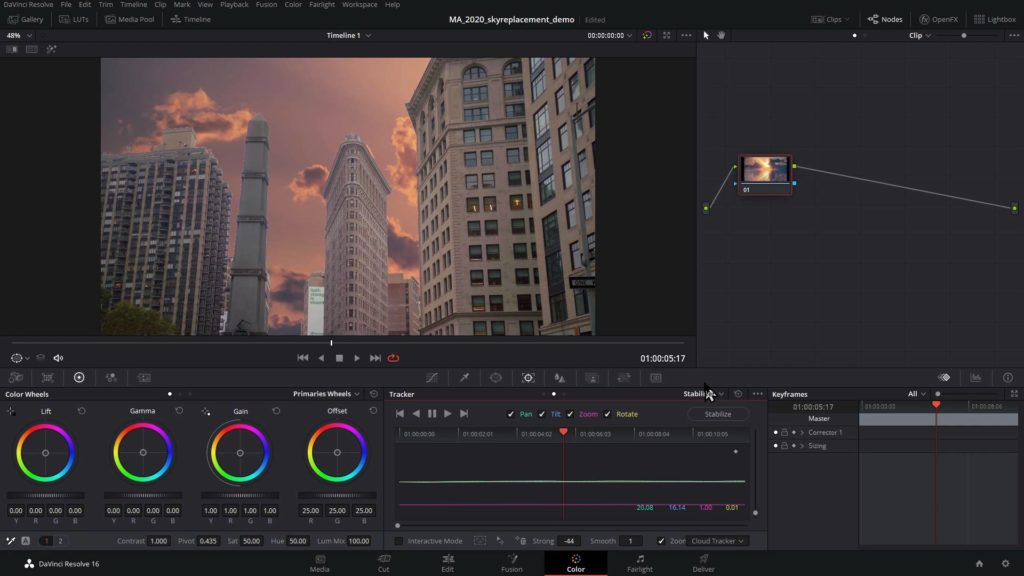
If you watch back the timeline, you’ll see the sky is now moving! However, it’s doing the exact opposite of what we would like. The sky does not move with the camera. That is because we need to invert the movement.
- Change the Strong value from 100 to -100. This inverts the data.
Playback the timeline. The result is closer! However, the camera is moving too drastically. This is because my video of the buildings is in 4k, but my sky plate is 8k. I need to adjust the Strong amount.
- Experiment with different Strong values. -50 is a good place to start. I decided to use -44 in the end.

Now you know how to replace a sky in DaVinci Resolve using the Color page. What makes the Color page unique is that tools can easily be used in tandem. In our exercise we keyed the sky, refined the key with a Power Window as a Garbage Matte, and tracked the Garbage Matte – all in the same node.
This works differently from other compositing suites like After Effects or Blackmagic Fusion and can be a very fast and efficient way to work once you master the workflow! The Color page in DaVinci Resolve is also particularly useful for tracking foreground objects and applying the tracking data to background objects.


