


Audio visualizers are a fantastic way of creating visuals from your audio content. Whether you’re making music videos, event promos, or podcast content, a trendy waveform video can help you create stylistic and engaging content. In this tutorial, we’re going to show you how to create custom audio visualizers in Motion 5. Don’t worry if you’ve not used Motion before, it’s super easy!
Summary
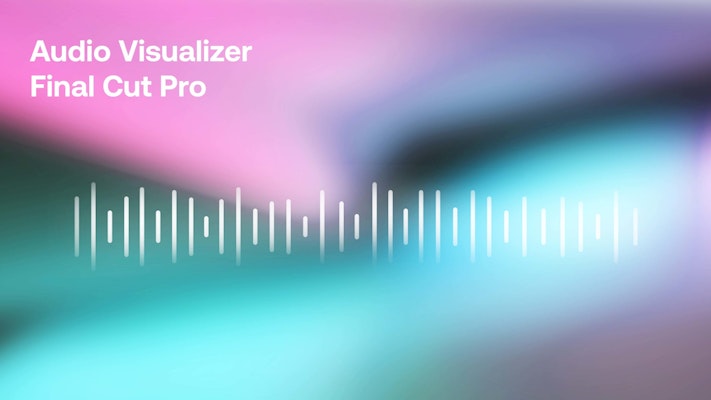
Part 1: How to Create An Audio Visualizer in Motion 5
Motion can be a challenging piece of software to use, especially if you’re a beginner. We’re going to take you through the 3 key steps to creating the audio visualizer look, but remember, each step will show you skills that can be used in other Motion projects.
Step 1: Creating a Mini Audio Visualizer
To create the full Audio Visualizer animation, we will first create a mini version with just 5 bars. By building the visualizer from segments, you’ll have more control over the animation.
- Open Motion 5 and select New Motion Project from the options.
- Go to File > Import (or Cmd+I) and find the music track you want to use as the source audio. We’re using the fantastic I Feel So Wild.
Note: You can also use this free royalty-free song as well, So Much Warmth.
- Select the Line tool from the bottom of the media viewer. Click on the screen, and while holding shift, draw a straight vertical line.
- In the Inspector, click on the Geometry tab.
- Adjust Point 2 Y settings to 0 and the Point 1 Y setting to 400.
- Click on the Properties tab and go to Position > Reset Parameter.
- Select the Line layer in the Project Browser and hit L on your keyboard to create a Replicator.
- In the Inspector under the Replicator tab, from the Shape drop-down menu choose Line.
- Adjust the Point settings to 5, and change the Origin to Center.
- Next, open all of the Scale property controls. Select the arrow next to the Y scale setting and choose Add Parameter Behaviour > Audio.
- An Audio Dropzone will be added to the Inspector. Then go to the arrow beside the dropzone and choose your audio track. Motion 5 will analyze your audio which may take a few moments.
Step 2: Replicate Your Visualizer
The next step is to duplicate your mini audio visualizer and create a full-scale version. We’ve chosen to create this effect using 5 duplicates, but you can adjust the settings to suit your needs.
- In the Project browser, select your Replicator layer.
- In the Inspector, drag the Y scale Value down to 0 and change the Scale Randomness to 5.
- Click on the down arrow alongside the settings and choose Add Parameter Behaviour > Randomize.
- Adjust the Randomize and Noise settings until you are happy with the look.
- Go to the Audio panel and set the High Frequency to 20hz.
- Go to the Replicator and hit Cmd+D to duplicate it. Do this 5 times, so you have 5 mini audio visualizers.
- Select the top Replicator layer and change the X position to 525.
- Select the bottom Replicator and adjust the X position to -525.
- Select all of the replicators in the Project Browser, and at the top of the screen, choose Object > Alignment > Distribute Horizontal Centers. You should now have a line of audio visualizers spread evenly across the screen.
- This next step is a little tricky: as you want the audio visualizer to move differently along the various frequencies, you need to adjust the Low Frequency and High Frequency settings for each replicator audio layer.
- Start with Replicator 1 – set the Low Frequency to 11 and High Frequency to 111. For Replicator 2, set the Low Frequency to 111 and the High Frequency to 211. For Replicator 3, set the frequencies respectively to 211 and 311, continue through each replicator, gradually increasing the Frequency settings of each.
- In the project browser, search for Random to bring up all the Randomize settings. Go through each Replicator layer and click on the Generate button alongside the Random Speed Settings.
- Finally, to increase the overall size of your audio visualizer lines, select Line in the Project browser and adjust the Point 1 Y settings to your desired length. If you want your visualizer to animate below the line, add a minus number to the Point 2 Y settings.
Step 3: Add Color to Your Visualizer
The final step is to add color to your visualizer; you could change the line color, but this method will allow you to use cool gradient styles mapped across the whole waveform.
- In the main project, click the Shape tool at the bottom of the media viewer and draw a rectangle to cover the screen.
- In the Inspector, go to the Shape options and choose Gradient. Use the Inspector Color settings to select your preferred gradient style.
- Go to the Rectangle layer in the Project browser and ensure it is above all your replicator layers outside the replicator Group.
- Right-click the Rectangle layer and choose Add Image Mask.
- Drag your replicator group to the Image Mask dropzone in the Inspector.
- Adjust your colors and blend modes until you get the look you like.
Part 2: Top 3 Final Cut Pro Audio Visualizer Templates
1. Music Players With Lyrics Titles
The Music Players with Lyrics Titles offers 5 stunning audio visualizer designs with lyric title placeholders. The modern and trendy designs include circular and Line-based visualizers with a fun, bokeh-inspired backdrop.
Download Music Players With Lyrics Titles Now
2. Music Players
Music Players is an FCP pack that includes 5 beautiful and glitchy feeling visualizers with a fuzzy, feathered edge. Including circular and Line styles, this set also allows minus audio visualization.
3. Waveform Audio Visualization
The Waveform Audio Visualization pack is the perfect option for musicians, podcasters, and event editors looking to add a stylistic audio animation to their projects. The collection includes 21 exciting and energetic designs with a lot of versatility.
Download Waveform Audio Visualization Now
Audio Visualizers are a lot of fun to create, and you can often produce bespoke looks unique to your track. If you’re looking for a quicker waveform effect solution, you can create audio visualizers in Final Cut Pro with a range of templates and if you’re looking for more downloadable projects, check out these 17 eye-catching free and paid audio visualizers.


