


You can make your audience feel the impact with camera shake effects in Final Cut Pro. This fun technique has been used in everything from action movies to video games. You can combine it with sound effects to make your punches, stomps, and explosions pack a wallop. You can even use this technique to make your titles hit harder.
Below, we’ll cover creating realistic camera shake yourself and then give you 5 amazing downloads with customizable camera shake controls for Final Cut Pro.
Summary
Part 1: Learn to Apply Creative Camera Shake Effect in Final Cut Pro
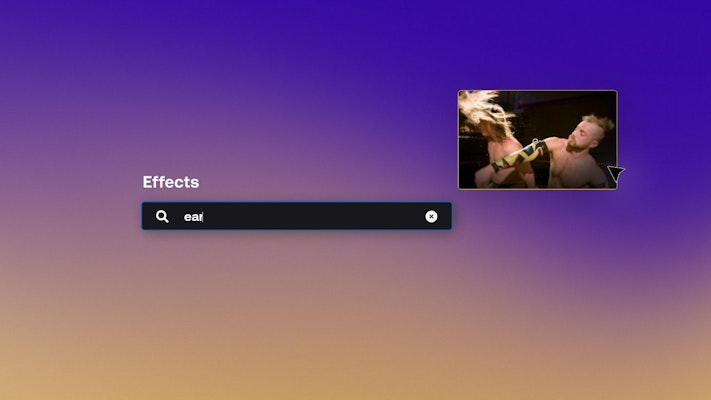
Below we’ll walk through 3 easy steps to add camera shake to an action clip in Final Cut Pro. In step 4, we’ll use the same effect to create a slamming full-screen title. All you need is a copy of Final Cut Pro, a clip to work with, and the built-in earthquake effect, which can be found in the Effects browser.
Step 1: Import and Add Footage to the Timeline
In this tutorial, we’ll be using action footage of a man punching. You can substitute with any footage of your own, as long as there’s something there that could reasonably be expected to make the camera shake.
- If you haven’t already, create your project by selecting File > New > Project in the top menu bar.
- Import your clips by pressing Command + I or pressing the Import button above the browser.
- Skim through your clip in the browser and set the in and out points using I and O keys, respectively.
- Drag your clip down into the timeline.
- Select your clip in the timeline. Then in the Inspector, increase the Scale property to 105%. This will prevent black borders from appearing when your camera shakes.
Step 2: Add the Earthquake Effect
Earthquake is a free effect included with Final Cut Pro. By using keyframes, you can manipulate this effect to match the action in your clip and create realistic shaking camera movement.
- Select the Blade tool by pressing B on your keyboard or choosing from the drop-down list of tools just above the timeline.
- Skim through your footage in the timeline. At the moment of impact, make a cut in your clip. Skim along 1-2 seconds to the right and make another cut.
- Now change to the Select tool by pressing A on your keyboard or choosing from the drop-down list of tools.
- In the Effects browser, find Earthquake and drag it to the new short clip you created.
Step 3: Use Keyframes to Adjust the Camera Shake
If you press Space and preview your project so far, you should see that there’s some pretty noticeable camera shake right at the moment of impact. In this step, we’ll add keyframes so that wobble winds down gradually, in a realistic way.
- In the timeline, skim to the first frame of your short clip. Select the clip by clicking on it with the Select tool.
- Now move over to the Inspector, where you should see controls for the Earthquake effect you added in step 2. Increase the Amount property between 20 and 100, whatever looks best for your particular video, and create a keyframe by clicking the black diamond to the right.
- Now skim ahead in the timeline to the end of your short clip. In the Inspector, create another keyframe, and drag the Amount down to 0.
Now the shakiness of your clip should wind down gradually, creating a realistic camera shake effect that emphasizes the action in your footage in a realistic way.
Part 2: Top 5 Camera Shake Effects for Final Cut Pro
These are some of the very best camera movement downloads you can add to your Final Cut Pro toolkit. Each one includes dynamic controls which can be manipulated in the Inspector to customize the camera movement in your project. They’re all easy to download and install, and then they’ll appear directly inside Final Cut Pro alongside all of your other built-in effects and transitions.
1. Smooth Camera Shake
Give your footage some realistic camera motion with Smooth Camera Shake. This pack of effects includes 10 different preset camera motions which can be added to your footage and even combined. You can also use this effect on text and titles!
Download Smooth Camera Shake Now
2. Camera Shake Effects
This pack includes a total of 9 different camera shakes which are quite unique in style. These vibrating camera movements can be used to create glitch effects, add suspense to a scene, or creatively used as transitions between clips.
Download Camera Shake Effects Now
3. Shake Transitions
Bouncy and fun, Shake Transitions is a great fit for music videos, advertisements, upbeat YouTube videos, and more. They Include effects controls that allow you to modify the movements right from the Inspector so you can customize these transitions however you want.
Download Shake Transitions Now
4. Pro Camera
Take control of a virtual camera and create realistic panning, tilting, and zooming with any photo or video clip. You can also use this effect to create multi-camera footage by zooming out and arranging multiple clips within the frame. This is a must-have for any editor who wants to add some sizzle with simulated camera movement.
5. Hit Presets
Built just to create the type of brief impact shake we created above in the tutorial, Hit Presets is a pack of short shake effects that you can place to emphasize impacts to the rhythm of music or with your titles.
Wrapping up, today we’ve covered how to create a cool camera impact shake in Final Cut Pro using the Earthquake effect and a couple of keyframes. Using that and these 5 handy camera shake effects and transitions, you should be able to bump up the engagement on your next video project and get creative!
If you thought those 5 camera shake plugins were useful, check out everything else Motion Array has to offer. There are thousands of effects and transitions, and also stock footage, sound effects, royalty-free music, and more!


