


It doesn’t take long to learn how to fade audio in Final Cut Pro. There are a number of different methods to do it, and also a few cool tricks you can learn such as crossfading. These techniques are basic but essential for producing professional-quality video compositions, so it’s definitely worth taking a few minutes to learn.
This tutorial will cover the 2 main ways to fade audio in Final Cut Pro, and in the end, we’ll share a few really great music tracks to jazz up your next production.
Summary
Part 1: Fade Audio Using the Modify Menu
One of the great things about Final Cut Pro is that there are several ways to do just about anything, depending on your preference as an editor. If you’re adding audio fades to your project in Final Cut Pro, one way to do this is by using the Modify menu at the top of the screen.
Apply Fade-In and Fade-Outs
Abrupt changes to audio levels can be jarring for the viewer, which is why audio fades are such a common practice. You can use them at the beginning and end of your videos, or any clip that has a very different audio profile than the one next to it. Here’s how…
Step 1: Select your clip by clicking it in the Timeline.
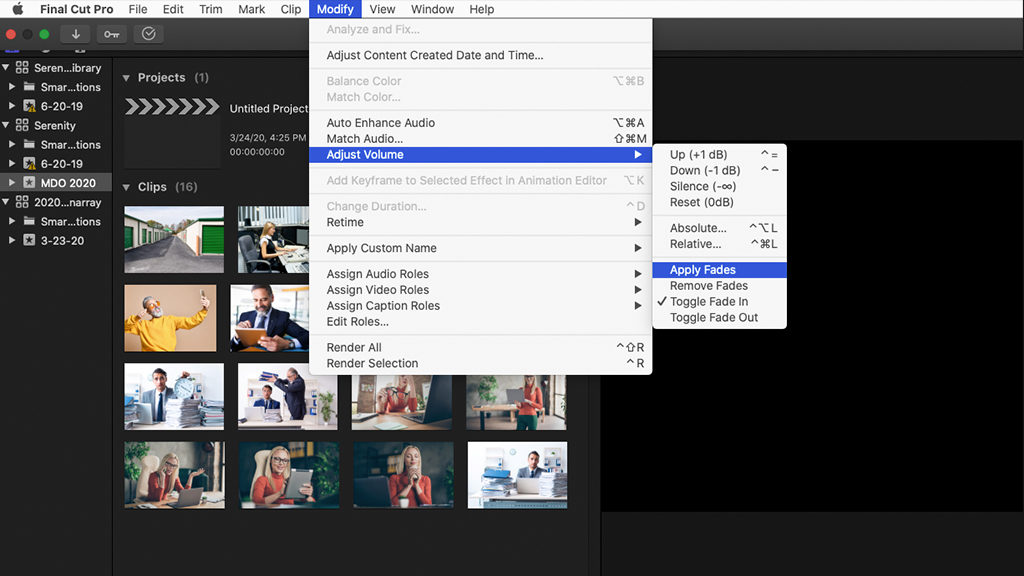
Step 2: Navigate to the top menu bar and select Modify.
Step 3: Scroll down to Adjust Volume. From there you can select Apply Fades to apply both fade-in and fade-out to your selected clip.
Adjust Audio Fade Duration
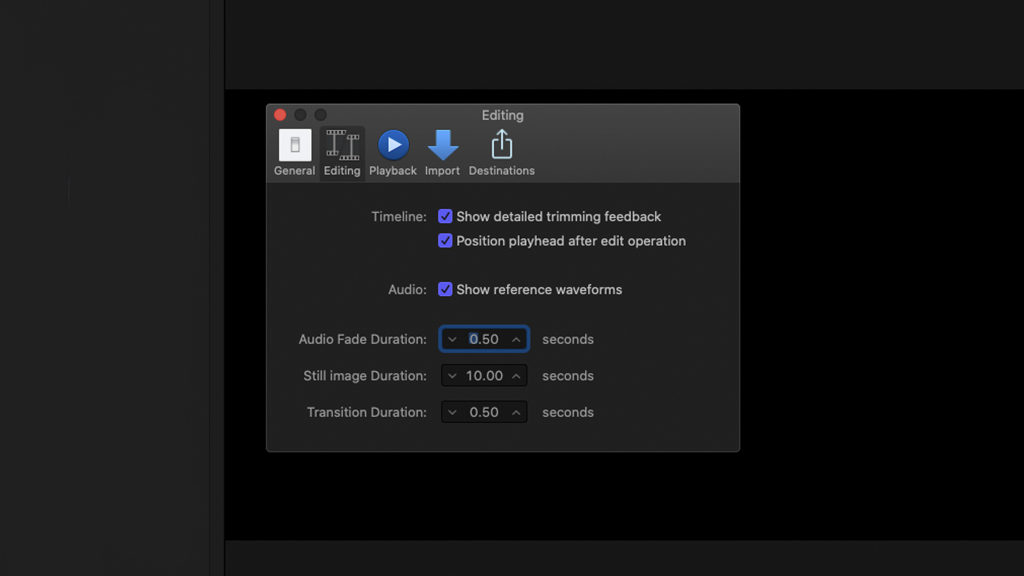
All fades added using the Modify menu above will be set to a default duration, like .5 seconds. If your project calls for something different, you can change this default in the Preferences menu.
Step 1: On the top menu bar select Final Cut Pro, and then Preferences.
Step 2: An Options window should appear. Select Editing at the top to open the editing preferences.
Step 3: You can adjust the Audio Fade Duration to anything you want here, and it will apply to any fades you add going forward.
Remove Fades
Now if you’ve added some fades to your project and you’d like to remove them, that’s a simple task. You can even do so in a large batch by selecting multiple clips at the same time.
Step 1: Select the clips you’d like to modify by clicking them in the Timeline.
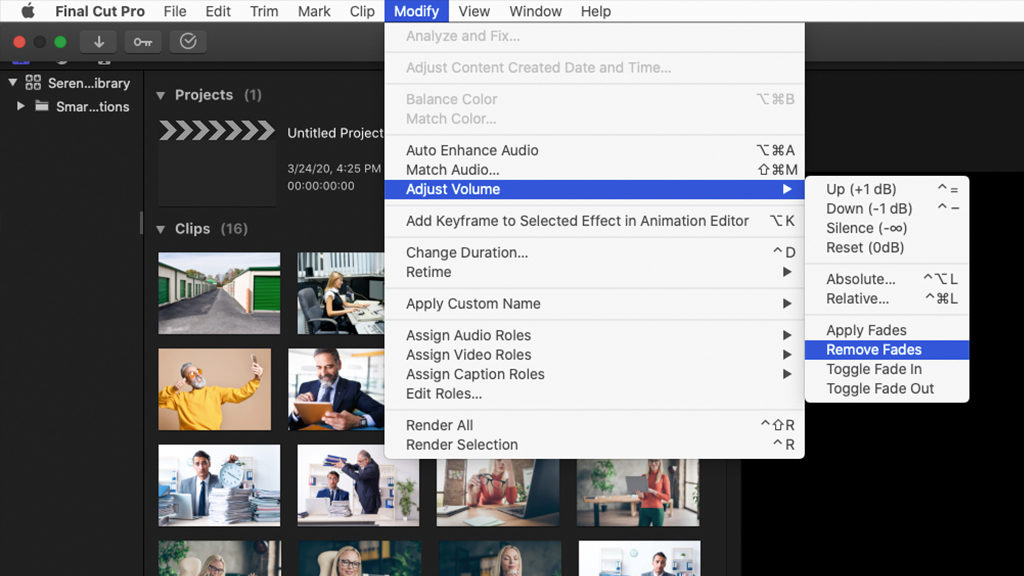
Step 2: On the top menu bar select Modify > Adjust Volume.
Step 3: Click Remove Fades on the menu that opens up.
Other Options for Fading In and Out
The above tutorials are useful for adding fade-ins and fade-outs to clips in your project, but what if you’d like to add just one or the other? You may have noticed in the Modify > Adjust Volume menu there were several options including Toggle Fade in, & Toggle Fade Out. You can use these options to add or remove either type of audio fade at the ends of your clips.
Using Keyboard Shortcuts
If you’re doing this a lot, you might want to go ahead and use keyboard shortcuts. Unfortunately, none of the above commands are included as automatic keyboard shortcuts in Final Cut Pro, but we’ve got a handy trick for changing that.
Step 1: On the top menu bar, navigate to Final Cut Pro > Commands > Customize.
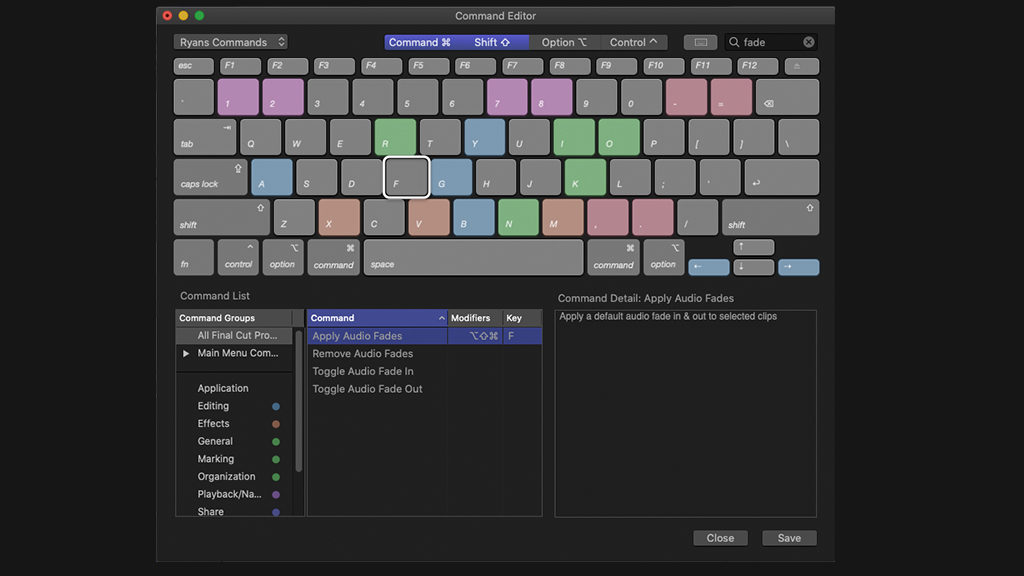
Step 2: This opens up the Command Editor, where you can assign keyboard shortcuts to any action in Final Cut Pro.
Step 3: In the search bar at the top right of the popup window, type in “Audio Fade”. You should see a number of audio commands appear in the Command box toward the bottom of the window.
Step 4: Above the keyboard display, you should see a few modifiers like Command, Shift, & Option. Choose one or any combination of these that you would like for your new shortcut.
Step 5: The grey keys on the keyboard display represent keys which don’t currently have a shortcut with your selected modifiers, choose which key you’d like to use.
Step 6: Drag a Command–like Apply Audio Fades–up onto a grey key to assign a keyboard shortcut.
Step 7: If Final Cut alerts you that you cannot edit this command set, click Make a Copy and name your new command set before repeating the steps above.
Step 8: Back in the Timeline, select a clip and try out your new keyboard shortcut by pressing the modifier and key you selected for your shortcut.
You can use this technique to create keyboard shortcuts for anything in Final Cut Pro or to change any of the default keyboard shortcuts for various commands. Careful though, changing default keyboard shortcuts might be confusing when following online tutorials!
Part 2: Create Audio Fades with On-Screen Controls
Keyboard shortcuts and menu commands are one way of doing things in Final Cut Pro, but some editors prefer using their mouse to fine-tune their edits with the on-screen controls. Although slower, these controls are more intuitive and also easier for beginners to learn.
Fade Handles
If you’re not already aware, all clips in Final Cut Pro have convenient Fade Handles for adjusting audio fades. These are great for making small adjustments here and there, and you can easily change the length of any fade with them.
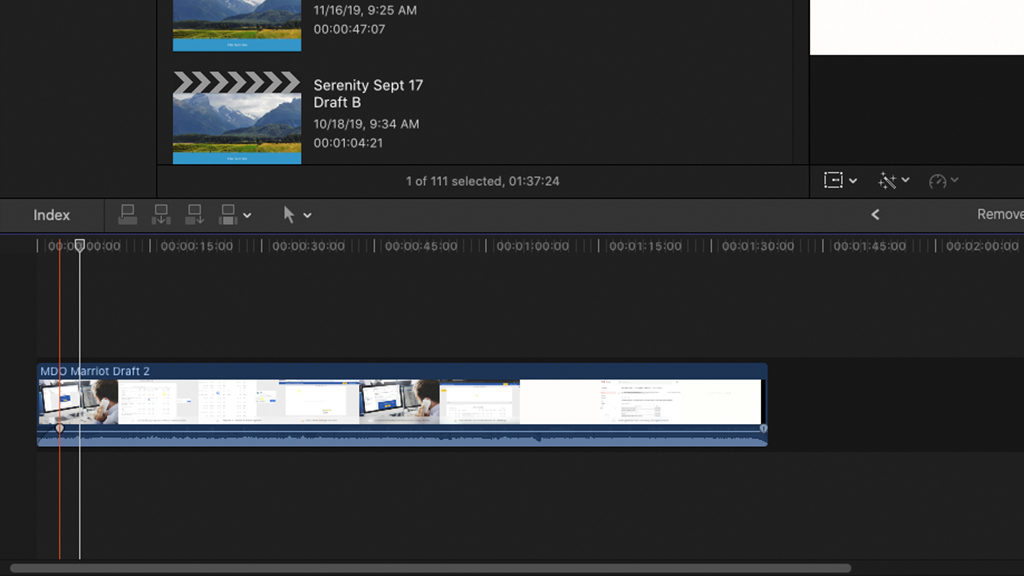
Step 1: Find your clip in the Timeline and move your mouse cursor to the very edge of it.
Step 2: At the bottom of the clip, you should see an audio waveform, and just above it–at the left or right side of your clip–a small circle, this is the Fade Handle.
Step 3: Click and drag the Fade Handle to create a fade-in or fade-out. Using this method you can create an audio fade of any length, even the entirety of your clip!
Adjusting the Shape of Audio Fades
You can also adjust the shape of fades in Final Cut Pro to fine-tune the type of audio transition you create. To access these options, just Control-Click the audio fade handle of any clip. There are several options:
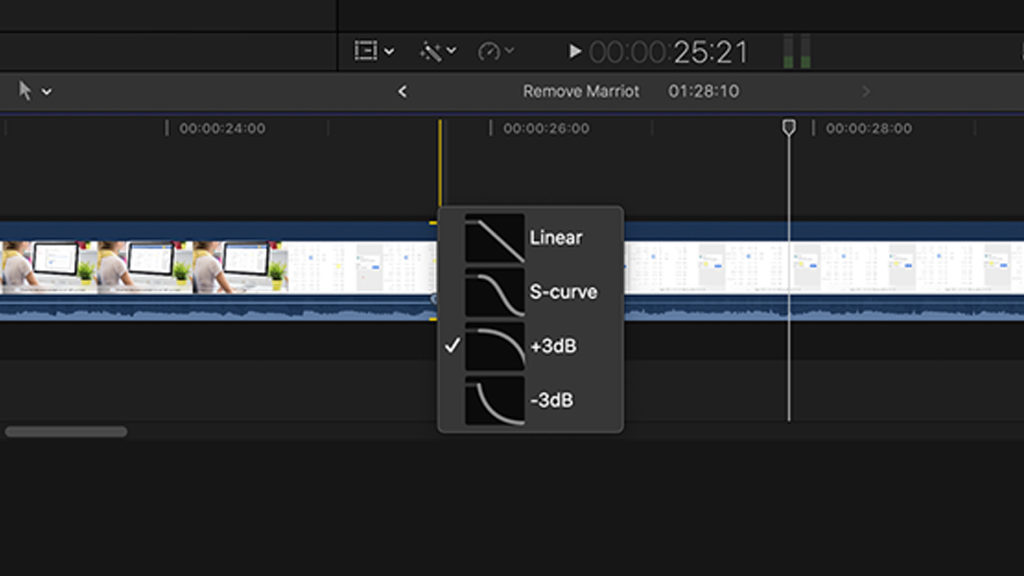
- Linear: Fades in or out at a constant speed.
- S-curve: Eases into the fade and then eases out of it at the end.
- +3dB: Good for quick fades, it begins fading quickly and tapers off at the end
- -3dB: Begins slowly and then increases speed, useful for crossfades.
Create Crossfades Between Clips
Abrupt audio cuts can be distracting to your viewers and using Fade In and Fade Out between clips will create moments of silence in your video. If you’d like to keep the action going without any jarring audio transitions, use crossfades to smoothly transition the audio from one clip to the next.

Step 1: Add 2 clips to the Timeline, next to each other.
Step 2: Double-click the bottom of each of your clips to separate the audio waveform, allowing you to edit it independently.
Step 3: Using your mouse cursor, place it at the edge of the left clip’s audio waveform and drag it to the right, about .5 seconds past the end of the left clip.
Step 4: Do the same with the right clip’s audio, dragging it left about .5 seconds past the end of the clip.
Step 5: Using the Audio Fade Handles, add a fade on each clip, about 1 second long.
You should now have a smooth audio crossfade between the 2 clips. If you use a video transition between any 2 clips, Final Cut Pro will automatically add crossfade for you as well!
Part 3: Free Audio Resources for Final Cut Pro
Audio is important. Viewers might tolerate shaky and low-resolution video, but high-quality audio is essential for keeping your audience engaged for any length of time. Music tracks are a fantastic way to add captivating audio to any video, but you have to be careful not to use unlicensed music or you can run into copyright claims. That’s why we’ve assembled a few quality tracks for your next project.
1. Free Lofi Boom Bap Workout
Upbeat, cool, retro hip-hop vibes to make any video feel like a party. It’s hard to listen to this song without nodding your head to the beat–so it’s a perfect track for any project with a lot of energy and rhythm. You can use the full-length track, or the 15, 30, and 60 second version to fit the length of your video.
Free Lofi Boom Bap Workout Download
2. Free Future Bass
This dynamic instrumental screams of adventure. It jumps back and forth between a solid percussive backing and instrumental breakdowns, which makes it a good choice for videos that would like to alternate between high & low energy, like photo montages, promotional advertisements, or time-lapses.
3. Free Epic Staccato
Classically influenced modern orchestral composition that feels heroic and bold. Use it for dramatic projects like video games, adventure films, product unveilings and more. You can also use this song ironically to add a humorous sense of adventure in a YouTube video.
4. Free Hip Hop Corporate
Clean and loud synth composition with hip hop percussion and spacey jam-band guitar licks. Perfect for montages, closing credits, or low key background music; this is a nice track to just set the mood for any chilled out video that takes viewers on a ride.
Free Hip Hop Corporate Download
Time to fade out! Today we’ve covered everything you need to know about audio fades in Final Cut Pro, including using the Adjust Volume menu and the Audio Fade Handles, plus a few extra tricks: Crossfading is great for linking to clips together, fade shapes can be adjusted to achieve different effects, and of course nothing beats a solid backing track.
If you enjoyed those royalty-free background songs, there’s a lot more like it to explore! Check out Motion Array which is jam-packed filled to the rafters with great Final Cut Pro content like songs, plugins, effects and more. You can find everything you need to upgrade your Final Cut Pro software and produce top-notch, pro videos.


