Flower photography is such a rewarding genre. You can produce beautiful results with the minimum of fuss because your subject is, largely, highly cooperative. It’s also versatile and diverse, so never grows old. And while flower photography makes it easy to get good results, with some tips and a little practice, you can elevate your images to great.
Summary
Main Camera Settings
You might be wondering what the best settings are for flower photography. From indoors to outside, if you are using only natural light or flash, and depending on the lens you choose as well as the look that you want, your aperture, shutter speed, and ISO will have to be adjusted according to your shooting conditions. It is useful to remember the following pointers, though:

- If you use a very large aperture, say ƒ/2.8, with a macro lens, it will give you a very shallow depth of field with only a sliver of the flower in focus.
- Shooting inside or in a studio with a tripod allows you to control your background and the stillness means that you can successfully use a smaller aperture for greater depth of field and a slower shutter speed to get a good exposure.
- When you’re shooting outside, you will likely need to blur your background to keep it from detracting from your subject and use a fairly fast shutter speed to prevent motion blur. You can use your ISO to get the exposure right.
Remember: the farther your subject is from your background, the more the background will appear blurred. The closer the camera is to the subject, the shallower the depth of field.
- There’s a handy rule to help you select shutter speed when you’re hand-holding your camera: don’t try to shoot slower than 1/focal length. With a 50mm focal length, use a shutter speed of 1/50 seconds or faster. If you can, use a tripod and a remote release to give yourself the best chance of capturing a blur-free photo.

The aperture that you will choose is always going to rely on the conditions of the shoot and the look that you want to achieve. Don’t be afraid to experiment.
Part 1: 10 practical tips for flower photography with a DSLR
1. Location Isn’t Everything
From photographing orchids in your own kitchen to daffodils on a verge or strelitzias in your local botanical garden, you don’t have to venture far afield to find beautiful floral specimen subjects. Flowers really are everywhere and very often free to photograph, too. Keep your eyes open and unique flower photography opportunities will soon present themselves to you.
2. Block the Wind
When you are shooting outside, the slightest and lightest breath of wind can flutter the petals on a flower and shift the stem. Do the best you can to block the wind from your floral subject, whether that’s you acting as a breaker, or a carefully positioned sheet or board.
3. Use fill light
The golden hours will give you beautiful soft light for flower photography, but sometimes, that won’t be enough. You might not be able to shoot in the morning or evening, or your subject could be shaded. In which case, using a reflector to bounce some light back onto your flower or adding some flash to lift the shadows is the best option. Ring flashes are easy to use and especially good with macro lenses, but off-camera flashes can work wonders. Start with a low power output as you might find that all your flower needs are a sparkle, not full-on dazzle.

4. Spritz Water
If you’re lucky enough to capture dew or raindrops on a flower, you’ll know how magical it looks. If there’s no natural water around, a little spritz from a spray bottle can do the trick. But please do not do this in someone else’s garden, a botanical garden, or a park. These plants will be in carefully controlled conditions and your drop of water could cause havoc.
5. Show Movement
Don’t be afraid of your flowers moving in the wind. This can be an opportunity in itself. Stop your lens down a bit, use a slower shutter speed and a tripod) and capture the wind giving movement to your flower subjects for a different image.
6. Use the Sun
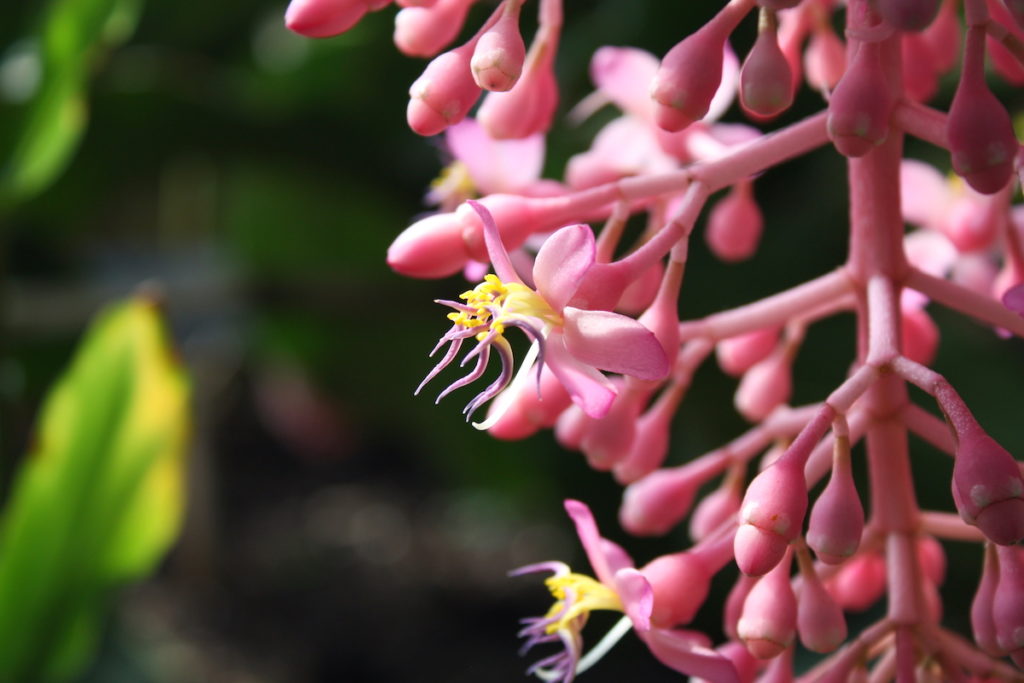
Backlighting from the sun can give petals the most beautiful translucent look. This is easiest when the sun is low in the sky, so around sunrise or sunset, which has the added benefit of casting soft, warm light over your scene, too. By using the sun to light flowers from the side, you will show off the different textures in their anatomy.
7. Don’t Shy Away from Overcast Days
Sun is great. But so too are clouds. Clouds work as a giant softbox, providing you with oodles of wonderful, soft light. Get out there on cloudy days to shoot shadow-free flowers with colors that really pop.
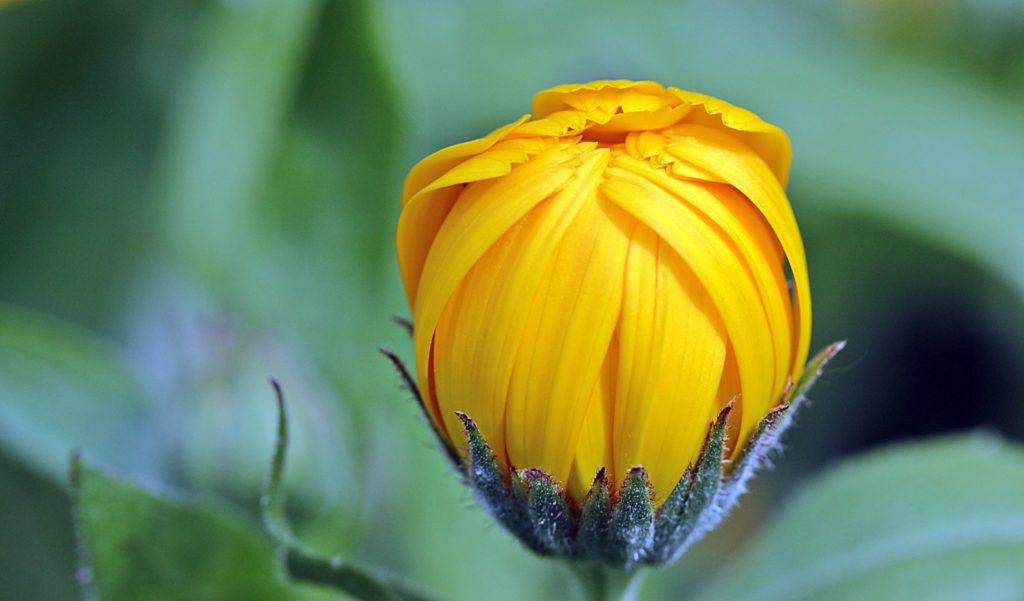
8. Document Life Cycles
Whether you shoot a triptych showing bud, full bloom, and decay, or opt for a timelapse video of a flower’s life cycle, it’s a revealing project that gives you a sense of completeness.
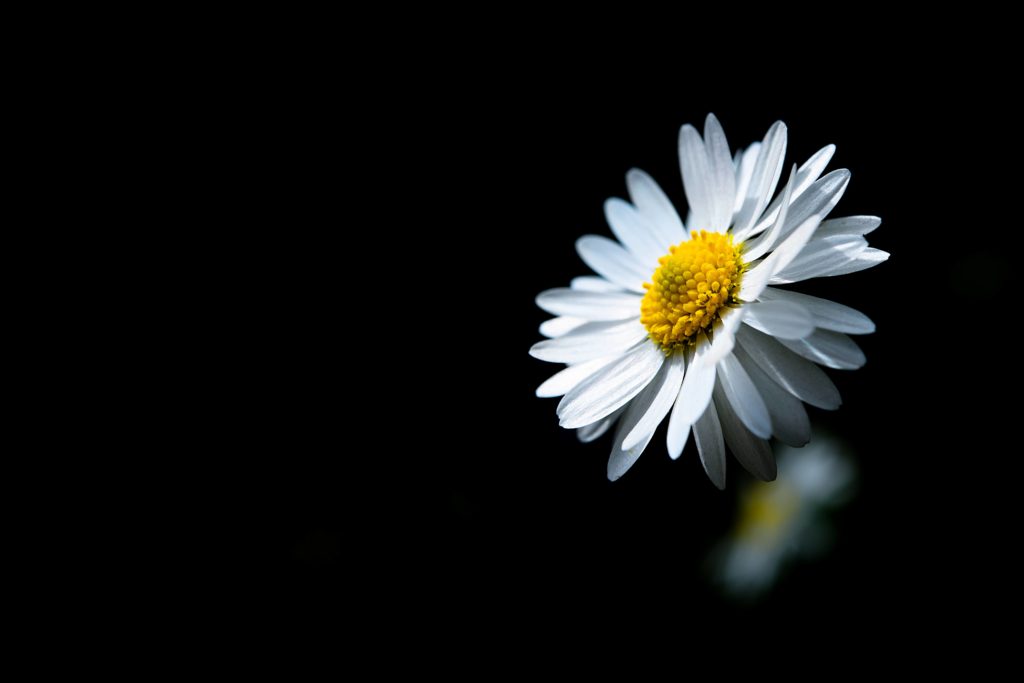
9. Fade to Black
With the correct lighting conditions, you can make your flowers look as if they are emerging from a sea of blackness. While this is easiest to accomplish in the studio with flashes, you can manage it in bright natural light, too. To do this, ensure that your flower is lit, not the background, and expose the flower.
10. Avoid Cluttered Backgrounds
Even with a shallow depth of field and blurred background, distractions can still, well, distract from your subject. Do your best to ensure that background in a natural setting is as clutter-free as possible. That’s fairly easy indoors, when you can use a blank wall or a backdrop but outside, look for monochrome foliage or other flowers that will offer a pretty colored background, but not detract from your chosen subject.
Part 2: 5 useful Tips for iPhone Flower Photography
1. Shoot in Soft Light
Bright sunlight means harsh shadows. By shooting in soft light, for example when the sky is cloudy, during the golden hours or when your flower is in the gentle shade, you will create an image with much better exposure and color.
2. Shoot from a Low Angle
To help avoid a cluttered and distracting background, get down low and shoot up toward the sky. Whether it’s an overcast day or one with a beautiful blue sky, it will give you a lovely consistent background. Alternatively, getting down low can give you a great background of the other flowers around your specific subject and a different view of them to make for an interesting image.
3. Fill the Frame
To help avoid distracting backgrounds, get in really close to your subject and completely fill the frame with your flower. Don’t be shy of cropping off the edges of petals as you do so. It will create a stunning, intimate photo.

4. Go Minimal
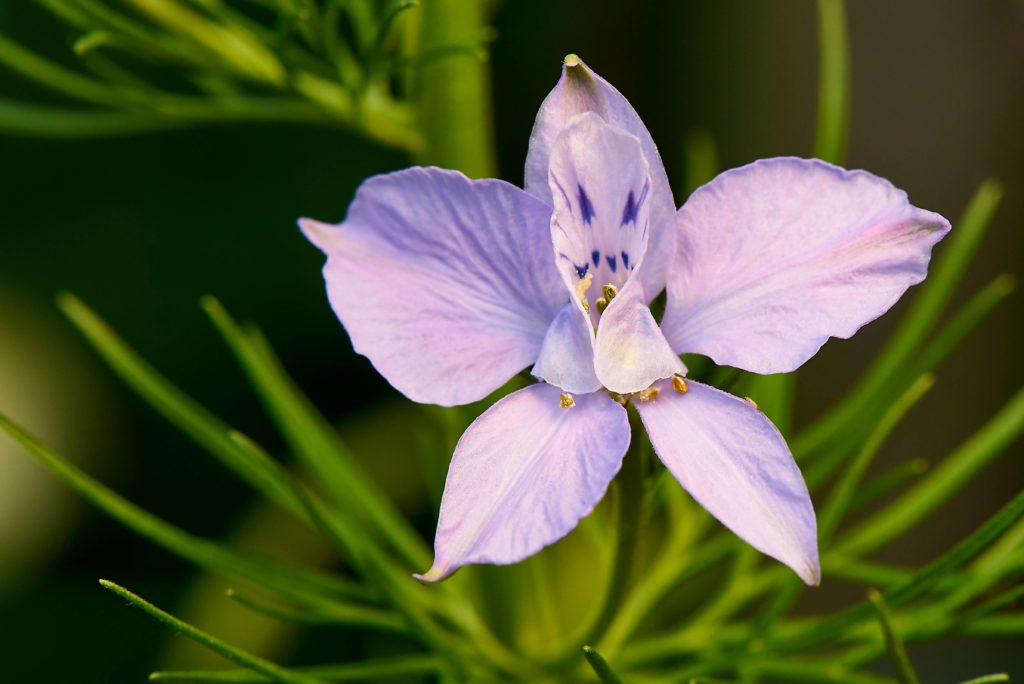
Having plenty of negative space around a flower really does bring your audience’s focus onto its delicate construction and vibrant colors, and shows it off to its best advantage. Minimal compositions are usually easiest to achieve in a controlled environment, but you can accomplish them outdoors, too. You just have to look for the right flower with the right background.
5. Consider Shooting Indoors
Don’t think that all flower photography has to be conducted outside! A vase of flowers photographed against a blank wall is a beautiful image. Shooting from above onto a table or the floor can give you a stunning photo. Shooting indoors allows you the opportunity to control the conditions and therefore your exposure more, giving you a better chance of capturing a great image.
Flower photography gives you a wonderful opportunity to create interesting, unique images at home, in a studio, or outdoors. The unflinching nature of flowers means that you can use them to practice your techniques without fear of them growing bored or criticizing your work, too. There are not many reasons to have a go at flower photography.