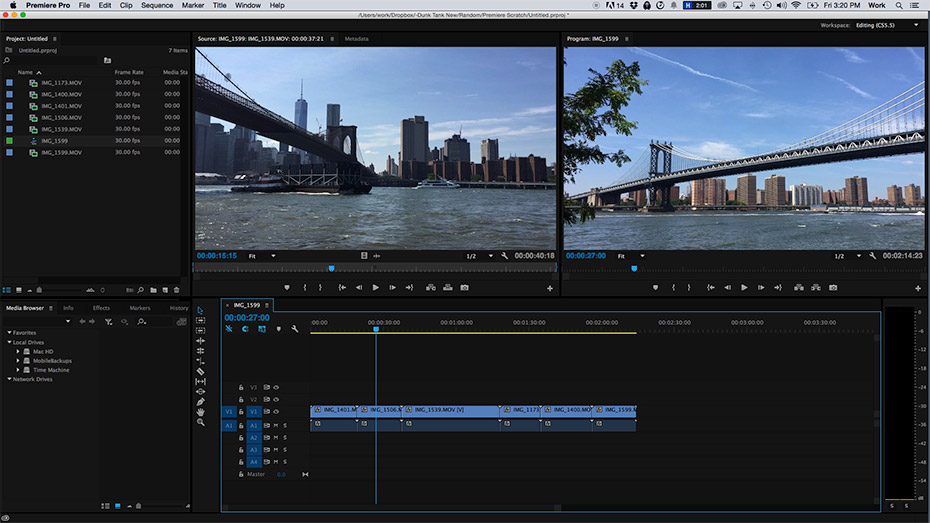
Editing is truly an art form, and it’s one that often goes unnoticed. In fact, in most circumstances, good editors make themselves invisible by creating a seamless scene or film that appears to have laid itself out naturally.
Editing is about tricking the viewer into believing they are part of what’s going on in the scene, but there are lots of common editing mistakes that do just the opposite. Let’s explore some of them so you can avoid them in your edit sessions.

Pacing
The most fundamental part of being a good editor is understanding pacing. Depending on what is happening in your scene, the pacing of the edits can change. But it’s important to find a rhythm and work with it.
Cutting shots is almost like playing music. If you are cutting a scene with a lot of action, you’ll want the pacing of the edit to be quick, and once you’ve established that, you’ll want to stick with it until the scene changes and the pacing needs to change.
As an exercise, cut a scene together, and then go back and watch it. Set an internal rhythm in your head and look for places where a shot goes too long or is cut short. Find ways to alter the shot lengths that work with your story to create a good pace throughout.
Jump Cuts
Although jump cuts have become commonplace in things like YouTube video blogs, they are generally something you want to avoid in traditional editing.
A jump cut is a cut where a portion of action gets chopped out and time “jumps” slightly ahead. Imagine we are watching a character run-up to a car and fling open the door. We cut to an alternate camera view and the character is sitting in the car. We’ve lost the rest of the moment when they are climbing into the seat.
This is a jump cut, and it’s jarring to the viewer who is expecting a logical progression of time. To avoid jump cuts, try cutting on actions. If a hand is reaching for a handle, cut to another angle of the hand reaching for the handle. If you don’t have enough footage to properly cover your shot, use a cutaway shot to fill the time needed to get from one action to another.
Match Frames
Match frames are another continuity issue in editing that can be jarring to the viewer. They occur when an editor cuts from one camera angle to another, but where the camera angles are very similar.
Typically, when you make cuts, you want to change the angle dramatically enough that the viewer feels like they are getting a different point of view. Two shots back to back with similar composition and angle just give the sense that the earth has shifted slightly, and it feels like an unnecessary cut.
Match frames can be avoided just like jump cuts by adding in a cutaway shot that will break up the two shots so the viewer is less likely to feel the slight shift between the two angles.
Flash Frames
Flash frames are a very common editing issue that are easy to miss. They occur when you accidentally introduce a random frame into your edit. Maybe you have cut from one shot to another and then you replace the second shot but place it off by one frame, so the old second shot just flashes on for a brief moment, or maybe you introduce a frame of black by not perfectly aligning your edits in the timeline.
Either way, this brief moment or “flash” can be jarring to the discerning viewer. With most video running at frame rates between 24 and 30 frames per second, we are only talking about a very brief glitch in the edit. Sometimes viewers and editors don’t even know what they are seeing.
None the less, they feel that something is off. So, watch carefully for flash frames in your timeline.
Ghost Frames
Don’t let these spooky little errors haunt your edit. Ghost frames occur when you use a dissolve transition from one shot to another, but where the outgoing shot actually cuts to another shot before the dissolve is complete.
What you end up with is a “ghosted” shot overlaid on the incoming footage for a brief moment. The simple solution is to make sure there is no other shot that can come up in between your transition. Trim the outgoing footage to where your shot ends, and make sure your transition completes by the time that shot finishes. Ghosts eradicated.
Audio Syncing
Audio syncing issues are one of the worst editing mistakes with regards to throwing off the viewer. This is especially important when it comes to speech and seeing lips moving.
When moving clips around the timeline, it is possible to have things move in and out of sync. Generally, the software will let you know when this happens, but watch out for it and make sure to stay in sync.
If you have an issue with frame rates or sample rates slipping out of sync in your timeline, locate the point at which you notice the issue, split the clip, and realign the audio so that the lips and audio move in sync.

Audio Mixing
In some edit situations, there will be a professional audio mixer to handle audio needs, but often this falls on the editor’s long list of tasks.
We often say that bad audio makes bad video. If you have the best edit in the world, but fail to spend the time creating a proper audio mix, your viewer will be too busy focusing on the sound to enjoy the visuals.
Remember that background music should be in the background. Don’t let the music interfere with dialogue or sound effects that need to be heard.
Add in sound effects that make sense. Sounds like doors shutting and footsteps go a long way to adding realism to a scene. But don’t put in more sounds than you need, or you may distract the viewer.
Bad Transitions
This one is a little more about choices than mistakes. Transitions can be used to help move from scene to scene with a little more visual interest than a straight cut. Sometimes they will add a specific visual style to the edit.
But it’s important to know when they add to the edit and when they distract. Too many dissolves can slow and edit down and make it feel labored.
And tacky transitions can draw way too much attention, pulling the viewer out of the scene. A well designed transitional device can be used to great effect when wiping from one scene to another. Think of it as a chapter heading. But try and limit them to the important breaks, and make sure that they are designed to match the look and feel of the rest of your video.
Graphic Nightmares
Just like with transitions, there is a time and a place for graphics. Some movies and tv shows make graphics an important part of the edit. But be sure that you are using graphics when and where they are useful.
And more importantly, use graphics that add to the overall appeal of your edit instead of distracting. Design is a different discipline than editing, so if you aren’t a designer, find one who can create graphics to help your project along.
If this isn’t an option, remember that less is more. Refine your graphics down to one or two fonts that work well together, limit your color palette, and make sure that your graphics are clean and easy to understand.
Color Matching
A very common issue when working with footage is mismatched colors. This often happens when lighting conditions change during shooting or when footage comes from multiple cameras that weren’t properly white balanced.
When editing, the viewer is supposed to feel like they are a part of the scene and shifting colors will quickly remind them that they aren’t. The only way to avoid this is to color correct the offending footage.
Find the shots that have the colors you want and correct the rest of the shots in the scene to match for a more seamless edit.
Becoming a great editor takes time and practice, but avoiding these common mistakes will help you get a long way towards creating great edits on every project.


