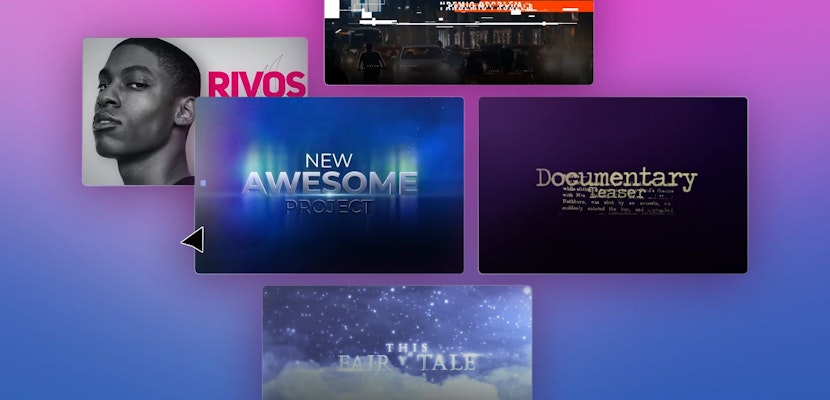
Head-Up Displays (HUDs) are a fantastic way of displaying information to your audiences. When used correctly, it can enhance your storytelling. You’re probably familiar with using HUDs in Sci-fi and Superhero movies. Still, they can also be used in promos, vlogs, and presentations to convey information to your viewers in a stylish and hi-tech way. Today we’re going to show you the basics of creating HUDs from scratch in After Effects; let’s jump in.
Part 1: Creating a HUD from Scratch in After Effects
The best thing about building HUDs in After Effects is that once you understand the basics, you can create incredibly complex visuals; it just takes a bit of time.
Step 1: Animating Circles Elements
Many HUD elements involve a circular theme, but you can use this same technique with any shape you’d like.
- Create a New Comp, change the Height and Width to 1000, and hit Ok.
- Select the Ellipse tool, turn the fill off and set the Stroke to 50. Drag on the screen to create a circle that fits the canvas.
- Hold Command/Control on your keyboard, double-click the Pan Behind icon to center the Anchor Point, and then use the Align Tools to center it to your canvas.
- Click the Add button and choose Trim Paths.
- In the Trim Paths settings, create a keyframe for the End property and change the setting to 0. (please ensure the playhead is at the beginning of the timeline.)
- Move the playhead to around 1 second and change the End property to 100; your circle will animate on the screen.
- Select the keyframes and right-click > Keyframe Editor > Easy Ease.
- Open the Speed Graph and drag the last keyframe point toward the first, creating a peak at the start.
- Select the layer and hit Command/Control + D to duplicate it. Select the duplicate and hit U twice on your keyboard to reveal the properties.
- Adjust the Scale of the circle and the Stroke width to create an outer circle.
- Create as many duplicates of the layer as you need to create your design, adjusting the Scale and Stroke Width with each layer.
- If you’d like to make some of the Circles Dashed or Dotted Lines, open the Stroke settings in the Layer Menu and adjust the Dashes settings.
- When you have created a layout of circles you like, select all the layers and hit R on your keyboard.
- Go through each layer and adjust the Rotation setting to the circle starting from a different point.
Step 2: Animating Radar Lines Elements
While the circles look pretty cool, hi-tech HUD visuals will include other shape layers that interact. With this technique, you can add radar-style pulses and flourishes to the circle motif.
- Create a New Shape Layer and select the Rectangle tool; set the Stroke to 0 and the Fill to white.
- On the screen, draw a small rectangle and align it to the center; decrease the Scale until it is only just visible.
- From the Add menu, choose Repeater; increase the Copies setting to 8.
- Open the Transform Repeater settings; uncheck the Uniform Scale box, and adjust the Y-Axis Scale until you see the thin lines appear.
- Adjust the X-Axis Position setting to create a row of lines across the screen, increasing the Scale.
- Place the playhead at 1 second and add a keyframe for the Repeater Copies setting.
- Move back to 0.5 seconds and adjust the setting to 0; select the keyframes and add an Easy Ease.
- Create duplicates of the layer, adjusting the Repeater Transform settings and the Layer Rotation each time to create cool shapes in your design.
- Finally, to change the color of your layers, use the Fill Effect.
Step 3: Adding 2D Movement
Your HUD will now animate on the screen, but it should also have some movement within each layer; to do this, we’re going to use Expressions.
- Hit R on your keyboard for any layer you want to rotate continuously.
- Hold Alt on your keyboard and hit the Stockwatch next to the Rotation setting; in the box, type Time*5
- Use this method to add rotation to any layer and adjust the number to change the rotation speed. If you want the layer to rotate anticlockwise, use a minus figure.
Step 4: Adding 3D Movement
In this step, we will use 2.5D effects to give the HUD a 3D look; if you’re creating 2D elements for your video, you can jump straight to Step 5.
- Create a New Comp, 1080*1920, and drag your HUD comp to the timeline.
- Make the HUD layer 3D, and adjust the Orientation and Position so it sits where you’d like.
- At around 2 and 3 seconds, create keyframes for the Position settings, but don’t adjust the Properties.
- Hit Command D on the HUD comp to duplicate it, then UU to reveal the properties.
- Decrease the Scale so it is half the size of the first copy.
- Go to the second keyframe and drag the HUD upwards on the screen to create a second ‘level’ of effects.
- Do this as often as needed to create a 3D-looking HUD visual.
Step 5: Adding a Glow Look
For the super hi-tech look, you’ll want your HUD to look as if it is emitting or made from light; the Glow effect is a fantastic option for giving any layer a neon effect.
- Add a New Adjustment layer and rename it Glow.
- In the Effect Panel, search for the Glow effect and add it to the Adjustment Layer.
- Adjust the Glow settings in the Effects Control Panel to create a nice edging for your HUD.
- Add a second Adjustment Layer and choose a Photo Filter from the Effect Panel that suits your color scheme.
Part 2: 5 Incredible HUD Templates from Motion Array
If you don’t have time to create a HUD from scratch, you can quickly build one from stock assets. The best thing about After Effects templates is that you can choose the layers you use, mixing and matching to create unique looks.
1. HUD Access Technology Intro
The HUD Access Technology Intro is a fun and hi-tech Logo indent, ideal for YouTube channels and tech-based content creators. The template takes your viewer through 3 title placeholders featuring fingerprint scanners before landing on your logo.
Download HUD Access Technology Intro Now
2. Digital Futuristic Interface Pack
The Digital Futurist Interface Pack includes a range of HUD designs ideal for adding high-tech style infographic elements to your videos. The thin, neon look allows for super detailed elements from which to build your digital interfaces.
Download Digital Futuristic Interface Pack Now
3. HUD Interface Titles
The HUD Interface Titles pack includes 10 stunning neon designs with plenty of room for your Titles and paragraph text. The individual elements can be used as lower thirds or scaled up for full-screen titles.
Download HUD Interface Titles Now
4. IT HUD Slideshow
The IT HUD Slideshow is a fantastic template for editors that want a high-tech look without dealing with all the elements. The sci-fi style project includes 20 title and media placeholders in a module, build-your-own structure.
5. 500 HUD Abstract Pack
As you might have guessed, the 500 HUD Abstract Pack includes a massive library of digital assets to build your own displays and interfaces. With creative color control and easy layer building, this collection is ideal for anyone wanting to use more digital effects.
Download 500 HUD Abstract Pack Now
HUD graphics are powerful tools for conveying information to an audience, either through titles and images or through storytelling. Building HUDs isn’t difficult; it just takes time and patience. If you want to learn more check out this handy tutorial. about HUD techniques


