In today’s busy world, it’s pretty easy to become disorganized quickly if you aren’t keeping on top of things. The same is true with editing video. Staying organized can help you save time, energy, and even potentially money, but it always seems to be a challenging task.
In this tutorial, you’re going to learn five tips to help you stay organized in Premiere Pro CC. Let’s get right into it!
Summary
5 Organization Tips for Premiere Pro Video Editors
1. Sort Your Media Into Bins
Mastering this step alone will make things miles easier when it comes to organization. When you upload your clips to the Project Manager, they show up as just file names, and it can be hard to figure out what’s what. The solution? Sort them into separate bins to keep track of different media files. This is really simple in Premiere Pro. Here’s how:
- To create a new bin, right-click and go to New Bin (or click the New Bin icon at the bottom of the project manager)
- Next, label it with something that will tell you exactly the type of footage it will hold. “Master Shots,” “B-Roll,” “Sound FX,” “Music,” or something similar.
- Sort your media into the appropriate bin.
It’s that simple! If you’ve got a lot of elements to your project, this will dramatically reduce the amount of time you spend searching around for that one piece you’re looking for. And here’s the best part: if you organize everything in advance in your file explorer, you can drag and drop into your Premiere Pro and keep the files exactly as they are set up. Easy peasy!
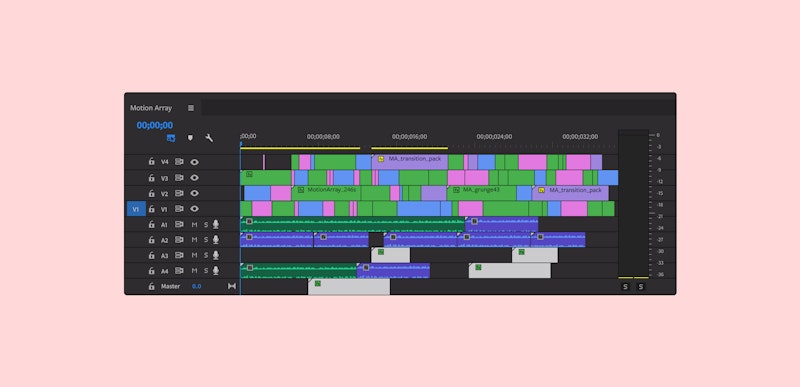
2. Use Colors For Quick Identification
Remember that one kid in school who had different color binders for each subject, color-coded and perfectly organized? Some of you may have been that kid, but even if you weren’t, color coding is immensely helpful in Premiere Pro. Being able to look at your timeline, then instantly know what goes where and what kind of footage you’re dealing with saves a ton of time.
Here’s how to color-code your stuff for easy reference:
- Right-click on any clip (or on a highlighted selection of clips) go to Label, and select a color.
- Once you’ve chosen your colors for various types of files, go to File > Project Settings > General, and select the bottom box for ‘Display the project item and name for all instances.”
- Now everything in your project manager and timeline will match!
If you’re on CC 2018 or up, you get 16 label colors to choose from. That’s twice as many as before! You can do this from the project manager too. Simply highlight the clips, go to Label and choose a color. You can manually change these colors under Edit > Preferences > Labels.
You may be surprised at just how much doing this one simple thing helps! It may sound strange, but a neat and color-coordinated timeline looks great and adds a professional and organized feeling to your project while you’re doing it.
3. Make Use Of Multiple Sequences
At some point, we’ve all done that thing where we use the editing timeline as a smorgasbord of anything and everything. We all know how it goes — you drag in all the clips you think would work and realize 10 minutes into editing that some just don’t quite fit in. Instead of deleting these (because they might work somewhere else), you put them to one side. By the end of the process, you have two different videos in the same sequence: your main project and all the leftover, unused clips.
If you really can’t bear to get rid of unused clips yet, create a new sequence and put it all there. This separates the two quite nicely and keeps the clutter to a minimum. Here’s how to create a new sequence:
- In your Project Manager, go to New Item > Sequence.
- A box will pop up, and here you can choose a preset based on the camera settings you used when recording.
- Click on “Sequence 1” and rename it whatever you’d like!
- If you aren’t sure about your camera settings, simply choose any option. When you drag your first clip onto the sequence, a box will pop up asking if you want to change the sequence settings to match the clip. Simple!
It’s as quick and easy as that. Separate sequences can also work really well if you want to try a second, different edit of the same video. You can even have those two different sequences visible at the same time. Want to compare or swap footage between them? You totally can! It’s super easy.
By the way, this method of sequencing actually has a name. It’s called the pancake timeline (because of it’s stacked nature), and you can use it right from the get-go of your project to save a lot of time. We have a tutorial all about the pancake timeline that can save you precious editing time.
4. Get Rid Of Useless Stuff!
How many times have you come to the end of a project and realized you hadn’t used half the stuff you imported? Your bins are chock full of files, and if you need to find something specific, you end up wading through all the junk that doesn’t even feature in your project. If you’re sure you’ve used only the elements you need to, here’s how to get rid of the junk:
- On your main Premiere Pro menu, click Edit.
- Select Remove Unused.
- Now anything that doesn’t appear in one of the sequence timelines you’ve created will be removed from your Project Manager.
Just that simple two-step process can do wonders for cleaning up your project and removing some of the clutter (on your project manager and in your mind!). Don’t worry if you realize you accidentally lost something you intended to use — you can simply add the specific files to your bins once again.
5. Give Your Track Layers Names
By default, these layers on your timeline are all labeled boring things like “Video 1” or “Audio 1”. You can change the labels if you want to keep specific clips on specific layers.
- Select the Track Layer you want to add an informative name to.
- Right-click the name, go to Rename, and you can name each of these tracks yourself. For example, you can have one for the Master Shot, one for B Roll, and one for Titles, Graphics, Overlays. Perfect!
Now you’re ready to take on your edit like a champion!
There you have it, video editors. Just five simple things can take your Premiere Pro organization to a new level, and make your editing process a whole lot more streamlined.
Try these out on your next project if you aren’t doing them already — creating bins, color coding, sequencing, removing unused media, and renaming your tracks on your timeline. If you think we missed anything, or if you have any questions, let us know in the comments below!