When you move your head to look around, what you see blurs slightly with the motion. Cameras work a lot like eyes: when you move a camera to tilt, pan, or zoom, the image blurs a little bit. This is what’s known as motion blur. Today, you’ll learn how to create Premiere Pro CC motion blur effects to simulate this look during the video editing process!
Go further by applying these techniques to zooms, pans, text animations, video footage, speed ramps, and more. No plugins or After Effects required!
Summary
Part 1: Why Add Motion Blur?
In post-production, it’s common practice to artificially create movement using keyframes, and the initial result can look, well, fake without that motion blur. In Adobe Premiere, motion blur is a simple addition that can go a long way in creating a natural look for your keyframed elements.
Let’s look at an example of a simple digital zoom using this clip.
Now, let’s look at the same movement with a motion blur effect added.
The effect is slight, but the result significant and worth adding to most keyframed movements. Now its time to learn how to create this effect on your own!
Part 2: Methods to Add Motion Blur in Premiere Pro
Transform Effect
Using the Transform effect is the easiest way to create motion blur. But the key here is to add the effect before you create any keyframes.
While you can edit parameters like position and scale from the Motion section, for this effect you’ll need to use Transform. Begin by dragging the Transform effect from the Effects panel to a clip. In the Effect Controls panel, use keyframes to animate the desired parameters, such as Scale and Position. Note that you can only add motion blur to movement controlled by the parameters listed under the Transform effect.
After animating, uncheck the Use Composition’s Shutter Angle box. Click and drag to increase the Shutter Angle. The higher the number, the more motion blur. Experiment with increasing and decreasing the Shutter Angle until you’re happy with the look.

Directional Blur Effect
Another technique to create motion blur in Adobe Premiere is to use the Directional Blur effect. At its simplest application, Directional Blur yields a similar result to that of the Transform effect.
Directional blur, however, allows you to specify the direction of the blur, while the Transform effect settings will extrapolate that information automatically. What this means is you can get a little bit more granular when customizing a Directional Blur.
Another difference with the Directional Blur is that it can be applied to video clips in addition to keyframed elements, whereas the Transform effect’s Shutter Angle parameter only affects keyframed elements.
Let’s look at an example of a text animation without Directional Blur applied (we used this clip for the background).
Compare to this example with Directional Blur applied. You’ll notice that the movement is less mechanical.
To add Directional Blur, drag the effect from the Effects panel to your clip. What makes Directional Blur less convenient than the Transform effect is that you have to keyframe it. Set start and end keyframes at the beginning and end of your movement, and a third in the middle. Position the playhead over the middle keyframe to edit the parameters there.

Directional Blur has two parameters: direction and blur length. Setting the direction to zero creates a blur vertically.

Setting the angle to 90 will create a horizontal blur. Typically, you will set the angle to follow the movement. In this example, the angle is set to 90, as the text animation moves horizontally.

Blur length controls the amount of blur. Experiment with this number until you’re happy with the effect.
Note that if your animation moves both horizontally and vertically, you may need to keyframe the Direction parameter as well.
Part 3: Motion Blur Advanced Editing Tips
So far we’ve looked at how to level up artificial camera movements and text animations with motion blur. Let’s take a closer look at more uses for motion blur, like adding the effect to a video clip or speed ramp.
Add Motion Blur to Video Footage
Directional Blur can be added to a video clip with movement to help create a cinematic look. (The Transform effect can only be used to add motion blur to keyframed elements.) Add your starting and ending keyframes at the beginning and end of the movement in the clip, and set the Direction and Blur Length in the middle.
Here’s a before and after using this clip.
With Directional Blur
Without Directional Blur
As you can see, adding directional blur helps make this footage look more realistic as the man falls.
Add Motion Blur to a Speed Ramp
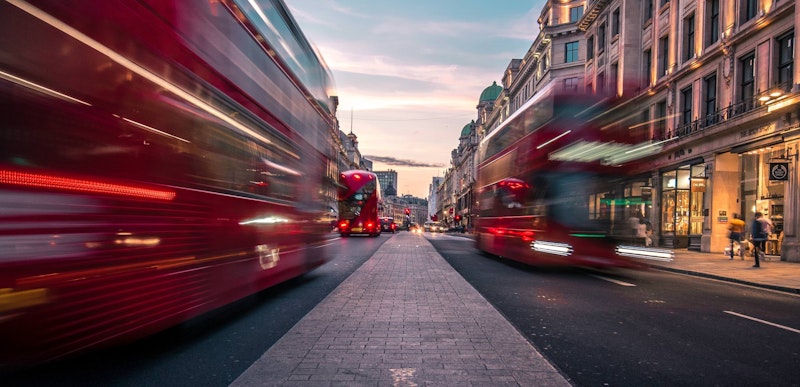
Directional Blur can also be used for work with speed ramping. This typically works best when your clip is moving faster, as blur suggests speed.
Check out the before and after with this clip.
With Motion Blur
Without Motion Blur
Again, we see that the added motion blur simulates how an eye might view this scene. The effect might be subtle, but now that you’re up to speed, we’re certain you can imagine lots of uses for it!
Motion blur with Adobe Premiere Pro is a great way to give a cinematic look and feel to any motion in your project. It’s worth understanding the options available right in Premiere Pro because it’s free (unlike plugins). Ultimately, this can save you that round trip through After Effects if you don’t otherwise need any functionality from the program. Motion blur is a simple, subtle add, with a big impact!