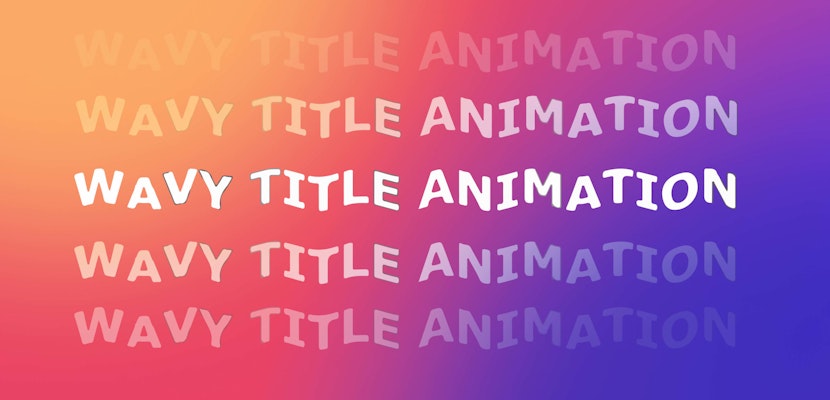
Animating text is one of the first things you can learn in After Effects and it can be applied to any project. Making the text follow a set path is a creative way to incorporate your text into any of your moving your footage. Follow this tutorial to learn how to create a text path in After Effects CC. Let’s get started!
Summary
How to Make a Text Path
Step 1: Create a Colored Background
- Make a new composition that’s 1920×1080, 29.97, and give it a name such as “Rollercoaster Text.”
- Add a new solid by going to Layer > New > Solid, and name it “Background.”
- Select the background layer and go to Effects > Generate > Gradient Ramp.
- In the Gradient Ramp settings, change the start color to a light, pale color and the end color to a darker version whatever color you selected.
- Move the start of the ramp to 960, 540 and the end of the ramp to 960, 1700.
- Change the Ramp Shape to Radial Ramp.
- Change the Ramp Scatter to 100 to get rid of any banding. Now you should have a nice background that is vignetted at the edges.
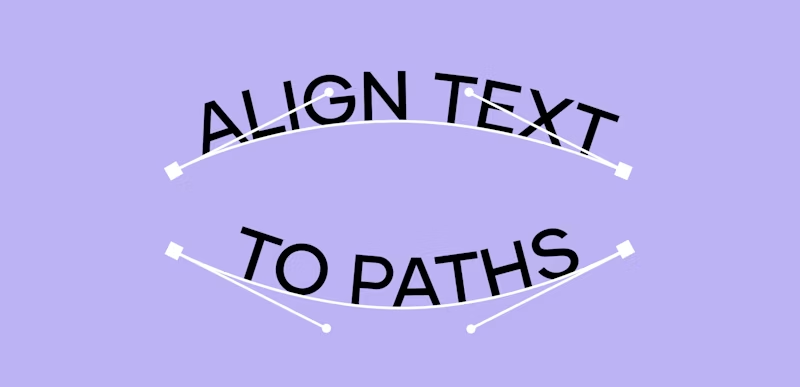
Step 2: Create Text Layers and Paths
- Use the Type Tool to create a new text layer and type out whatever you want your layer to say.
- Select the Text Layer. Use the Pen Tool to draw the path you want the text layer to align to.
- Twirl down the Text options of the layer to get to Path options. Under Path, choose the Mask you just drew. You may need to adjust your text size and tracking at this point to make sure it still looks good.
The cool thing about having your text aligned to a path is that you have some new properties to play with under Path Options.
First and Last Margin allows you to move your text along the path, which allows for some unique animations. If you slide your First Margin value into the negative values you can have your text start at the beginning of the path or even past that. You can then set a keyframe and move down your timeline. Change the First Margin to a higher value and you’ll have an animation of the text sliding along the path.
On top of all this, you can also use text animators to help add even more interest. Try drawing a rollercoaster path. Here you could make the letters of the word scrunch together as the word comes to a pause and then stretch back out as it starts back up again. You can do this with the help of expressions.
Step 3: Create Keyframes for Rollercoaster Text
- Switch the Type Layer to right justified.
- Set a keyframe for Last Margin so the text sits all the way to the left of the path. At frame 45, set another keyframe for the Last Margin where you’d like it to pause.
- Go to frame 75 and set another keyframe for Last Margin with the same value.
- Then set a keyframe at frame 120 for Last Margin so that the type is all the way to the right of the path or wherever you want it to end.
- Easy ease the Last Margin keyframes at frame 45 and 75.
Step 4: Add Tracking and an Expression to Make the Text Bounce
- In the text add menu, add Tracking to create a new animator.
- Set a keyframe for Tracking Amount at frame 10 with a value of 0.
- At frame 37, change that value to -15.
- Set another keyframe at frame 75 for -15, and then at frame 120 set the value back to 0.
- Easy ease the keyframes at frame 10 and 75.
- Option-click on the stopwatch for Tracking Amount and paste in the following expression:
amp = .15;
freq = 2.0;
decay = 5.0;
n = 0;
time_max = 4;
if (numKeys > 0){
n = nearestKey(time).index;
if (key(n).time > time){
n–;
}}
if (n == 0){ t = 0;
}else{
t = time – key(n).time;
}
if (n > 0 && t < time_max){
v = velocityAtTime(key(n).time – thisComp.frameDuration/10);
value + vampMath.sin(freqt2Math.PI)/Math.exp(decayt);
}else{value}
This is the “inertia” expression, which will give the animation some bounce. That should complete the look for this rollercoaster text!
Making text follow a path in After Effects is all about controlling the tools already built into the software. Once you’ve got used to working with keyframes you shouldn’t need too many creative workarounds, and enhancing your animations is a good way to learn about expressions too.
Add some dynamism to your projects with text paths, and check out our other cool text templates and presets to help make your videos even better!