If you have a composition, and you need to make several versions for different scenarios, you can set this up using Master Properties in After Effects. The Master Properties panel makes quick work of what is usually a labor-intensive process. It may take some time to build, but the payoff is totally worth it!
In this tutorial, you will learn how to set up Master Properties to customize templates easily without having to duplicate comps for each version. This is great for keeping your project files nice and neat. Let’s explore the feature!
Summary
Part 1: After Effects Master Properties Tutorial
Step 1: Setup Master Properties Using the Essential Graphics Panel
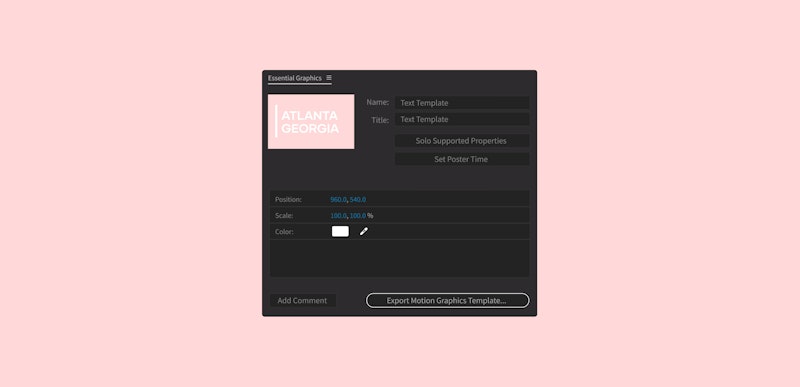
The first step is to setup your Master Properties template in the Essential Graphics panel. This is where you will house all of your Master Properties.
- Navigate to Window > Essential Graphics.
- With your Essential Graphics Panel open, select the name of your composition.
- With your composition activated, you can now create a name for your file. This will also reveal two buttons:
- The Solo Supported Properties button reveals all of the supported properties in your composition.
- The Set Poster Time button allows you to create a poster thumbnail from any image from where your playhead is.
While building your Essential Graphics panel, you will see an Add Comment button on the bottom left, and an Export Motion Graphics Template button on the bottom right:
- Add Comment: Allows you to add comments to your Master Properties Template. For example, you could add a comment reminding you of its intended purpose, if you have more than one design.
- Export Motion Graphics: Allows you to export your completed animations to Premiere Pro. Once exported, you could choose to edit in Premiere Pro moving forward.
Step 2: Add the Master Properties for the Template
Now that you’ve set up your preferences, you can add specific properties to your Essential Graphics panel. These properties will become your master controls across any project you require. Making you the master of the universe! Just kidding…
Creating a Text Control Object
A text control object is a control feature that allows you to easily manipulate your text’s size and position in your composition. Now you can go from a whisper to a shout!
- Go to Layer > New > Null Object.
- Change the name of the Null Object to something like Text Control.
- Parent all Matte, Text, and Line to the Text Control Object, by highlighting files, and then dragging over the Parent pick whip.
- With Text Control highlighted, press P and S on the keyboard to open Position and Scale.
- Highlight both, and drag the Position and Scale properties into the Essential Graphics panel.
Perfect! You created a Text Control Object. You’re kicking butt!
Changing the Source Text
With text options available, you can easily change the copy in your template without starting from scratch!
- Click on a Text Layer and twirl down until Source Text is revealed.
- Drag the Source Text into the Essential Graphics panel.
- Change the name to reflect property value.
Excellent, what’s your project going to say?
Adding a Color Control to a Text Layer
Life would be boring in greyscale, so let’s add some color options! You’re going to add color control to your Master Properties panel.
- Go to Effect > Generate > Fill.
- Change color back to white to activate edited properties.
- With your layer selected, double-tap UU on the keyboard to reveal the edited properties.
- Drag the Fill Color into the Essential Graphics panel, so it’s editable in the template.
- Repeat process for all Text Layers you may have.
Adding a Line Color
A line color will keep your work looking sharp, or funky… it depends on what color you choose. Here you’ll create a line color control.
- With Line highlighted, twirl down to reveal Stroke Color.
- Drag Color to the Essential Properties panel.
- Change the name to reflect property value such as Line Color.
Now you don’t have to color in the lines! You know, because you are outside of them.
Adding Background Properties
We are on the color express here! But that’s for the best. After all, your background is essential to your overall composition! Here you’ll create a background color property.
- With BG Layer highlighted, twirl down to reveal Fill Color.
- Drag Color to the Essential Graphics panel.
- Hit t on the keyboard to reveal Opacity.
- Drag Opacity into the Essential Properties panel.
- Change names to reflect property value such as BG Color and BG Opacity.
You’re on a roll now!
Step 3: How to Edit New Versions Using the Master Properties Panel
Now that you’ve set up your Master Properties panel, it’s time to see what it can do. Take your Master Properties panel on a test run by creating a new template variation.
Create a New Composition
Open up a new composition and access your Master Properties by following these steps:
- Go to your Project panel, and drag the template to the New Composition button. This will create a new composition with the template already in it.
- Rename new composition based on the variation such as Title 1.
From now on, you can make all future changes easily within the new composition.
Edit the Master Properties in the New Template Variation
With your properties all set up, it’s time to edit them in a new template variation.
- Twirl down the new composition template to reveal the Master Properties.
- You should see all of the properties you just created.
- When making changes for the new version, make sure you edit in Master Properties and not in the Essential Graphics panel. Making edits in the Essential Graphics panel will change the original.
- Move your playhead down in time so you can preview your changes.
- Make the desired changes for the version by editing each property value.
- To change the text copy, right-click on the Text Layer, and select Edit Value.
Wow! That was easy — time to pat yourself on the back because the hard part is over. Have some fun testing out all your Master Properties!
Part 2: Essential Master Properties Tips & Tricks
With a tool like Adobe After Effects, there is always more to know. Hopefully, these additional tidbits will set you on the right track when using Master Properties. Your project deserves the best!
1. Make Global Changes with Push to Master Comp
If you create a change that you want to see across all future files, you can implement this change by using the Push to Master Comp button from a template variation.
- Highlight the layer you want changed.
- Ensure the change is implemented.
- Press the Push to Master Comp button, so that all new duplicates will have this value by default.
Great! You now know how to make a universal change from a template variation to the Master Properties panel.
2. Pull From Master Comp to Reset the Default Value
You know where this is going. If you want to revert a property to the Master setting, you can achieve this by pressing the Pull button.
- Highlight the layer you want to revert properties on.
- Click the Pull from Master Comp button.
Alright, setting your property back to your original setup is pretty easy. A little push, a little pull, a little give, a little take… why is this starting to sound like relationship advice?
3. Duplicating a New Composition
Do you know what’s better than one? Two! Duplicate as many compositions as you need. Here’s how:
- Go into your Project panel.
- Highlight the composition you want to duplicate.
- Press Command + D on the keyboard.
Now you can make as many copies as you want!
4. Adding a Background Image
If you’d like to use something other than a solid background color, here’s how to add a transparent image. After all, a picture is worth a thousand words.
- Drag in the desired image from your Project panel.
- Initially, you won’t be able to see it. To fix this, lower the Opacity on the BG Layer.
- Don’t forget that you can also Scale your image, so it fits better.
Now you can reveal a background image in your composition. Nice!
In this tutorial, you learned how to build a Master Properties panel by dragging in property values into the Essential Graphics panel. These Master Properties can now be used in any composition. Now you never need to build a project from scratch!
The Master Properties panel allows you to create a spin on any design you love quickly. Now that you know how to build Master Properties in After Effects, get creative and start applying it to your future projects!