


Editing a video can be daunting when presented with a collection of video clips; it almost seems like creating something from nothing. Fortunately, the overwhelming prospect of editing a video is far more manageable when considering the individual post-production stages. In this guide, we’re going to take you through the entire post-production workflow so that you can become an efficient and streamlined editor.
What is a Post-Production Workflow?
Editing isn’t something that happens once the footage is loaded into your computer; it is a series of processes that help shape and tell your story. Post-Production workflow is the understanding of the different editing stages and the order in which they must be performed.
There is a pretty precise order to how you construct an edit; for example, before you add visual effects to a shot, you’ll need to cut and trim it. While all editors will adjust their workflow to suit their needs, the different stages of post-production will always be the same. By understanding each step of the editing process, you can adjust your workflow to create a streamlined process.
Stages of Post-Production Workflow
Before you start editing, you need to set up a project in your chosen software; believe it or not, it is pretty easy to make a mistake at this step. Each editing platform will have a different Project/Sequence management system. Take your time to ensure the Project and Libraries are set up correctly and saved to an appropriate location.
Capturing and Rushes
The first step of any editing project is to capture your footage; import it from wherever it was recorded or downloaded into your editing software. Rushes is a term that refers to all of your footage for a particular project. There can be hours of footage for even the shortest video.
The next step to a professional editing workflow is to sort through your rushes, using the editing software file management system to label and categorize your clips. This can take some time and be frustrating if you want to jump straight to editing. However, a little file management and organization at the start can be a great way to ensure a smooth workflow.
Assembly Cut
As the name suggests, assembly cut is where you begin adding clips to your timeline, assembling to composition. It can be tempting to start at the beginning and polish your edit as you go, but creating a full rough cut is incredibly helpful.
From the assembly cut, you should be able to see any areas where shots are missing, or the pacing is off. You’ll get an idea of the running length of your video and be able to organize the rest of your workflow accordingly.
Offline Edit
The offline edit is what most people think of when they imagine the editing process. Offline editing is the process of fine-tuning the assembly cut, trimming and tightening edits and adding transitions as needed.
At the end of the offline edit, you should have a full version of your video and the footage to be used. If you’re working with a client or director, the offline edit will be signed off first, allowing you to continue to the online edit, knowing the footage used in your composition is the final version.
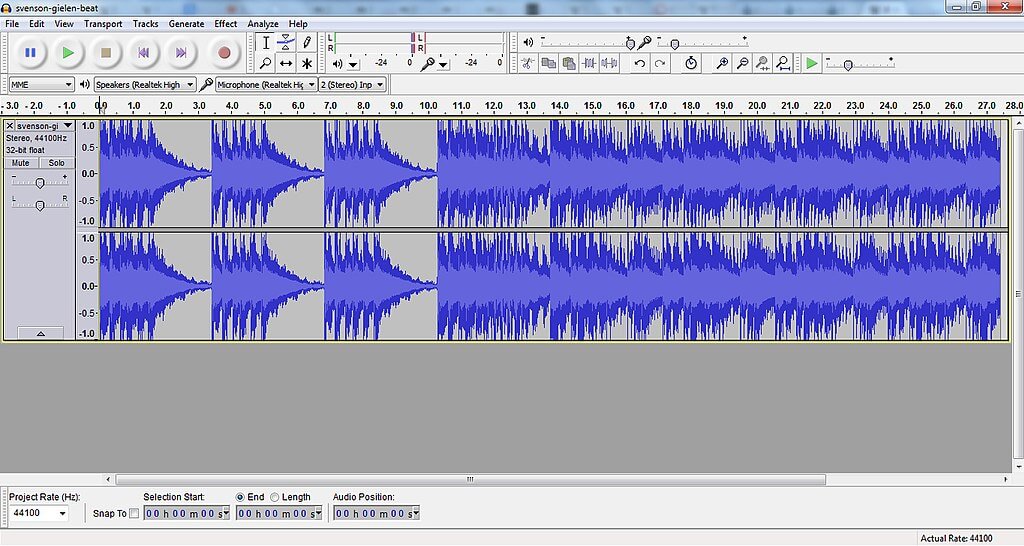
Audio Edit
Some projects, such as music videos, will start with the audio edit, as the composition needs to be timed to the music. For most projects, however, the audio edit comes after or during the offline edit.
The first step of the audio edit is to clean up any dialogue in your scenes. That means using noise removal effects, fading the ends of your clips and adding any effects needed. Music and sound effects will also be added, mixing them to create a professional sound design for your videos.
Online Edit
Online editing involves several different processes, including adding effects, color correction and grading. The online edit is where you create the look and design of your composition and build out any special effects required in your piece.
The order in which you add your effects and grading styles will depend on the project you are producing and how intensive any VFX or Compositing is.
Titles and Motion Graphics
Once your footage looks and behaves the way you want, you can add titles and motion graphics elements, including opening sequences and credits. Titles are generally the last element added to a project as they sit on top of the footage.
Before you start adding your titles, ensure you have a written document of what you want to add. Being able to copy and paste your titles from a text document makes the process much swifter.
Subtitles
Subtitles are different from the titles of your film and should be completed as a separate process. Typography videos are the main exception to this rule, as the video is built around the titles and voice-over.
Your editing software will have subtitling tools, but you will still need a transcript of what is said in your video. Some software, like Premiere Pro, has built-in Transcription, and many apps and websites use AI to complete this for you. Alternatively, if the video was scripted, you can use this as a basis for your subtitles.
Mastering
Mastering is the final step of the editing process, where you mix and export the final video. Hundreds of output options exist depending on whether you publish for TV, DVD or social media. A lot of editing software has presets to ensure you’re exporting in the proper format, but if you need a quick guide, check out this handy tutorial.
Tips for Streamlining Your Post-Production Workflow
Every editor has their preferred workflow, and you can choose the best methods for you and the projects you’ll be working on. Try to improve on your previous work with each project, adjusting your methods until you’re as streamlined as possible.
Don’t Rush Ahead
The best tip for streamlining your post-production workflow is not to rush it. Editing takes time, and if you want to produce a professional video, you’ll need to spend the time it takes.
It can be tempting to rush ahead to playing with effects or titles; if you’re experimenting, that is fine. However, by jumping too far down the editing process, you can cause yourself problems and waste your time on compositions that won’t make the final cut.
Get Help
There is a reason that professional editors specialize in a specific area; color grading, effects work, Motion Graphics, etc. While wanting to complete an entire edit yourself is possible, sometimes you need a little help to get the best results.
A valuable skill for any editor is to know what you are good at and to be able to accept help in the areas you might struggle with.
Save, Save, Save
This is an excellent tip for anyone using a computer; save your work often and repeatedly. It only takes a minor file corruption to crash your software, and you can lose hours of editing work if you haven’t saved it.
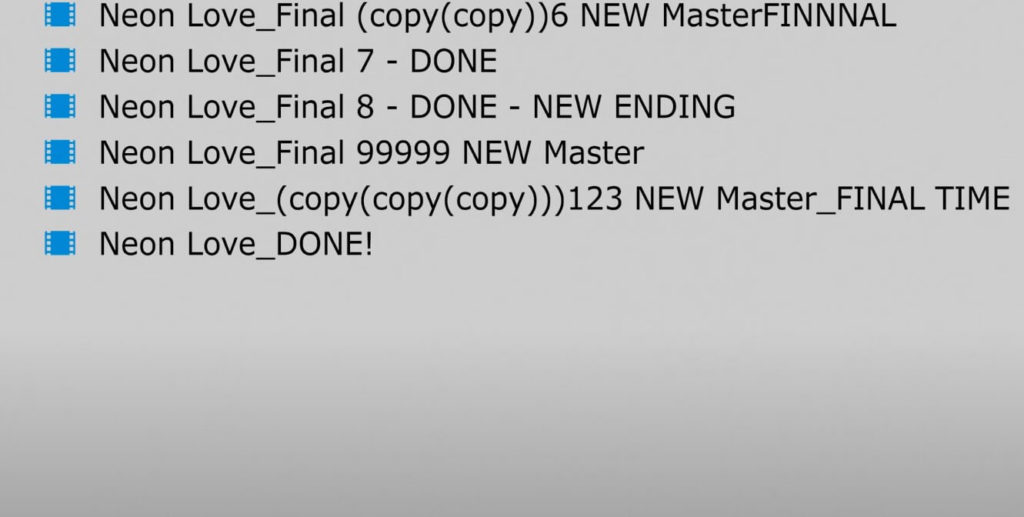
Going one step further, professional editors will save copies of their work, allowing them to revert to earlier versions. It is a great practice to save a project duplicate at each editing milestone, enabling you to go back a step if needed.
How Motion Array Can Help You Speed Up Your Workflow
Motion Array has an incredible library of assets that can speed up and smooth out your editing workflow. It is possible to produce entire videos using only Motion Arrays stock assets.
Stock Footage/Photos
Motion Array has thousands of video clips ready to download from their library, from business-based content to special effects shots. So whether you’re building a business presentation or a sci-fi movie, there will likely be shots you can’t film for practical reasons, or doing so would be beyond your budget.
Music and SFX
Audio editing is a challenging part of the process, especially when adding sound effects to any movement or action in a scene. Fortunately, Motion Array’s collection of royalty-free music tracks and sound effects includes everything from footsteps to laser gunfire, allowing you to mix and match, creating the perfect sound design for your projects.
- Browse Motion Array’s royalty-free music catalog
- Browse Motion Array’s royalty-free sound effects catalog
Motion Graphics
Using templates can save hours creating bespoke animations from scratch. Whether you’re looking to add quirky hand-drawn icons to your digital content or need a horror title sequence for your feature film, Motion Array has a ton of templates available for Premiere Pro, After Effects, Final Cut Pro, and DaVinci Resolve.
Effects Presets
Motion Array offers a wide variety of effects presets ready to install into your editing software. The preset packs include light leaks, grading LUTs, and transitions, you can even create retro and period looks with overlays. Effects presets don’t just save you time in the editing; they can help you plan your projects to create distinctive and unique styles.
- Browse Motion Array’s selection of After Effects presets
- Browse Motion Array’s selection of Premiere Pro presets
- Browse Motion Array’s selection of DaVinci Resolve Macros
Post-production is a series of processes that editors use to form a structured story, from a collection of raw footage to a sleek and stylish story. It can take years of practice to streamline your editing process, and with technological advancements, there will always be new things to learn. Check out these incredible tutorials if you’re looking for more helpful information about the filmmaking process.


