


Once you learn how to create speed ramps in Final Cut Pro, you’ll never stop noticing it everywhere you look. Blockbuster action movies, TV commercials, sports replays–this ubiquitous video editing technique is both thrilling and easy to create yourself!
Of course, there’s a right and wrong way to use speed ramping, so we’ll cover the method and the best use-cases for speed ramping your next video project. Let’s get started!
Summary
Part 1: What is Speed Ramping?
Whether you’ve got a long clip that just needs to just happen a little faster, or you’re just trying to squeeze some extra production value out of that cool footage you captured last weekend, speed ramping is a great and flexible solution that is simple to pull off in Final Cut Pro. Put shortly, speed ramping involves speeding up or slowing down part of a video clip.
The effect created feels like zooming through time in a short burst. The contrast between “normal” speed and your speed ramp effect should be noticeable, not subtle. Different types of shots can utilize speed ramping differently. For example, you might want to speed up camera movement in order to make a long pan more interesting or slow down fight footage mid-punch to draw attention to the action. Now, this brings us to the frame rate.
What Frame Rate is Appropriate?
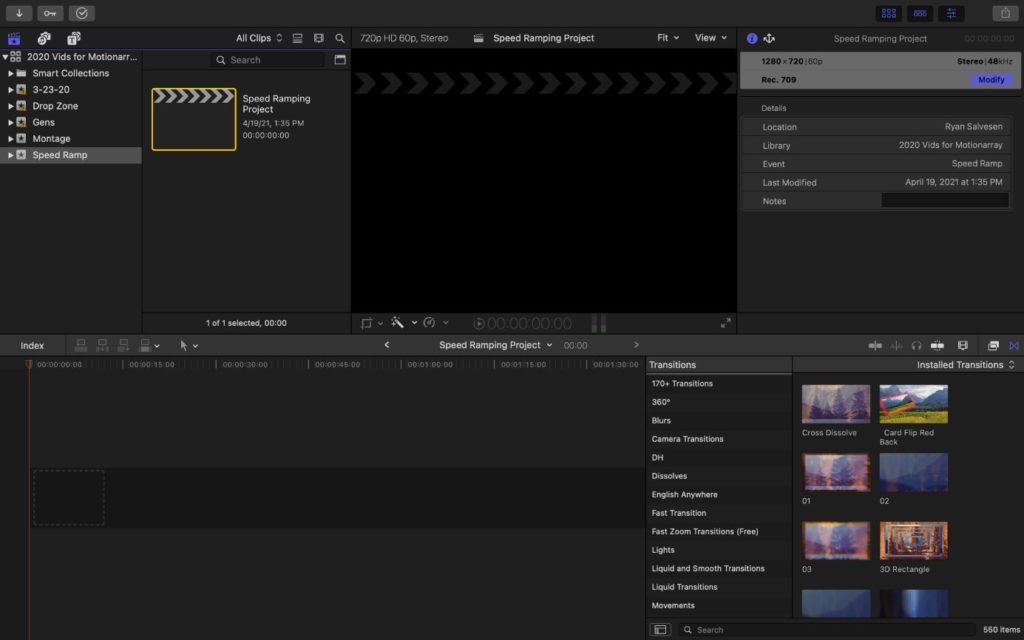
First, you’ll want to determine the frame rate of your project. Chances are you’re working at around 30 frames per second, which is a typical frame rate for ads, online videos, tv shows, etc. Movies are often shot at 24 fps for cinematic effect, and sports are sometimes shot at 60 fps for smooth action. You can check the frame rate of your project by selecting it in the Browser and then reviewing the information in the Inspector on the right of the screen.
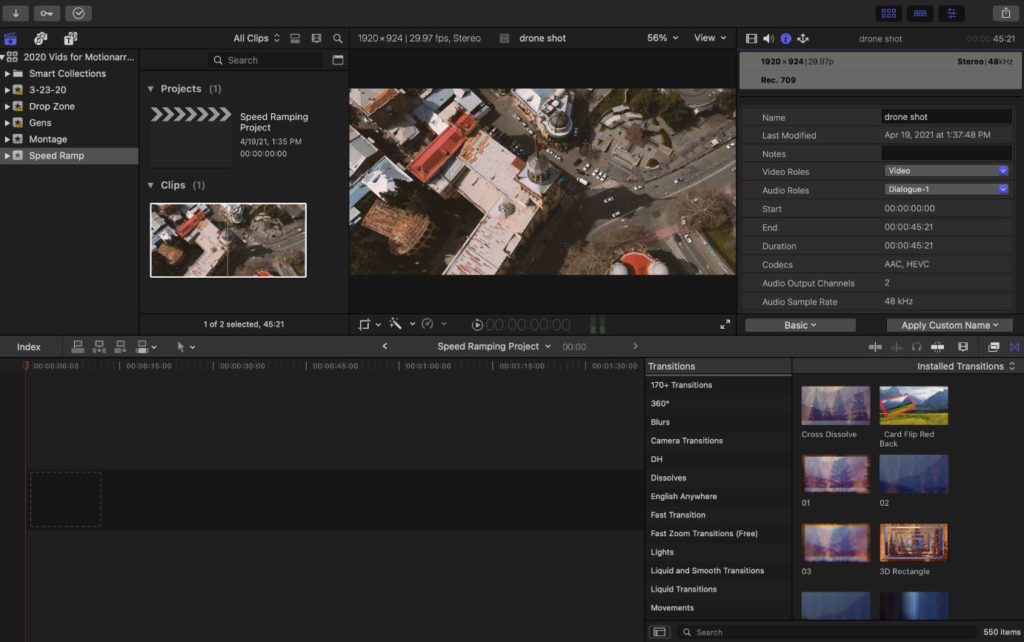
Secondly, you should verify the frame rate of the clip you’ll be using to speed ramp. Ideally, you always want the frame rate of your video clips to be at least as high as the frame rate of the rest of your project. So if you have a 60 fps clip in a 30 fps project, you’re golden. But if you are using 30 fps footage in a 60 fps project, it might appear a bit choppy. You can check the frame rate of your clip by selecting it in the Browser and clicking the Info tab of the Inspector on the right.
When you speed up footage, Final Cut Pro will remove frames so that it plays faster, which means there are really no limitations to how fast you can increase the speed. Slowing down, on the other hand, might require a little math to ensure it looks smooth. If your project is at 30 fps and your footage was shot at 60 fps, you can slow it down to half speed without any noticeable stuttering. Often, action footage is shot at 120 fps to give video editors the freedom to slow down as much as 4x for a 30 fps production.
Best Footage to Use
In order to get the most out of this effect, there needs to be some movement on-screen. This movement can come from the camera or action in the shot. Here are some common examples of great footage to use for speed ramping:
- Drone Footage – because of the dramatic camera movement, this type of footage is frequently used for speed ramps. By speeding up the intervals between points of interest you can transform drone footage from long-winded to exciting!
- Action or Fight Scenes – ideally shot at a high frame rate, action can be slowed down during a key moment to achieve that blockbuster effect.
- Sports Videos – the excitement and tension of sports footage can be highlighted by slowing down the footage just before a touchdown, catch, or goal.
- Car Chases – bonus points if one of the cars has taken flight. You’ll often see this effect in movies, slowing down just as a car passes by to show you what’s going on with the characters inside the vehicle.
Part 2: Learn to Speed Ramp in Final Cut Pro
Once you’ve selected your footage and determined what type of speed ramping the frame rate will allow, it’s time to start editing! Luckily this technique is pretty straightforward, and you’ll probably be surprised how easy it is to achieve an amazing effect without much time or effort.
Step 1: Add Your Footage to the Timeline
You might already have a project started and are just looking to add this effect to some of the clips, or maybe you’re starting from scratch here with a new project. Either way, the steps below will get you going.
- If you haven’t already, create a new project by selecting File > New > Project from the top menu bar.
- Import the new footage by pressing Command + I or clicking File > Import > Media.
- Drag your clip from the Browser down into the timeline.
Step 2: Make Cuts with the Blade Speed Tool
Once your clip is loaded in the timeline, you can skim across it with your mouse and see the preview in the Viewer. Look for points of interest that you want to highlight with the speed ramp.
- Drag the playhead to the position in the timeline where you’d like to change speed.
- Use the Blade Speed tool by pressing Shift + B or the top menu under Modify > Retime > Blade Speed.
- Find another point later in the clip and make another cut with the Blade Speed tool.
Step 3: Retime the Footage
Now that you’ve made your cuts with the Blade Speed tool you should see green retime controls appear above your clip segments in the timeline. The color indicates the speed of the clip. Green means normal, blue means fast, and orange means slow. Use these controls to change the speed of the clip.
- Adjust the speed of the clip by dragging the retime control at the right of the clip, or by clicking the down arrow to open the retime controls.
- Speed up or slow down your clips as appropriate to create the effect you are looking for.
- When you retime the clip segments, grey controls will appear at the transition. You can drag these to adjust the transition time to make the effect more gradual or sudden.
- You can also adjust the point of the transition by dragging the control at the center of the grey transition bar.
Speed ramp complete! Now bring the playhead back to the beginning of the project and hit Space to check out your creation. You can easily make adjustments by dragging the retime controls in the timeline until you’re happy with the effect.
Sometimes, the simplest tricks create the coolest results, and speed ramping definitely fits that category when used correctly. If it doesn’t look right at first, you can always play around with the timing and location of the cuts until it feels right. If that doesn’t work, maybe try a different clip because speed ramps aren’t appropriate for everything.
But don’t stop there! Final Cut Pro has hundreds of awesome effects you can use to pump up the production value of your next project. Rather than scouring the internet to find the gems, try Motion Array. There are literally thousands of helpful effects, plugins, transitions, and many other assets for your project all in one place for you to use.


