You’re probably familiar with filters and what they do, even if you have never used them in your editing. Filters are everywhere, from Instagram to zoom, everyone is adding filters to their photos and videos. Filters can help add a ‘look’ to your video clips; at a basic level, this might be for cosmetic reasons, but filters can help enforce your story or message with a little thought. We’re going to take you step-by-step through how you can create your own filters in Premiere Pro and how to use them in your projects.
Summary
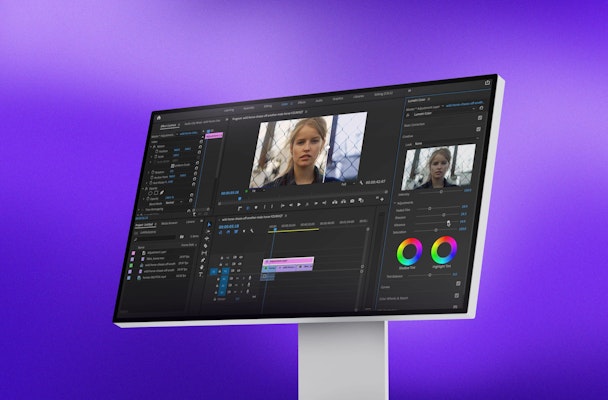
Part 1: Understanding the Lumetri Color Panel
The Lumetri Color Panel has a range of advanced color settings for you to create your looks. The best way to understand what each of these controls allows you to do is play around with them and experiment on a range of video clips.
Basic Correction
The Basic Correction menu includes many tools you are probably already familiar with from Social Media and Photo Apps. Basic Correction is where you will find all of your White Balance, Exposure, Brightness, and Contrast settings.
Creative
The Lumetri Color Panel’s creative options include Faded Film, Vibrance, Saturation, Sharpness, and Tints. You can use these options to create specific color styles, such as over-saturated and aged film effects.
Curves
The Curves menu is divided into two sections; RBG Curves and Hue Saturation Curves. RGB allows you to increase or decrease the Whites, Reds, Greens, and Blues independently of one another; ideal of adding cool and warm tones to your videos.
The Hue Saturation Curves settings allow you to manipulate the colors in relation to any combination of Luma, Saturation, and Hue. These settings might seem complicated, but you can create some super cool effects, such as isolating single colors while turning the rest of your shot to Black and White.
Color Wheels and Match
The Color Match function in Premiere can be helpful with your Color Correction process and a lot of fun when creating a look for your project. These handy wheels allow you to match colors between shots, separated by Shadows, Highlights, and Midtones.
HSL Secondary
This handy set of tools is where your Color options become even more advanced, allowing you to change single colors in your video. With HSL Secondary, you can target specific colors in your video using a picker and change the hue entirely.
Vignette
The last set of tools allows you to add a vignette to your video, with either a white, blurred, or dark tone. Vignettes are great for creating aged film looks or dreamlike sequences.
Part 2: How to Create Your Own Filters in Premiere Pro
Once you have Color Corrected your clips, we are ready to jump into the Color Grading and create some filters.
- You can add your filters to each clip individually, but it can save a lot of time to use an Adjustment Layer. Go to the Project Bin, right-click and choose New > Adjustment Layer.
- Drag the Adjustment Layer to your Timeline and place it above your clips. Drag the end of the layer to the length of your composition.
- In the Timeline, highlight your Adjustment Layer and go to the Color Tab.
- In the Lumetri Color panel, you will find a range of Color settings. Premiere has a range of presets you can choose from using the Preview Arrows.
Saving as a Preset
Once you’ve created a look you are happy with, you can save it as a preset to appear in the Preview window and use it across all your projects. What is even more exciting is that when you save as a Preset, you create a LUT file, which can be used in After Effects and Photoshop.
- Once you have created your look, select the Adjustment Layer in the Timeline.
- Go to the Effects Control Panel and find the Lumetri Color Fx.
- Right-click and hit Save Preset.
- Name your preset and hit Save.

Part 3: Create These Awesome Looks for Your Films
Horror/Thriller
Horror and Thriller films use similar grading techniques to create an uncomfortable feel to the film. This will often include making the footage darker, bringing out the shadows, and tinting toward an eerie color combination.


- In Basic Correction, decrease the Black Point, Exposure, and Shadows settings.
- If your shot is very colorful, decrease the Saturation slightly.
- Use the Color Wheel & Match settings to add a tint to your shadows, mid-tones, and highlights.
Westerns
Westerns tend to take on a more sepia tone, with orange highlights emphasizing the desert’s heat. You can also combine the Vintage and Western styles for an Old West-style look.


- Increase the Temperature for an orange glow.
- Add Aged Film effect.
- Increase the Contrast and decrease the Brightness as needed for your shot.
- Add a Dark Vignette.
Vintage
Creating a vintage look is excellent for creating dreamlike and flashback sequences or highlighting a passage of time. We have many examples of what vintage film looks like, so recreating the Look is relatively straight-forward.


- In Basic Correction, increase the Temperature, add a small green Tint and increase the Contrast.
- In Creative, add a Faded Film effect and reduce the Saturation.
- Finally, add a rounded and feathered Vignette to complete a vintage film look.
Single Color
Being able to pull a single color from your shot and turn everything else black and white isn’t an effect you would use every day. However, when used well, this simple effect can create a striking image.


- Color Correct your clips as you would normally.
- Go to the Curves options and find Hue vs. Saturation.
- Use the Color Picker to select your single Color; three points will be added to the Hue vs. Saturation graph.

- Reduce the two furthest points and watch all the other colors fade to black and white. You can adjust the points to encompass more or less of your chosen Color.
VHS style
VHS is a popular style for found footage and in-scene playback shots and a lot of fun for music videos and event promos. You can create a basic VHS style using the Vintage settings above and a few additional effects. Check out our VHS Effect Tutorial for how to complete the look.
Part 4: Over 200 Premiere Pro Filters You Can Download Today
1. Color Filter Pack
This massive pack of Color Filters for Premiere Pro has twenty categories, including Sunset, Urban Style, Vintage, Wedding, and Green Forest. Containing 505 beautiful color filters ready to drag and drop to your Timelines, this pack is a must-have for any Editor or Color Grader.
Download Color Filter Pack Now
2. Color Grading Filters
This set of 50 Color Grading Filters contains some genuinely unique styles or an original look. Along with basic filters such as Vintage and Sepia, you can treat yourself to a collection of RBG Glitch and Toxic Look filters.
Download Color Grading Filters Now
3. 100 Instagram Filter Presets
The 100 Instagram Filters pack puts the most popular and iconic influencer color grades in one place, ready to drag and drop to your project. From beautiful, subtle tints to bold contrast style, this pack has it all.
Download 100 Instagram Filter Presets Now
Color Grading can be a lot of fun, whether working on a stylistic sci-fi film or a simple product promo. The grade you use can help tell your story and offer context and emotional cues to your audience. Remember, you should always Correct your footage before creating your Premiere Pro Filters. If you want some help with your Color Correction, why not check out this handy guide.