


So you’ve finished your creative composition in After Effects, and now it’s time to deliver the final product. Traditionally, this process is referred to as rendering and exporting, although “render” can be used to describe the complete process too. The rendering process consists of preparing your composition and its effects, and then encoding them to a new exported file format.
If you’re unsure of how to render and export in After Effects, don’t worry. It all makes sense once you get the hang of it. You’ll be batch exporting like a pro in no time!
Summary
Part 1: Rendering & Exporting in After Effects
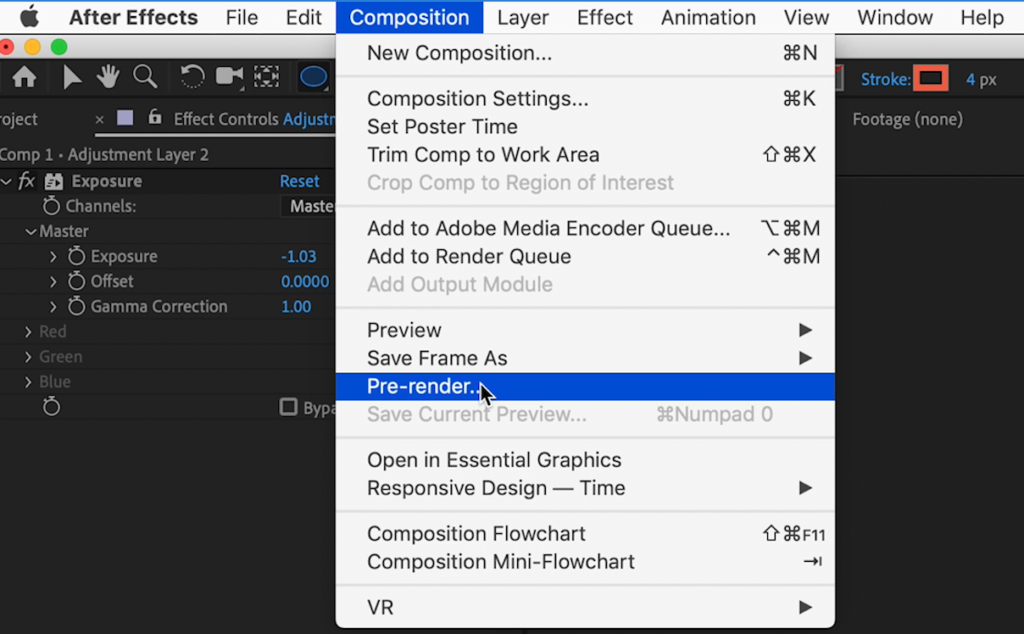
In order to playback your composition in real-time video preview before export, you need a pre-render. This pre-render helps speed up the final render and export in After Effects by taking the processing pressure off your computer. To pre-render your composition, simply go to the Composition menu and click pre-render. A render queue in After Effects is different from the pre-render.
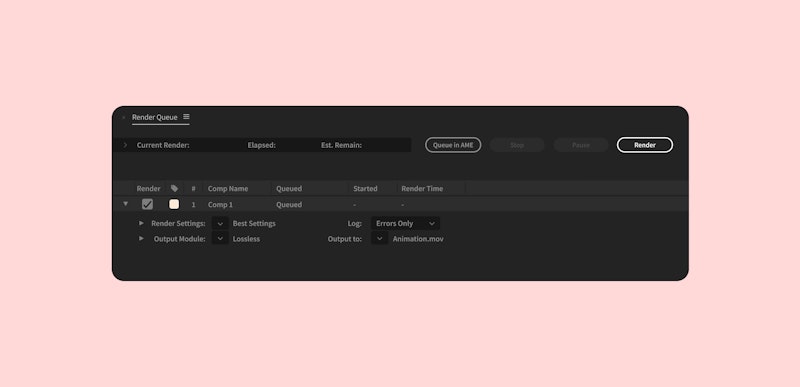
The render queue allows you to prepare your file settings for final export. The render queue in After Effects also allows you to batch export compositions by creating a list. This is helpful for projects with multiple compositions, where clicking just one button will allow you to export dozens of compositions in successive order.
You have 3 options for sending your project to the render queue:
- Composition > Add to Render Queue
- File > Export > Add to Render Queue
- Drag and Drop from Project Window
This option is ideal for downloading multiple animations, but you need to have the Render Queue window already open
You can also use the Command or Control key (depending on your operating system) + the “M” key as a keyboard shortcut.
The interface of the render queue contains several sub-menus: render settings, output module, and output to.

Render Settings: These will typically remain at the default Best Settings, unless you need to decrease resolution for speed or delivery purposes.
Output Module: This is where you will select your filetype format for delivery. Its default selection is Lossless, a Quicktime movie with an animation codec. To change this selection, click the Format dropdown menu and select another image sequence type. Clicking the Format Options button will allow you to change the codec of your filetype. Animation or Apple Pro Res are traditional standards for export.
Audio: The Output Module also allows you to format audio export settings. To adjust these, simply use the dropdown menu to select your desired audio output.
Output To: Clicking on the Output To menu will bring up a Finder menu for selecting the desired destination of your new file.
If you’d prefer to use Adobe Media Encoder for your exports, you can select Add to Adobe Encoder Media Queue from the Composition menu. Adobe Media Encoder offers more codecs and settings that aren’t available in After Effects.
Part 2: Most Effective Tips for Faster Rendering in After Effects
- Keeping Caps Lock On While Rendering – While rendering, leave caps lock on. This will prevent the composition window from refreshing while you render, and will help speed up render time.
- Turn On Multiprocessing – When multiprocessing is turned on, After Effects will use multiple CPU cores to process more than one frame at a time, greatly reducing render time. You can turn on multiprocessing by going to the Preferences menu, selecting Render Multiple Frames Simultaneously, and adjusting settings from there.
- Reduce Pre-Comps – Pre-comps are a wonderful organizational tool while working in After Effects. However, they can slow down the rendering process. Either delete unused pre-comps before rendering, or keep them to a minimum while working.
- Toggle Unused Features Off – Toggle off features that won’t be used in your final export, such as motion blur, depth of field, or 3D.
- Be Selective with Effects – Effects make a composition come to life, but they can also slow down render time. Certain few effects are more intense than the others, so try removing an effect or two if your render time is too long.
- Clean Up Your Compositions – Deleting unused layers from your project will help lessen render time.
- Trim Layers Off-Screen – You can also trim layers that are outside of the screen area.
- Close Other Programs – Take the pressure off your computer by only having After Effects open while rendering.
Part 3: Other Common After Effects Exports
Exporting a GIF from After Effects
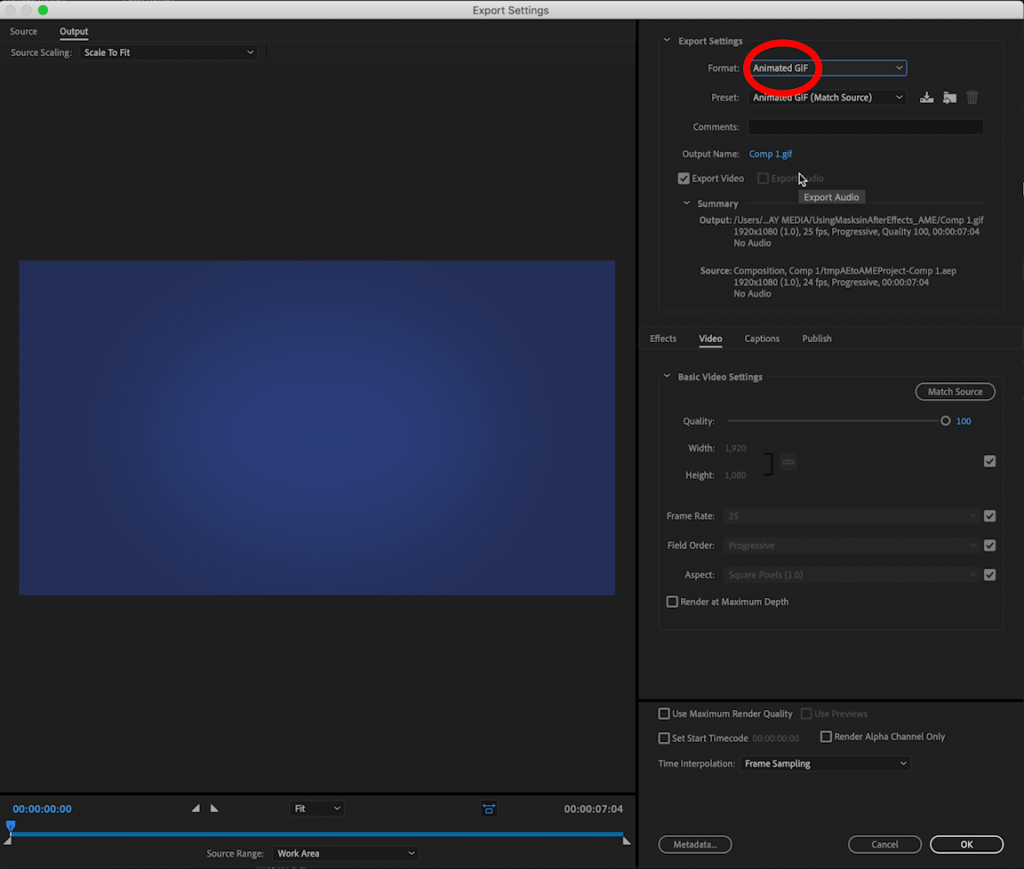
Since GIF is a format found in the Adobe Media Encoder, that’s the queue we’ll use for exporting it.
- From the Composition menu, select Add to Adobe Media Encoder Queue.
- From the Format menu, select Animated GIF.
- Adjust your desired settings, choose the location for saving your exported file and name it.
- Be sure to Use Maximum Render Quality. Hit the “okay” button to apply these settings.
- Finally, hit the Start Queue button in the top right corner of the panel.
Exporting & Saving an MP4 in After Effects
Again, we’ll use the Adobe Media Encoder for exporting an MP4 from After Effects.
1. From the Composition menu, select Add to Adobe Media Encoder Queue.
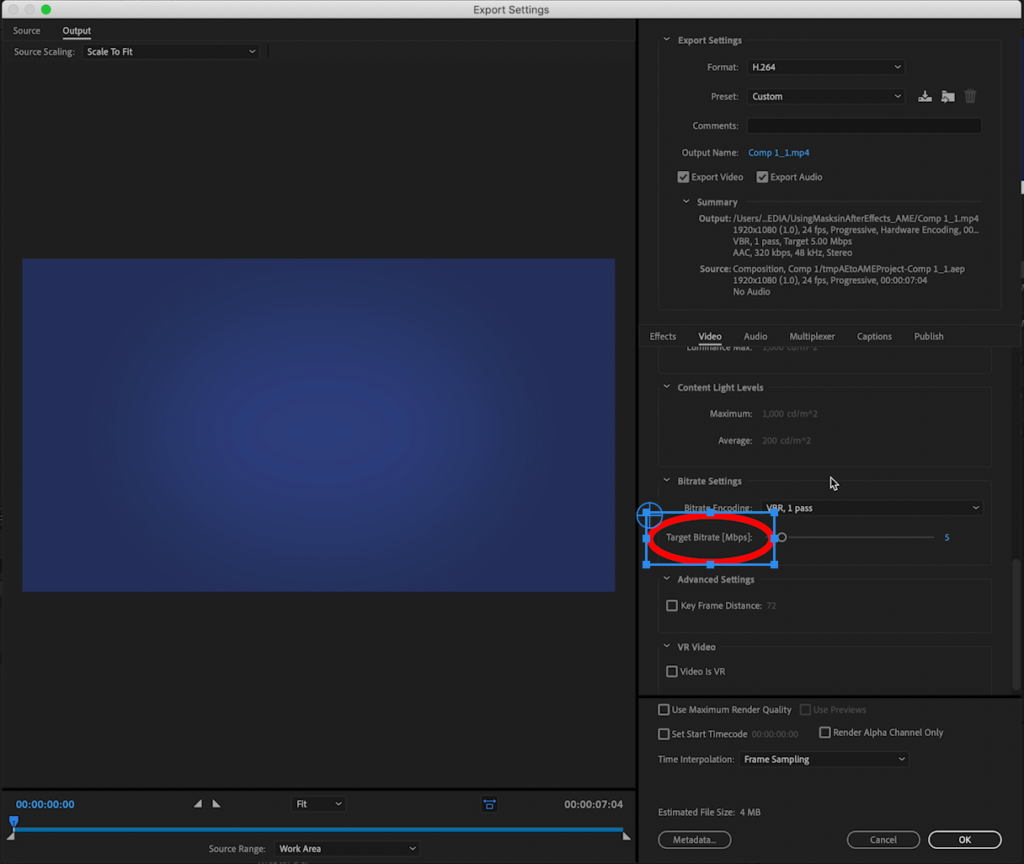
2. From the Format menu, select H.264.
3. Clicking the Match Source button will reduce file size by changing the format settings.
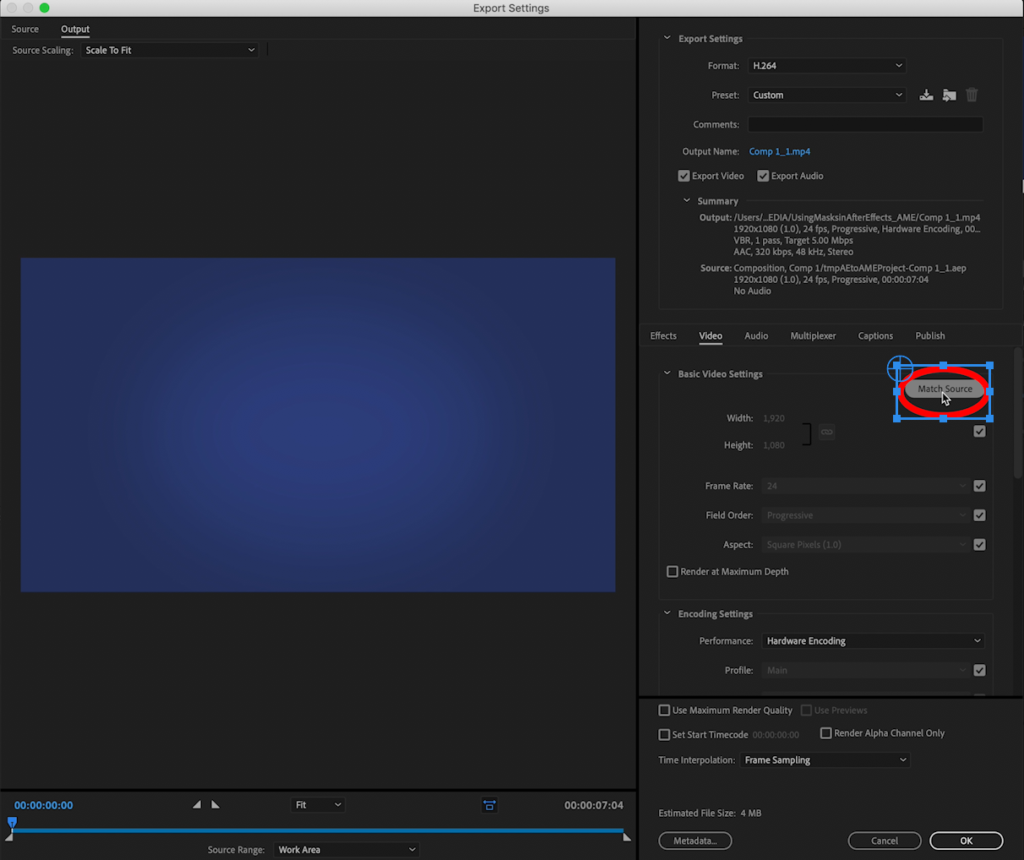
4. Another trick for maximizing render speed and minimizing file size is adjusting the Bitrate Settings. Decrease the Target Bitrate and Maximum Bitrate. Be careful not to go too low, or your video quality will suffer.
Rendering an Alpha Channel (Transparency) in After Effects
What is an alpha channel? Essentially, an alpha channel is what’s used to create transparency behind your exported video. Motion graphics artists and animators will frequently export with transparency, so their exported designs can be placed directly on video footage or another desired background.
1. From the Composition menu, select Add to Render Queue.
2. In the Output Module Settings window, select the Animation codec.
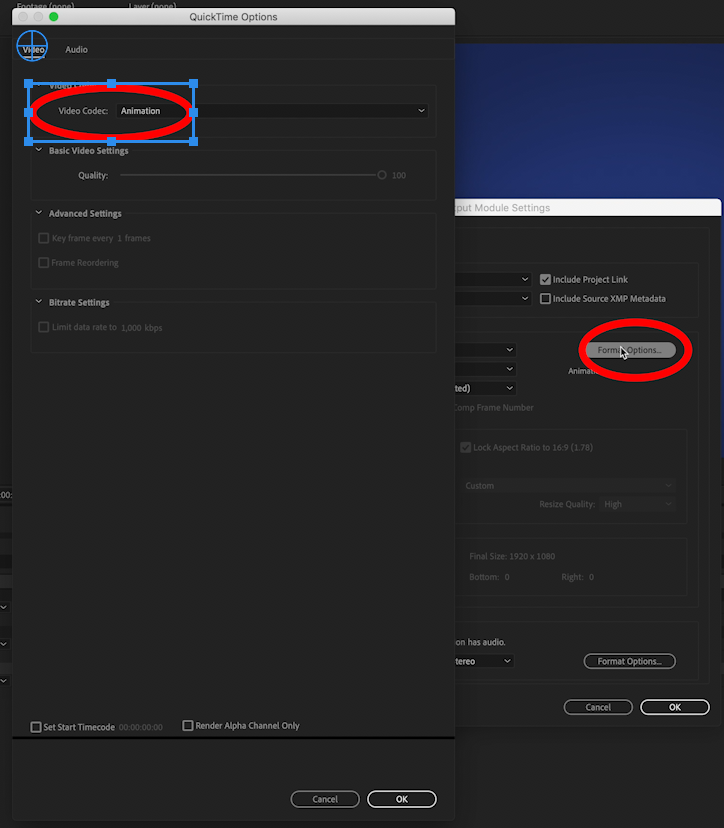
3. From the Channel Menu, select RGB+Alpha

4. Only certain codecs (such as Animation) will allow you to make this selection.
As you can see, there are many ways to export a single video project from After Effects. After awhile, however, you’ll find your settings for most projects remain the same, and the process will feel like the simple click of a few buttons. It will soon feel like second nature to queue up several compositions for rendering at once.
Once you’ve gone through the steps and learned how to render and export in After Effects, the hardest part will be making an amazing creative composition.


