Photoshop has so much to offer that it really can take a lifetime to master. Once you’ve familiarized yourself with the basics, you might want to try these Photoshop techniques, some of the lesser-known, to bring some pop to your images.
Summary
Part 1: Top 7 Photoshop Techniques for Beginners
1. Liquify
The liquify tool is great for retouching with its ability to push, pull, rotate, reflect, pucker, and bloat areas of your image. The Face Tool in Liquify identifies faces in an image and from here you can adjust any facial feature. Eyes can be enlarged, lips can be made to smile, face widths altered, in fact, almost anything you can think of.
With its distortion tools, you can use it for more dramatic and surreal effects than retouching, too. With a forward warp and twirl, you can expand, decrease and melt objects in your images for the effect you want.
Go to Filter > Liquify, and remember to zoom in to achieve a more controlled effect.
Notice how the lips now turn upwards slightly?
2. Color LUTs
LUT stands for Look-up Table. LUTs map one color onto another. It’s a technique used frequently with movies to give them a particular style – think orange and teal. You can do it in Photoshop, too, to give your images a unique feel. Photoshop has several out-of-the-box LUTs–for example old film stock looks, or mimicking sunset or moonlight–but you can also create your own for a distinctive look that might be the beginning of creating a brand for yourself.
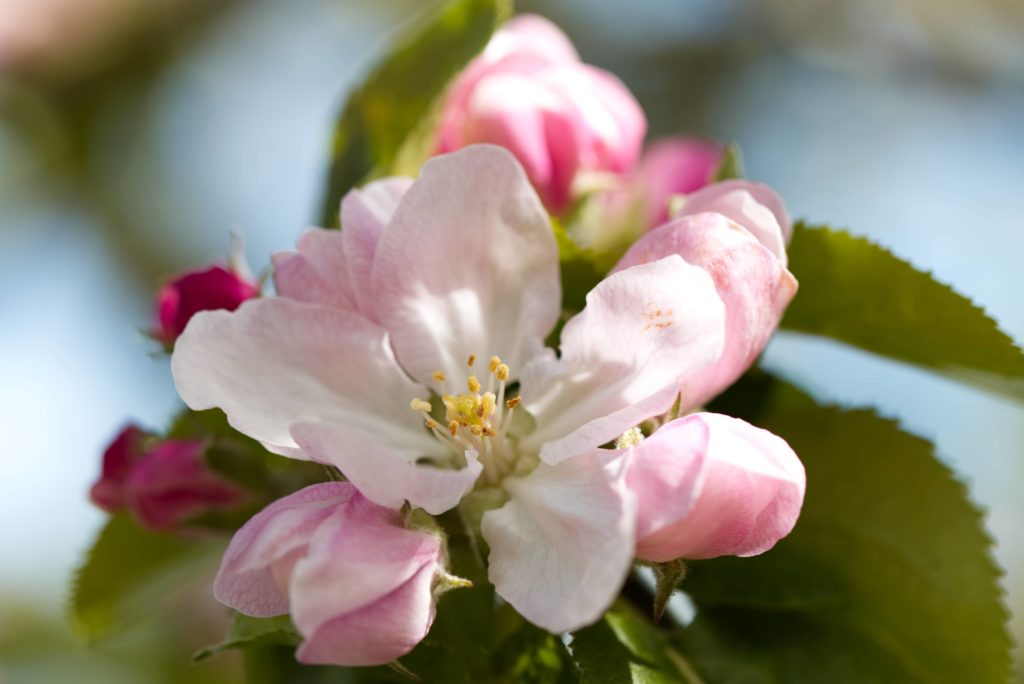
To apply a LUT, open the photo, add a Color Adjustment layer from the bottom of the Layers panel, pick a LUT, and if you want to, adjust the opacity. It’s entirely possible to apply multiple LUTs simultaneously, but do be careful doing this. It’s easy to overdo it. You only need just enough, not more than enough.
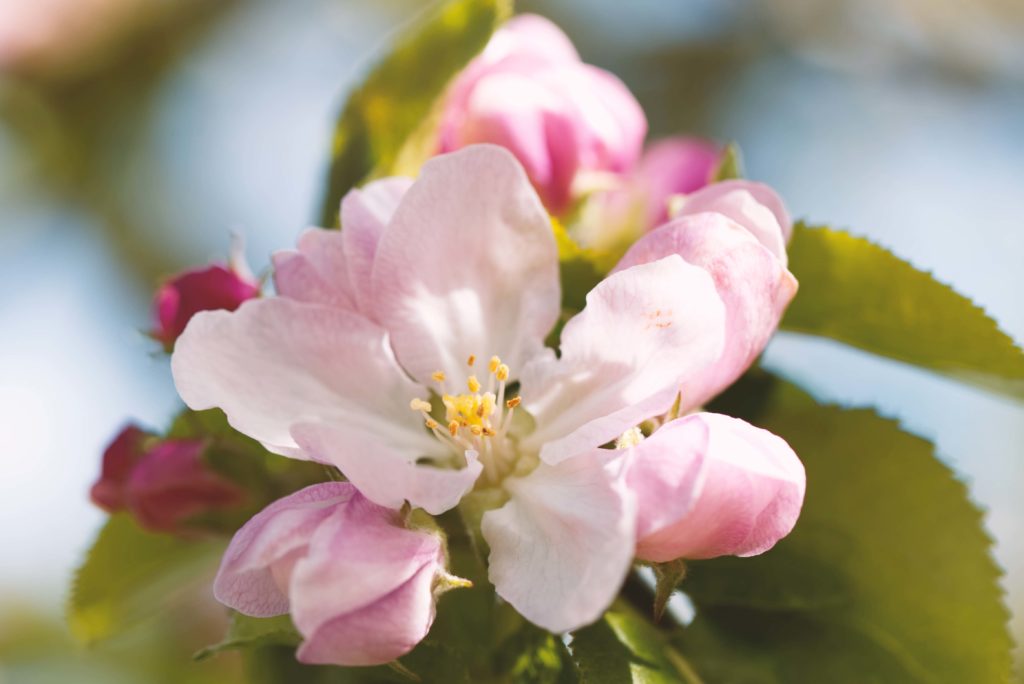
This apple blossom was given a film feel using the pre-installed Fuji ETERNA 250D Kodak 2395 (by Adobe).cube LUT.
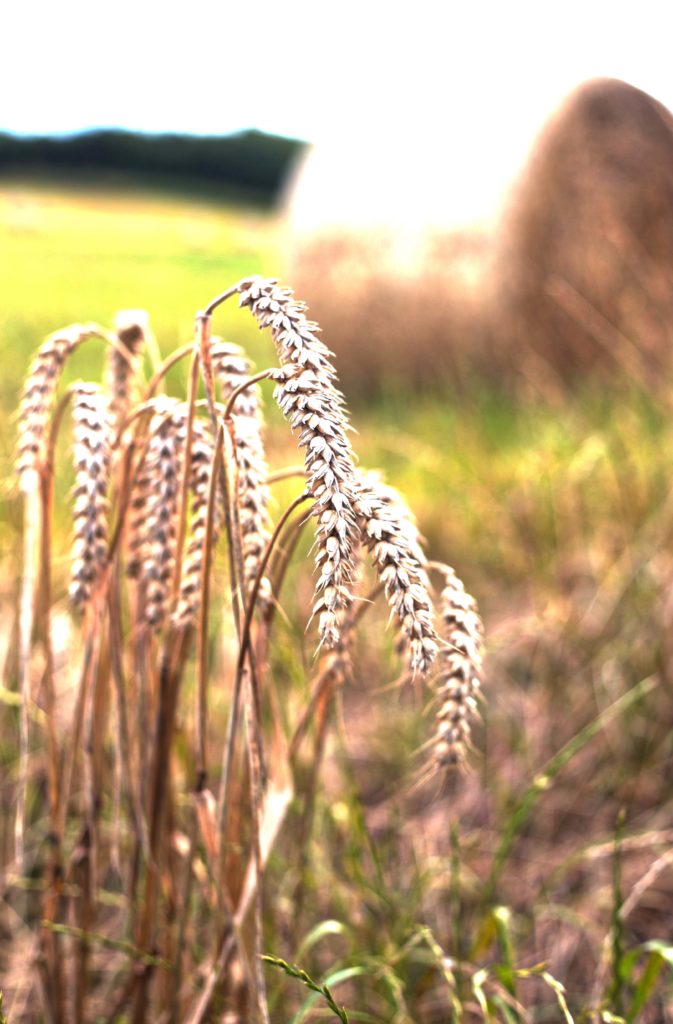
3. Adjustment Layers & Blend Modes
When you add an adjustment layer to an image, the blend mode determines how the different layers will interact with each other. Normal is the default mode, you can select from a huge variety in the drop-down menu. Some will darken, others will lighten, while others have an impact on contrast.
By adjusting the Opacity of the blend mode, you control how much of the lower layer is revealed through the upper layer. Effectively, it determines how strong the blend is.

Here, the blend mode was Color Dodge. You can see it with both 50% and 100% opacity levels, too.
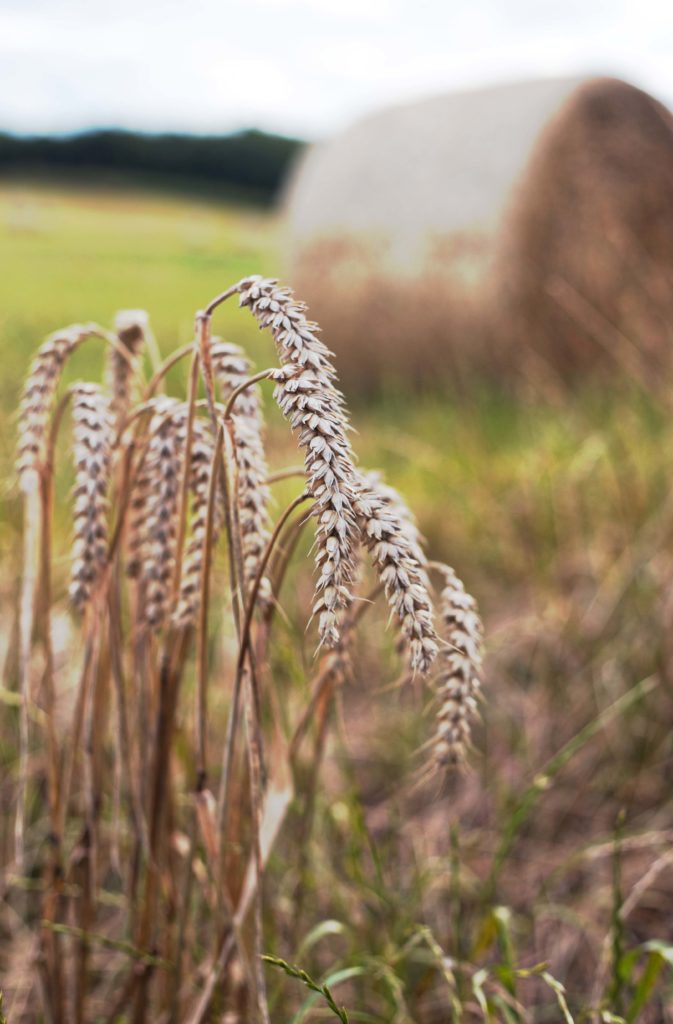
It’s given the image a fairly harsh sun feel and it’s almost as if it could be a still from a movie shot in a desert or during a time of drought.
4. Mixer Brush
The mixer brush simulates painting on a canvas. You can mix colors (both on the brush and on the canvas), vary how much paint is on the brush, and determine how wet the paint is. To use a color already in your image, sample it with the Eyedropper tool.
The Mixer brush is within the Brush tools: click and hold on the brush icon in the left-hand panel to reveal it.
You can see here how we added an extra smear of red paint to this wall.

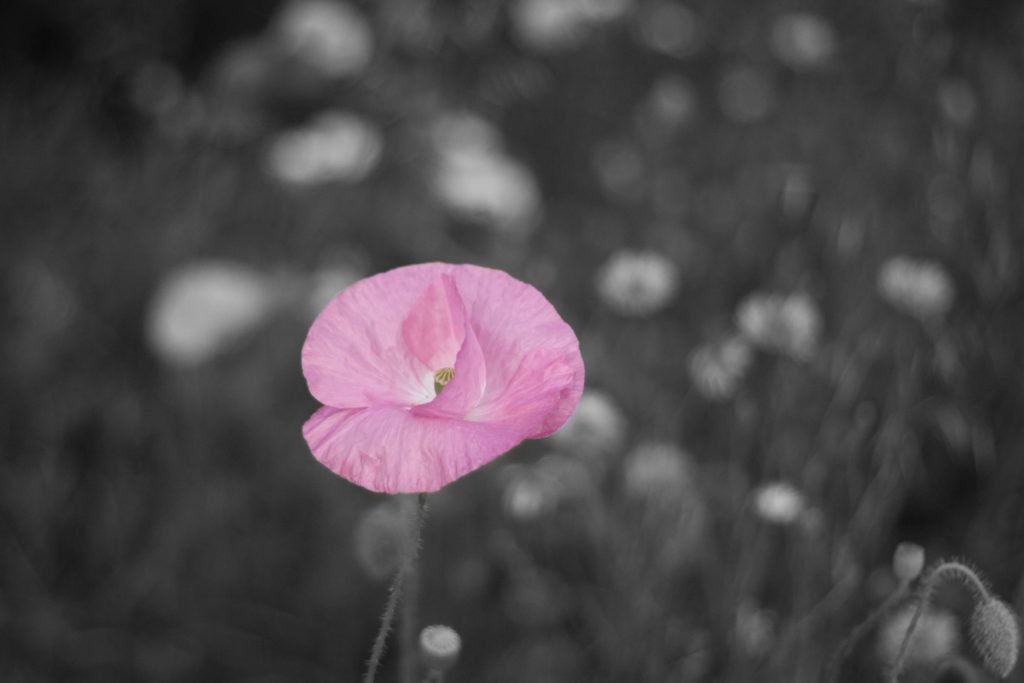
5. Color Pop Effect
Color popping is also known as selective color. You retain one color in a scene and turn the rest black and white. The girl in the red coat in Schindler’s List is a famous example of selective color.
- To achieve it, create a new Adjustment layer over the original image and use it to turn the image black and white. Don’t forget to tweak it to give yourself the black and white look that you want.
- Now select the Brush tool and with the foreground color set to black, paint over the element the color of which you want to reveal. If you make a mistake, switch the foreground color to white, repaint the error, then revert to black to continue revealing your chosen color.
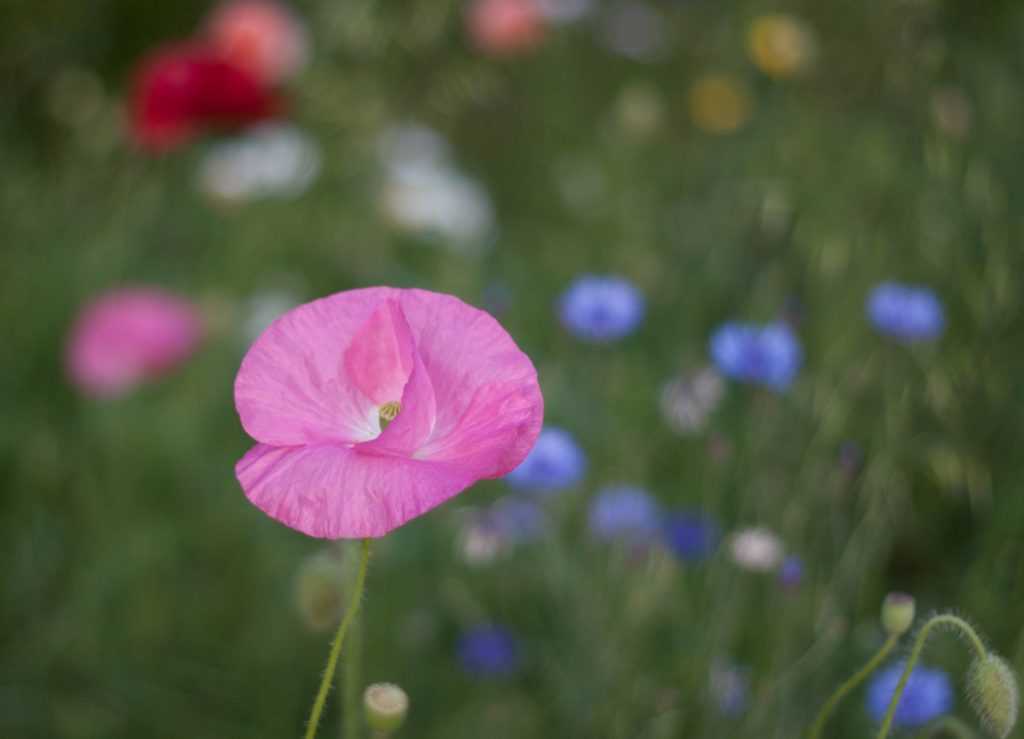
For a final touch, you can always reintroduce a very subtle and desaturated color to the black and white element.
The pink poppy always stood out from the rest, but now it really does!
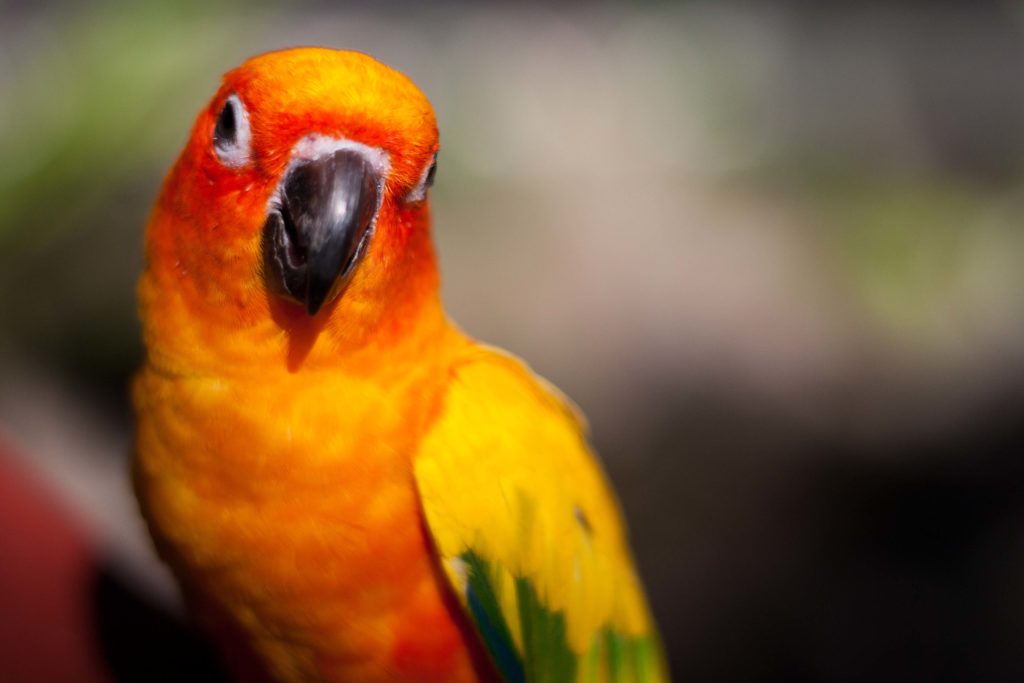
6. Selective Sharpening
Selective sharpening allows you to bring out the detail in your subject while leaving your background unchanged. For example, you might wish to sharpen all of a bird but none of the verdant background, or you could sharpen the eyes and lips in a portrait but leave the skin untouched. This kind of sharpening can add a real punch to your photos.
Remember: sharpening should be the last adjustment that you apply to your images. You’ll also need to use the Unsharp Mask after you’ve flattened or merged all of your previous layers as it can only adjust one layer at a time.

- To sharpen selectively, create a new layer and select the areas that you want to sharpen.
- Then choose Filter > Sharpen > Unsharp Mask, and make your adjustments. Remember to zoom in and zoom out while you work to ensure that you don’t overdo the sharpening.
- The selection will be sharpened, the rest of the image won’t be. That’s it!
By selectively sharpening the bird, the details in the feathers can stand out while the background remains soft.
7. Color Range
If you want to make adjustments to a specific color within an image, you can create an adjustment layer mask for just that color.
- Go to Select > Color Range. Using the Eyedropper + tool, select the color you wish to adjust.
- Apply an adjustment layer and then make the changes you want -increase or decrease the saturation or maybe brighten or darken it.
Here, the more yellow-toned lights were selected and increased in saturation to give it a more orange look.
Part 2: 3 Amazing Compositions with Photoshop Techniques
1. Create Triptych
If you are looking to create a cool composition with your photos on the wall, we recommend trying the triptych. This structure basically includes 3 similar or different sections of a sequence or can show different elements of the same theme or item. We will show you how easy it is to create this in Photoshop.

- Make sure you have measured the frames you will place the photos in and select the best photos of your sequence or item you wish to use for the project.
- Use some of the techniques above to polish up your images and create a more unified modern look.
- Go to View > Rulers to make a grid using guides by clicking on one of the rulers and drag out over to your template.
- Create 2 horizontal lines to sit in the middle of your template for your images to be placed in line.
- Add in vertical lines to create equal spacing between each of your images.
- Now drag your images to the composition and resize them by clicking on each of the layers and going to Edit > Free Transform. If you want to move them into a different position, just select the Move tool.
Note: Hold down the Shift key to adjust the Anchor point of your image to avoid them stretching out of proportion.
2. Create Polaroid Effect
Sometimes you can create an old retro look with your digital photos that will add some nostalgia and a fun way to share your photos online. You can also create interesting party invitations or posters for your next event. We will break down the main steps to recreate this timeless photo style.

- Begin by importing your photos to Photoshop and edit the shape of your photo into a square. To do this, use the Crop tool and draw out a square over part of your image, and hit the Enter or Return on your keyboard.
- To create the white border, go to Image > Canvas Size to extend the canvas size. Select Pixels for the Amount and adjust the size slightly larger than the original image, then hit OK.
- Create the fill of the border first. Create a new layer, call it something like White border to keep your work organized, and drag it under the photo layer.
- With the foreground color set to white, hit Ctrl+Backspace on your keyboard to turn the new layer white.
- Now create another layer, name it something like Frame, and place it in between the 2 layers we created earlier.
- Select the Rectangle marquee tool and draw out a shape to form the white edge of the photograph.
Note: Make sure to leave more space on the bottom, just the way polaroids look.
- Again with the new layer selected, hit Ctrl+Backspace to make the shape white.
- You can apply an additional drop shadow by going to Layer > Deselect and double-click on the frame layer to open the Layer Style menu. Select the Drop shadow option and apply it to the frame.
- As a final touch, you can apply the Gradient overlay for a glossy look. Simply create a gradient that goes from Grey to White and reduce the Opacity to around 30-40%.
3. Create Ragged Borders
Similar to the polaroid effect, you can also create another nostalgic old photo look by using the Erase tool and color fill. We will show you step by step how easy and effective this photo look is for your next project. You can even create amazing shapes by creating ragged borders.

- Once you have imported your photo, start by going to Layer > New Layer (on a PC, hit Shift+Ctrl+N on the keyboard). Name it as you wish; we will use it for the frame.
- Select the Rectangular marquee tool and make a selection on the photo for the frame border.
- Go to Select > Inverse. There are now 2 lines that depict the selections.
- Now go to Edit > Fill and pick the color you want to fill the edge of the frame with. Usually white or black is good. Hit OK.
- Before moving on, go to Select > Deselect to remove the selection.
- For the final step of the effect, find the Erase tool from the toolbar. At the top of the window, you’ll find an option to change the brush.
- We recommend using the Pastel Medium Tip brush for this effect.
Note: Remember to adjust the diameter of the brush so it’s not too big – we recommend somewhere around 30 pixels.
- Brush along the frame so the background shows through, creating the ragged effect. And you are done!
There is so much that you do with your photos when you understand just a few Photoshop techniques. And there’s a lot of fun to be had as you learn and experiment, too. Don’t be afraid to get creative and remember, you can edit non-destructively in Photoshop so if you don’t like something, you can go back to the beginning and start again.