Double exposures used to be just this – you would expose one section of film twice in order to superimpose one scene over another. Getting the exposure correct was tricky. It was easy for a double exposure to be overexposed, not to mention having 2 images that you wanted to combine in the space of using one reel of film.
Now, if you want to create a double exposure effect, Photoshop offers a straightforward alternative. The images can be taken years apart, or downloaded from Motion Array if it has just what you need, and combined to produce an ethereal-looking scene. We will walk you through this tedious process step-by-step.
Summary
Part 1: Learn How to Make Double Exposure in Photoshop
1. Choose a Concept
Before you embark on creating a double exposure, think about what sort of sensation you want to evoke. Do you want something naturalistic? Futuristic? Urban industrial? When you have a vision, the process is a little easier.
2. Select Base Images
We would suggest selecting 2 base images for your double exposure composite: one portrait and one scenic background. Ideally, the portrait needs to be on a plain background, which makes it far easier to extract and blend. If you don’t have the perfect images in your own archive, have a look at what Motion Array has.
3. Create Your Double Exposure
For this double exposure, we’re using a model on a plain white background and a mountain lake scene from Motion Array’s marketplace.
- Import your first base image, your portrait, into Photoshop.
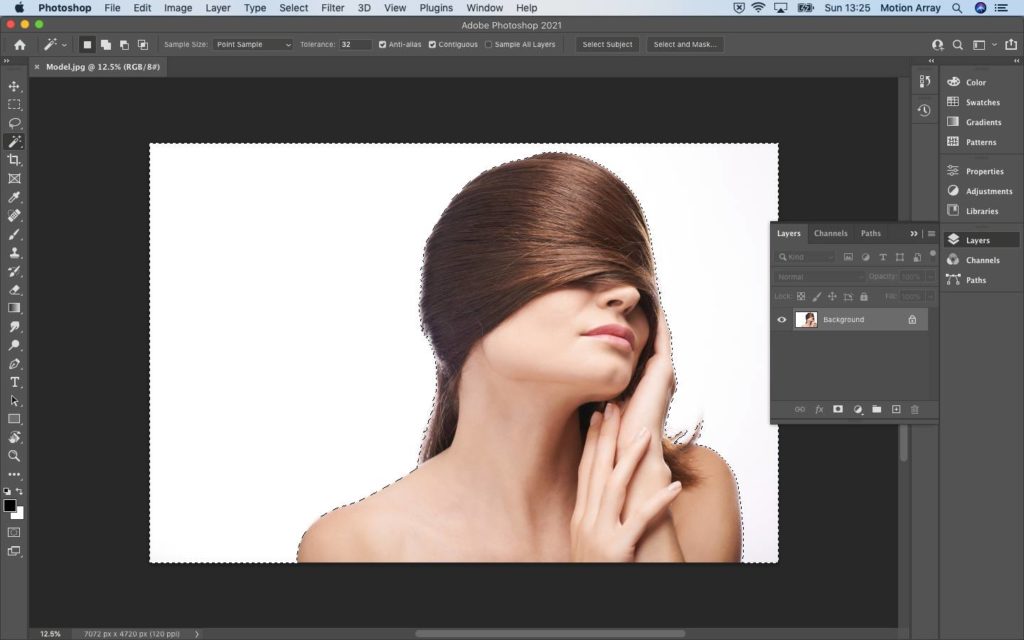
- Using the Magic Wand tool, extract the subject from the background. With Magic Wand enabled, click on the white background. You will see an army of marching ants outlining the image.
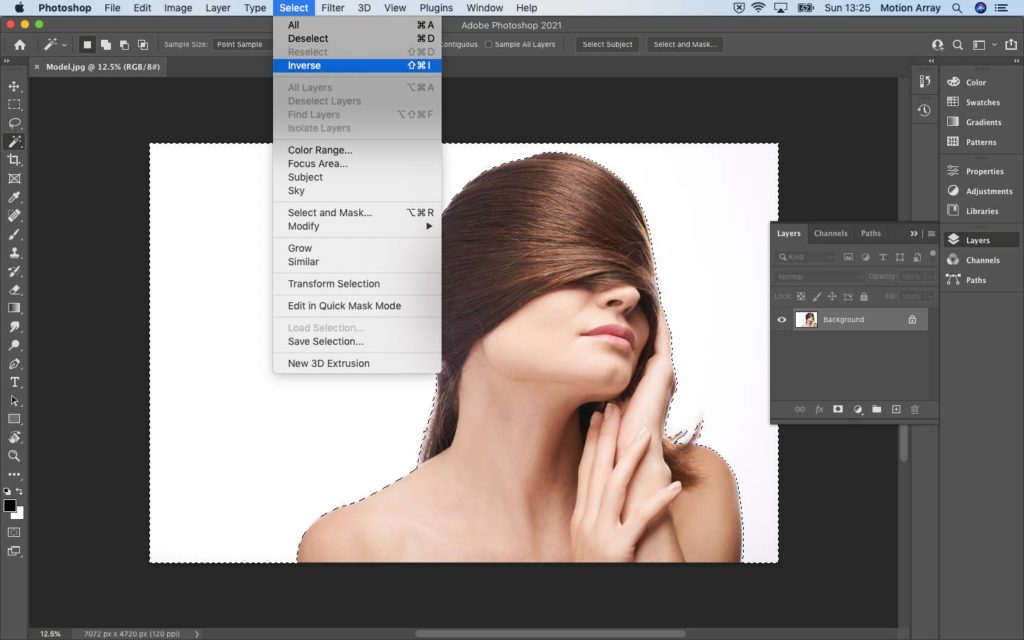
- From the Select menu, choose Inverse.

- Choose the Select and Mask button from the upper mid-to-right of the screen.
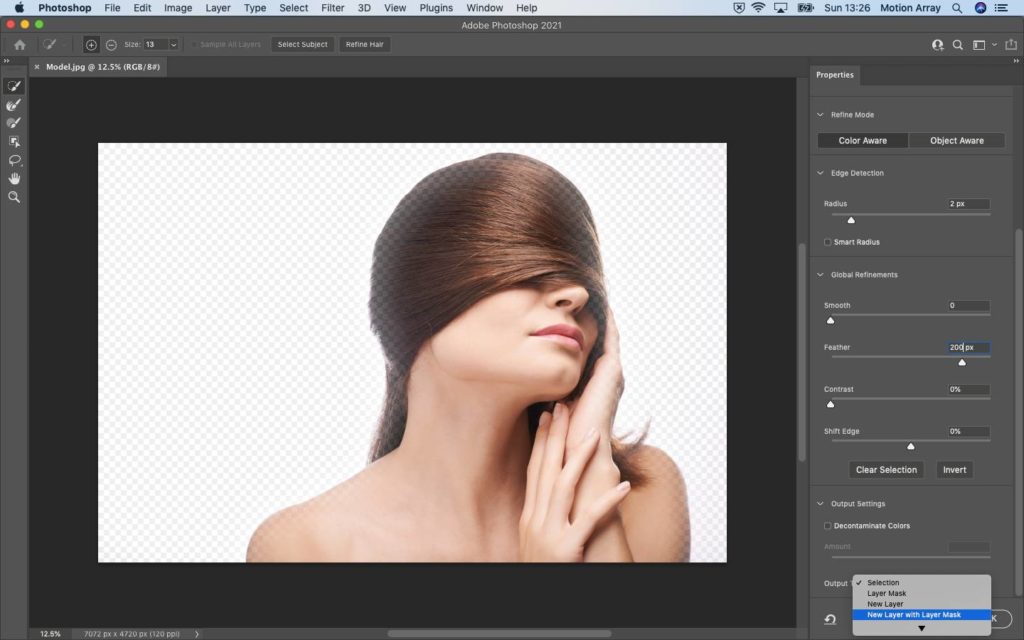
- In this instance, a very sharp extraction would not work with the final image, so set the Feather to 200px. This will give a lot of softness between the model and the background, when the 2 images are combined.
Note: If you were to want a much cleaner extraction, select the Smart Radius box and set the Edge Detection Radius to 2 or 3px.

- From the Output Settings drop-down menu in the bottom right corner, choose New Layer with Mask, and then OK.
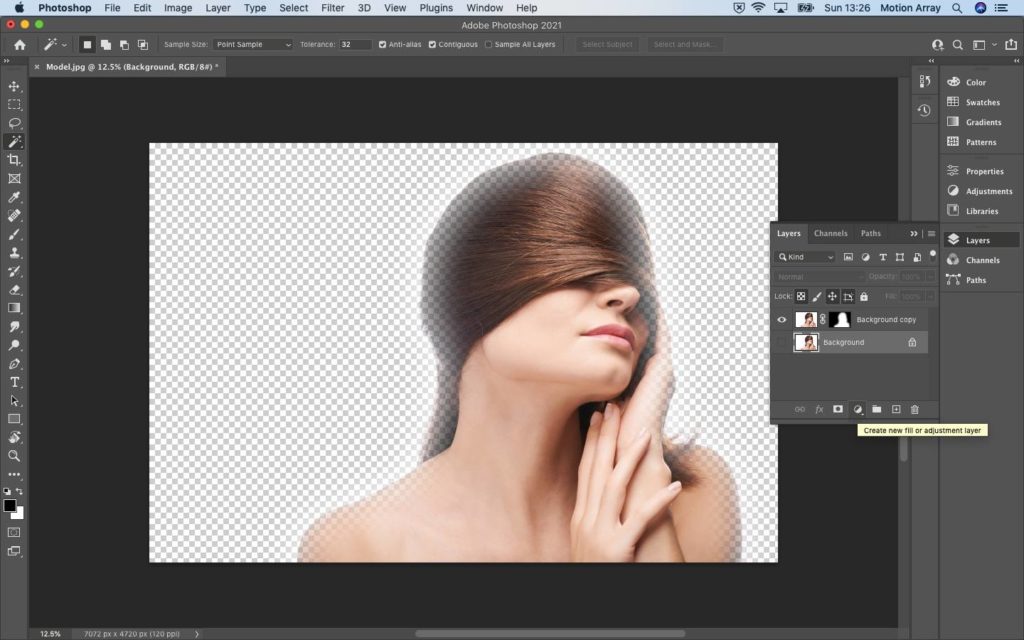
- Beneath the new layer with the extracted model, make a New Fill layer. At the bottom of the Layer panel, there is a button for a New Fill or Adjustment layer.
- Select Solid, and then choose the color you want. In this instance, it’s a pale green, to blend with the mountain feeling. (If the new fill layer goes on top of the cut-out model layer, just drag it beneath the cut-out model one.)
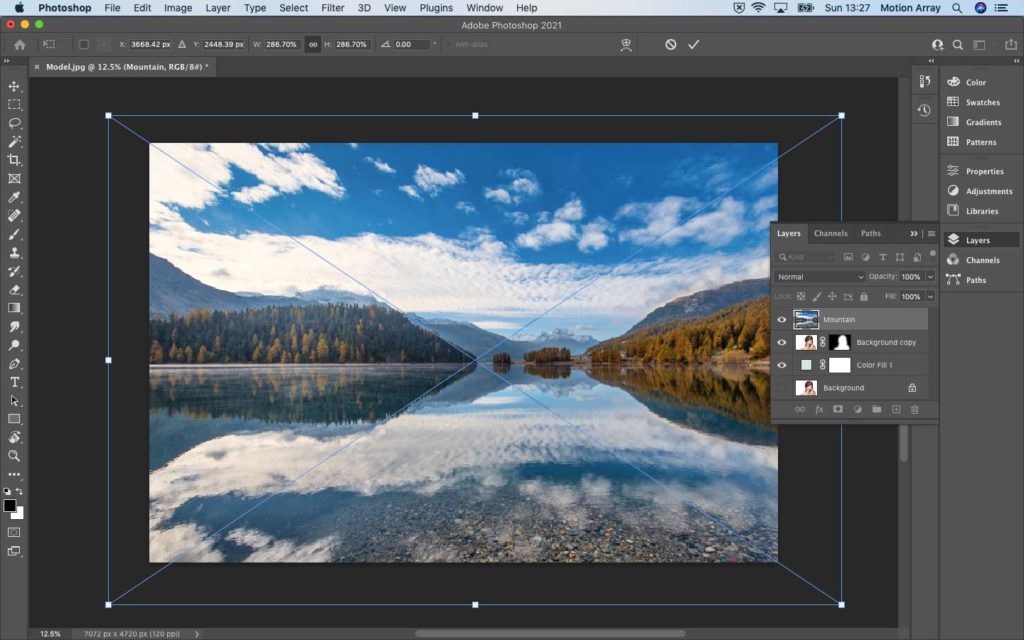
- Import the mountain lake scene and make it larger than the base image of the model. In the Layers panel, set the Opacity to 50%.
- Move the mountain scene layer so that it sits over your model precisely where you want it to be. Notice how the shoreline and the model’s lips are echoing each other here? When the images are in the correct positions, commit the crop and placement with the tick in the upper mid-right of the panel.
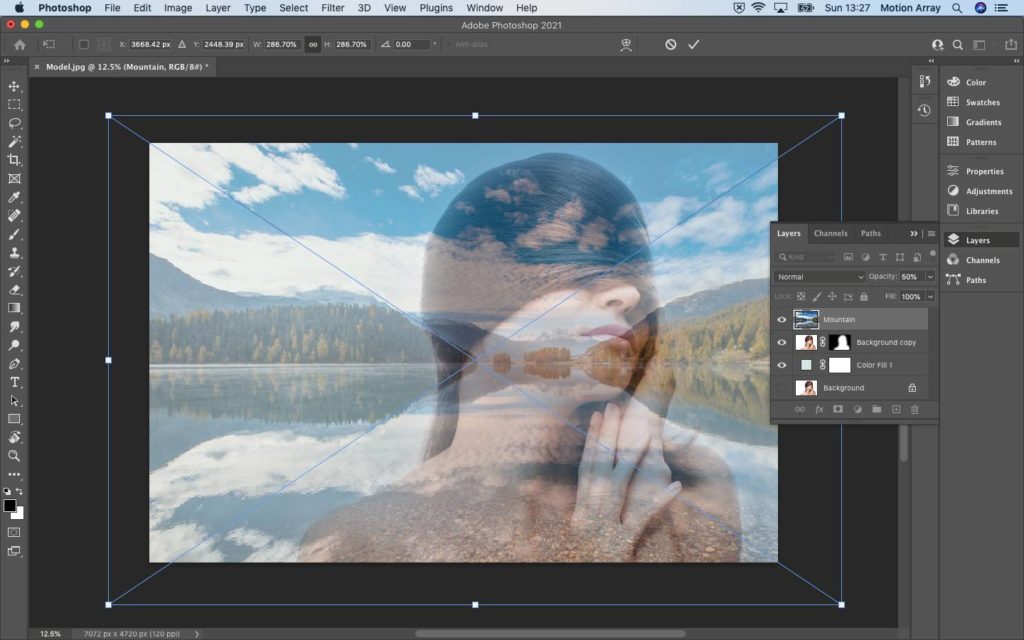
- With the mountain layer selected in the Layers panel, Cmd+Click or Ctrl+Click on the cut-out model icon in the layer below. You should see an army of marching ants outlining the model.
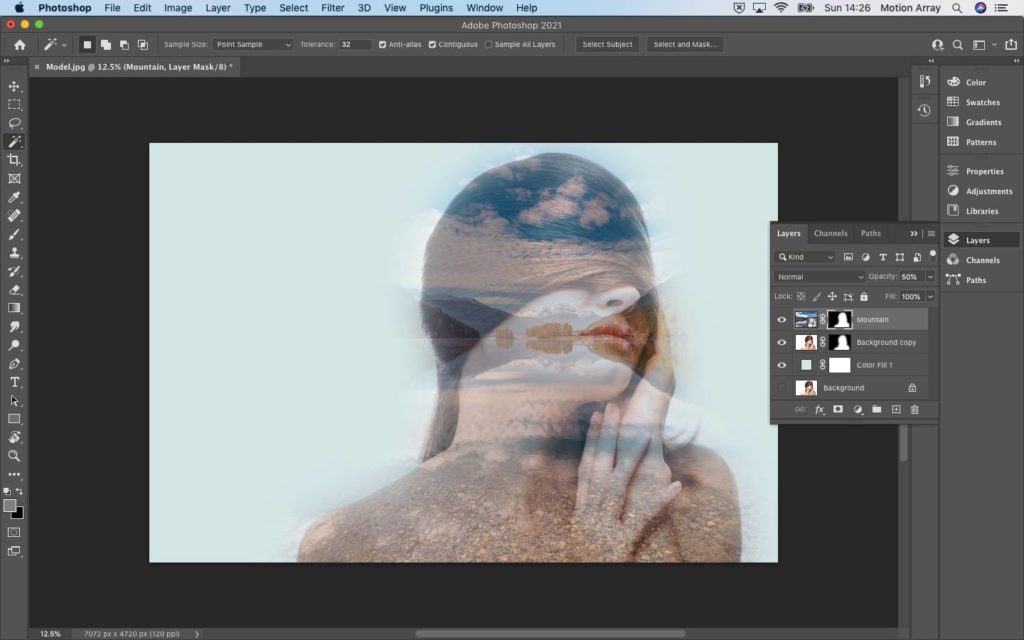
- To hide the background outside of the model, select the mountain layer and add a Layer Mask from the icons at the bottom of the Layers panel. You should now see the model overlaid with the mountain image, and the pale green background surrounding it.
- Now you can choose the precise Opacity that you want for the model-mountain merge. Select different Opacity percentages until you achieve the degree of merge that you want.
Note: You’ll notice how adjusting the Feather at 200px means that there’s a gentle transition between the model-mountain cut-out and the pale green background. Using a hard edge would have been too severe for this composite.
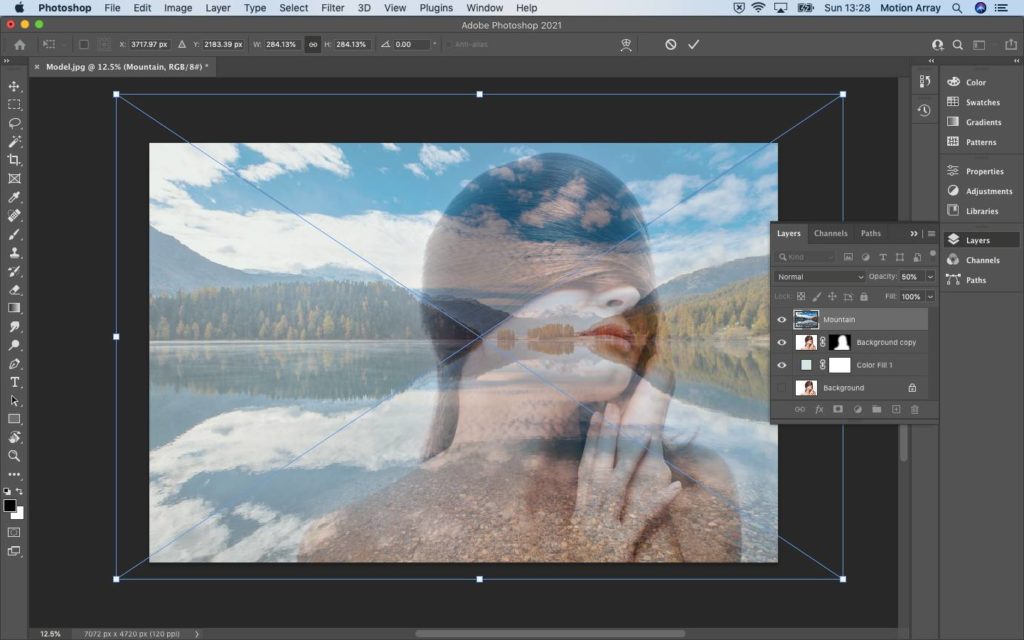
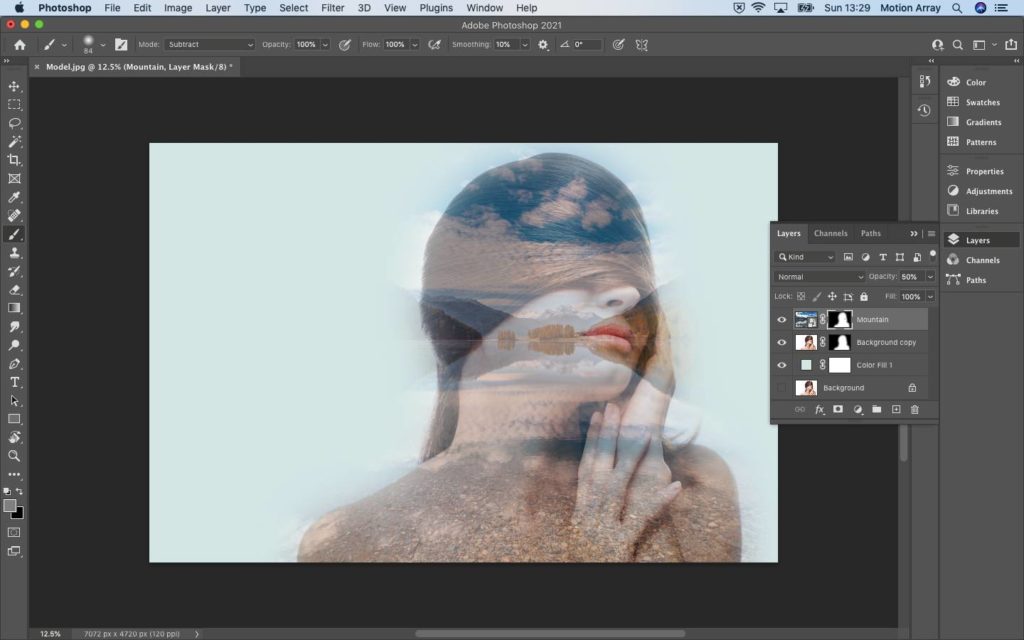
- To enhance the lips of the model and let them shine through the layers, select the model cut-out icon on the mountain layer. Now choose a Soft Brush with a Size of about 80px and set to the Subtract mode. Gently brush away over the model’s lips to reveal their pink tone.

- To help create a slightly more ethereal feel to the double exposure, add a Gradient layer using the Add create New Fill or Adjustment layer button at the bottom of the Layers panel.
- Each of the different gradient layers will bring a different look or feel to your composite. In this case, Neutral Sand 2 gives a natural feel that works with the model’s skin and the shoreline details. Again, you can choose the Opacity that you think works best here, but try around 25% as the starting point.
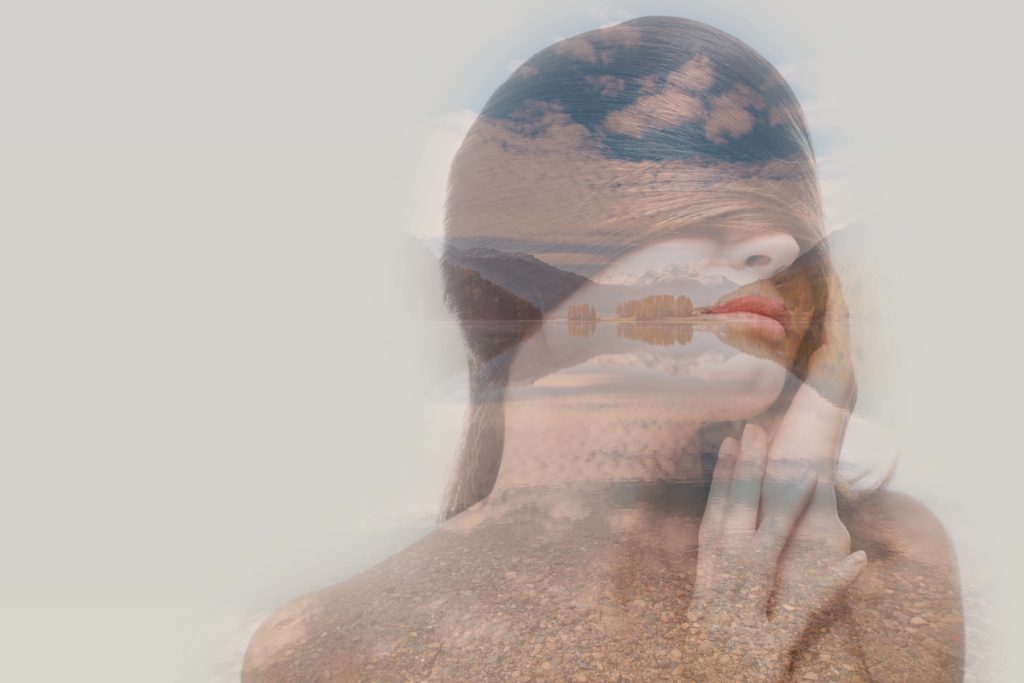
How does that look to you? If you think it’s ready, then it’s time to finish.
- From the File menu, choose Save As, and save your image as a PSD file that you can return to if you feel the need.
- From the Layer menu, choose Flatten Image, which will merge all of your layers together, creating a smaller and more manageable final image.
- Now go back to the File menu, select Export and then Export As, and download your double exposure as a jpeg image!
Part 2: 5 Double Exposure Templates to Create Amazing Photo Stories
If you’d like to create a video double exposure, there are some great templates available on Motion Array that do all the hard work for you.
1. Double Exposure Slideshow
This is an easy-to-use template designed for After Effects to create intros for your social media videos. It comes with light leaks, transition effects, and text animations. Edit your text, drag and drop your images, and hit render.
Download Double Exposure Slideshow Now
2. Double Exposure Opener
This template, designed for After Effects, includes 24 media placeholders and 12 editable text layers. You can use it to show off sports, fashion, and portfolio photos or to create intros for videos ranging from commercials to events videos.
Download Double Exposure Opener Now
3. Light Double Exposure
This template, designed for Premiere Pro, is perfect for creating openers, intros, and film titles. It doesn’t require any plugins or professional skills, making it perfect for anyone short on time or looking for an easy way to create professional-looking videos.
Download Light Double Exposure Now
4. Epic Double Exposure
This Premiere Pro template is perfect for creating video intros or trailers. It comes with 9 pictures or video placeholders and 9 titles that you can easily change. All you have to do is drag and drop in your videos or photos, adjust their positions, add your audio, and hit render.
Download Epic Double Exposure Now
5. Double Exposure Stomp Opener
This Premiere Pro template is great if you’re looking for dynamic intros and trailers. Easily draw a mask and alter your background color! Perfect for your next fashion, sports, or travel videos or trailers.
Download Double Exposure Stomp Opener Now
Double exposures can range from the deeply surreal to the very simple. It all depends on what you are looking to achieve and the feeling that you want. Hopefully, this tutorial has given you a flavor of what’s possible to create a double exposure with Photoshop.
If you are looking to create more cool effects using Adobe software, check out our tutorial on creating photo cinematic effects in Premiere Pro and learn to bring still photos to life in After Effects.