


If you’ve shot something in front of a green screen After Effects is your best friend when it comes to replacing that green screen with the footage. Using green screens is a great way to keep your options open in the edit, and give you complete flexibility over the content you are making. The green background can be swapped out for your chosen footage or effect very simply using Adobe After Effects. Read on to learn how to do it.
Summary
Part 1: How to Remove or Key Green Screens
The first thing to ensure is that you have good footage against your green screen. We won’t go into detail on shooting against a green screen here, but generally speaking, you need to ensure the green screen is evenly lit, without any shadows or creases that will disrupt the keying. Once you have your footage with your subject perfectly contrasting with a flat green background, import it into Adobe After Effects.
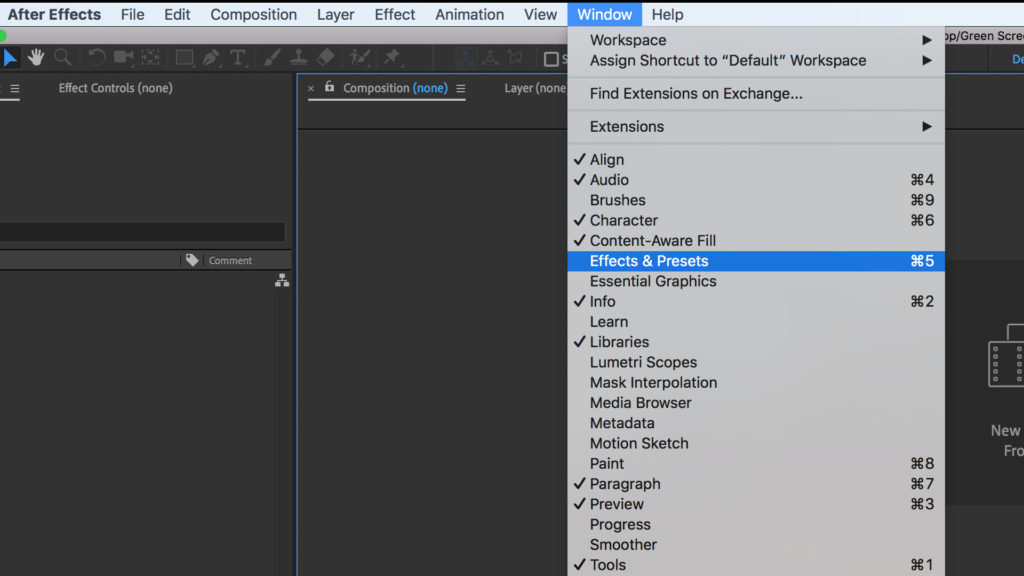
Step 1: Open up the Effects & Presets window by going to Window > Effects & Presets.
Step 2: In the Animation Presets dropdown, toggle open the Presets folder and then toggle open Image – Utilities.
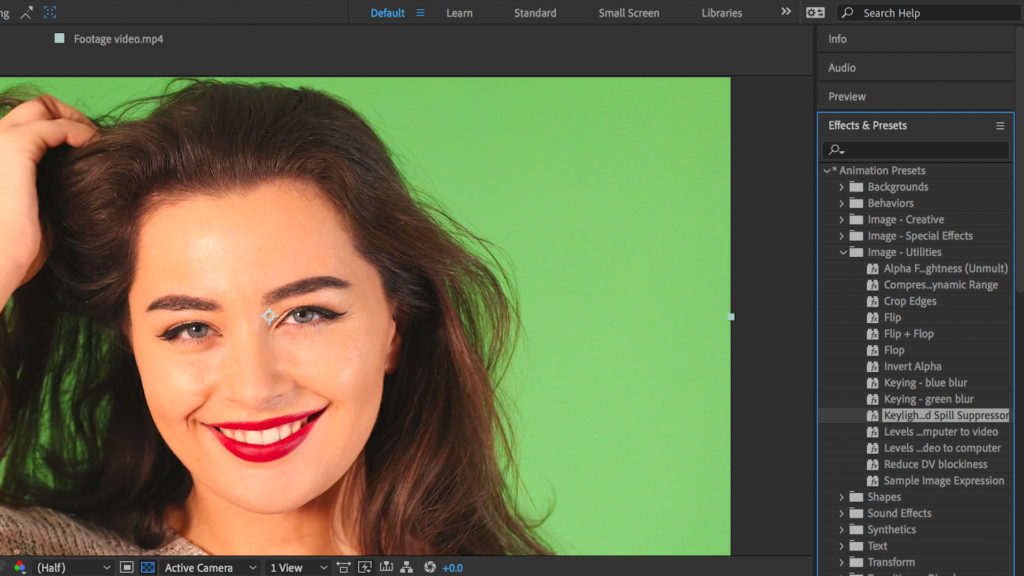
Step 3: Drag and drop the preset Keylight + Key Cleaner + Advanced Spill Suppressor onto your footage.
This is a preset that contains three separate effects that can be combined to create great green screen keying results. It’s Adobe’s recommended combination of effects. Here’s what they do.
- Keylight is a chroma keyer that lets you select a color and make it transparent. This is the first step in any green screen replacement.
- Key Cleaner lets you sharpen the edges of the subject in the footage.
- Advanced Spill Suppressor reduces the color of the background that might have spilled onto the subject. This is a common situation when shooting against a green screen, as the subject may have a green tinge around themselves that is reflecting the background. This is especially useful for preserving hair and other fine detail.
Keylight
Keylight should be your first port of call when replacing green screen footage. Activate this effect first.
1. Besides Screen Color, use the Color Picker tool to select a patch of green background close to your subject.
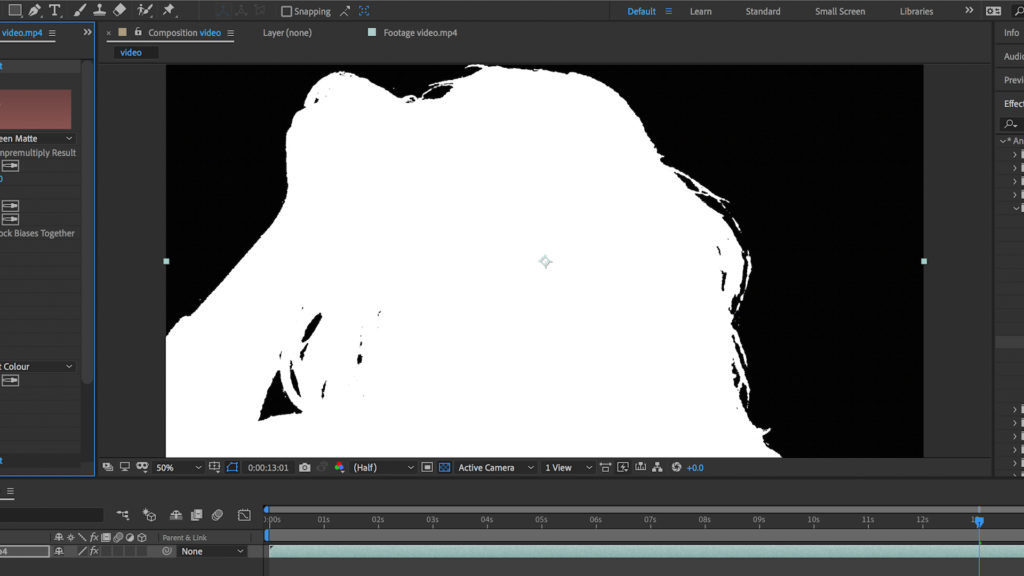
2. Change the View to Screen Matte.
3. Amend the Clip Black and Clip White settings in Screen Matte, and you should see the image change in the preview window. Play with the values until the background is completely black and the subject is totally white.
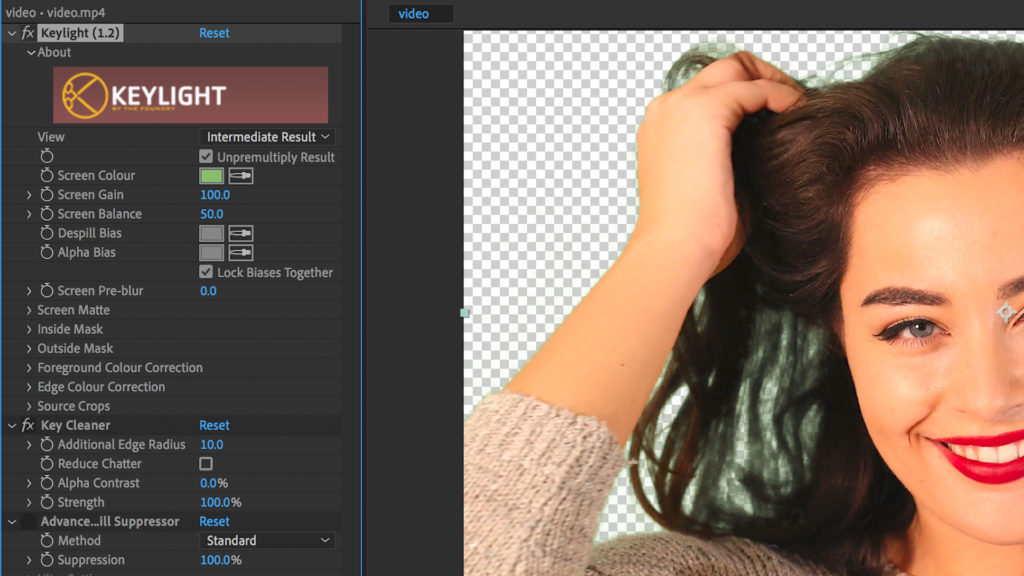
4. Switch the View to Intermediate Result to see your subject against a black background.
Key Cleaner
Key Cleaner will be working in the background while you adjust the Keylight settings, but once you have removed the green background this is your opportunity to refine the Key Cleaner results.
1. Adjust the Additional Edge Radius slider to make minor adjustments to the edges of your subject. You should be able to see the results in real-time.
2. Check the Reduce Chatter option to remove any noise in the image. As if by magic you will see any artifacts disappear in front of your eyes.

Advanced Spill Suppression
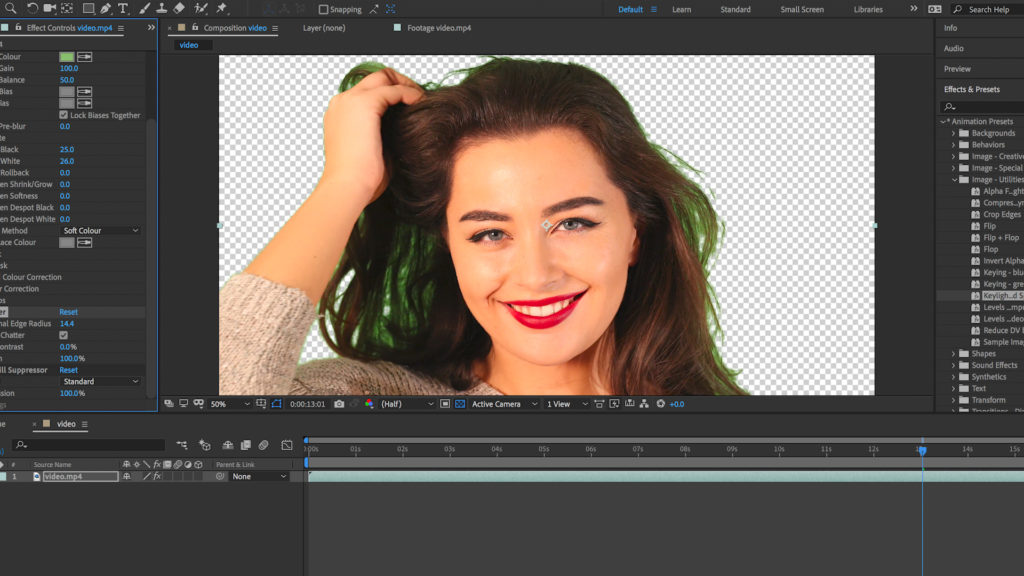
Once you’ve amended Keylight and Key Cleaner, go ahead and activate Advanced Spill Suppression last. This tool will automatically detect any green spill infringing on your subject, for instance within stands of hair and around the very edges of the subject. You should be able to see the results immediately.
The tool is powerful enough for most situations, but if you’re still not totally happy with the results then switch the Method from Standard to Ultra to unlock more advanced features. Here you can make fine adjustments to the Spill Range, Tolerance, Luma Correction, and more.
Toggle the Transparency Grid and you should find the subject isolated against a transparent background, with a nice clean key.
Part 2: How to Replace Chroma Key / Green Screens
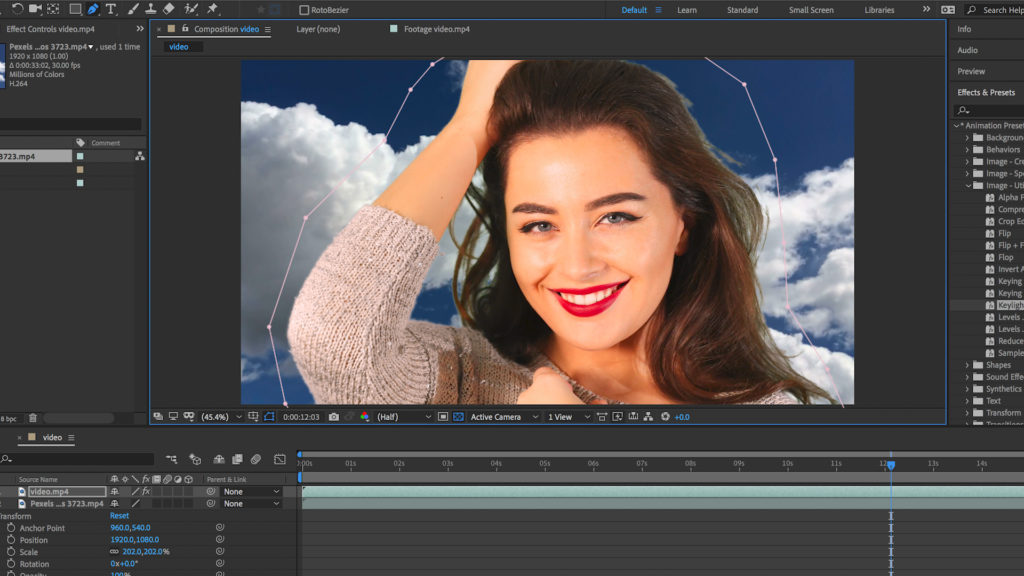
Once you have keyed out the green screen and separated the subject, you can add your subject to other footage.
1. Firstly, import the footage you’d like to use as a background in place of the green screen.
2. Drag the footage onto the timeline below your green screen footage.

3. If you find the edges of the frames don’t quite match up, or if there is something else in the green screen footage you’d like to remove, you can use the Pen tool to draw a mask around the subject and isolate it.
You can also use green screens on computer displays to replace the contents of a computer or tablet in post. This involves tracking and can be a little more detailed, but you can find a tutorial on how to replace green screens in devices here.
Green screens are powerful tools that give you complete flexibility with your footage. Film something against a green screen to be able to swap out the green for anything you like afterward. You can replace green screens quickly and effectively in After Effects, using the built-in After Effects green screen replacement presets.


