


Looping clips are popular on social media platforms, ranging from simple repeating footage to more complex compositions. The Infinite Loop and Glitch Loop effects look complicated and frustrating to create, but the process is surprisingly simple. In this tutorial, we’re going to show you how to make two stunning looping effects that will leave your viewers asking, ‘how did they do that?’
Summary
Part 1: Learn to Create an Infinite Loop Video in Final Cut Pro
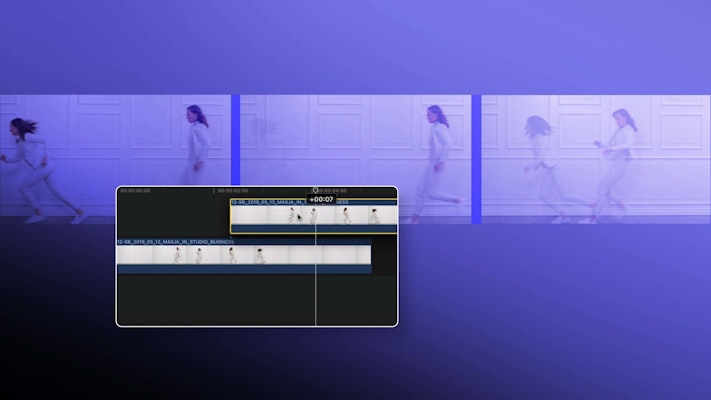
Creating the Infinite Loop Effect requires more than placing duplicates of your clip in a row; in a true Infinite Loop, your shots should cross over and appear to be happening simultaneously. For this example, we’re going to use this fantastic Running Late clip from Motion Array and edit it, so it seems the performer is leaving one side of the screen as she arrives on the other.
- With the clip in the timeline, trim the ends to the length you require.
- Hold Alt on your keyboard, then drag the clip upwards to create a duplicate.
- Select the duplicate in the timeline and in the Inspector, decrease the Opacity to about 50%.
- Move the duplicate along the timeline until there is no overlap of the performer in both clips.
- Set the Opacity levels back to 100%.
- In the Effects panel and search for Draw Mask, add it to the duplicate clip.
- Using your Pen tool, draw a mask on the screen. Your Mask may be slightly different depending on your clip, but for our example, a rectangle will work well.
- Position the mask off-screen around the performer and create a keyframe in the Inspector for Mask Path.
- Move along the timeline, adjusting the mask each time to follow the performer on screen.
- Keep adding keyframes until the duplicate shot fills the screen.
- Select both clips and right-click > New Compound Clip, give your loop a name, and hit OK.
- You can now copy and paste the compound clip as many times as you want to loop to repeat.
- To add an extra touch, choose an atmospheric track to help add a consistent sound, such as this awesome Indoor Ambience.
Part 2: Create Cool Glitch Video Loops in Final Cut Pro
The glitch loop effect is a super cool and unique effect for your videos, but it does take a little preparation and purpose shot footage. Don’t worry, we’ve covered the shooting steps as well. For the best results, you should use 2 performers, one to glitch and one to react to the glitching.
Step 1: Create Clean Plate
A clean plate is a shot of your location with no performers, movement, or other elements in it. Clean plates are used to fill backgrounds of elements you want to mask, and as you will see, this effect uses a lot of masking.
- Using a tripod, set your camera up at your location.
- Record at least 30 seconds of your location with no performers.
- Next, you need to record a clip of your glitching performer. Do not move your camera between shots.
- Finally, record a clip of your second performer, the subject who’ll be reacting to the glitching effect. They would be in a different position to your glitch performer without crossing into the same space.
Step 2: Offline Edit the Sequence
In the offline edit portion of this effect, we will concentrate on creating a couple of glitch effects with cutting techniques. You can use both the Stutter and Rewind effect in whatever arrangement you like. Once you know the method, you can create endless combinations.
- Drag your Glitching Performer clip to the timeline, and trim as needed.
- Go through your clip and cut out all the sections where your performer moves between positions, so they jump around the screen.
- Move your playhead to the point at which you want to create the first glitch.
- Press B on your keyboard to access the Blade tool, and make 2 cuts in your Performer Clip, creating a single frame section.
- Holding Alt on your keyboard, drag the frame so it sits next to the first. The rest of your clip will move up the timeline.
- Select the second Frame and press Cmd+R on your keyboard and a green bar will appear at the top of the clip on the timeline.
- Click the small downward arrow on the green line and choose Custom. You may need to zoom in to do this.
- In the pop-up box, select Reverse Speed and hit OK. You have now created a rewind glitch.
- For the stutter glitch, cut a section of your Performer clip about 3 frames in length.
- Hold Alt and drag the 3 frame section to sit next to the original, and trim a single frame from the end.
- Add more duplicates of the section, adding and removing frames until you are happy with the look.
- If you want to add pauses, add duplicates of a single frame section.
Step 3: Masking and Glitching Transition
The rewind and stutter glitch effects are a fantastic way to add style to your editing, but you can also use a range of glitch transitions to create a unique look. We’re going to use the incredible Glitch Transitions pack from Motion Array.
- Find a point in your timeline at the end of a clip before the performer changes position.
- Cut from the end of the first section and the start of the second, each about 3 frames in length.
- Select each section in turn and right-click > New Compound clip.
- You should now have 2 compound clips on either side of the position change and each is 3 frames in length.
- In the Effects panel, search for Draw Mask and add the effect to each of your compound clips.
- Using the Pen tool, draw a mask around your performer for each compound clip. Make sure your performer is not cropped during the frames.
- Go to the Inspector, and increase the Feather of your mask to 100.
- Drag your Clean plate clip from the browser and position it below your Performer clips in the timeline. Your sequence should now look normal again, with your performer in the background.
- Next, you need to add your glitch transition. Search your Transitions panel for your chosen effect.
- Double click on the first compound clip and drag the transition to the end of it. Make sure the transition covers all 3 frames.
- To return to the main comp, click the back arrow, and double click the second compound clip; and add the transition to the start of the clip.
- Return to your main timeline, and your performer should now glitch from one position to the next.
Step 4: Adding your Reactive Performer
To finish off the effect, you need to add the reactive performer shot to the sequence. Sound effects are also crucial for a convincing glitch, so you can use one of Motion Array glitch sound effects packs, which you can download here.
- Take the clip with your second subject and position it on the top track of the timeline.
- Grab the Draw Mask effect and drop it on your Reactive Performer clip.
- Draw a mask around the performer, ensuring you include any shadows they cast.
- In the Inspector, increase the Feather until any edges are blended.
- Finally, add in some glitching sound effects to match with the video composition.
Glitch effects are super cool and easy to create on any editing platform. The techniques you’ve learned here can be used in DaVinci Resolve, Premiere Pro, and After Effects. Now that you know how to create your own infinite loops and loops effects in Final Cut Pro, get creative with your next project and create compositions that will put you on the same level as the pros!


