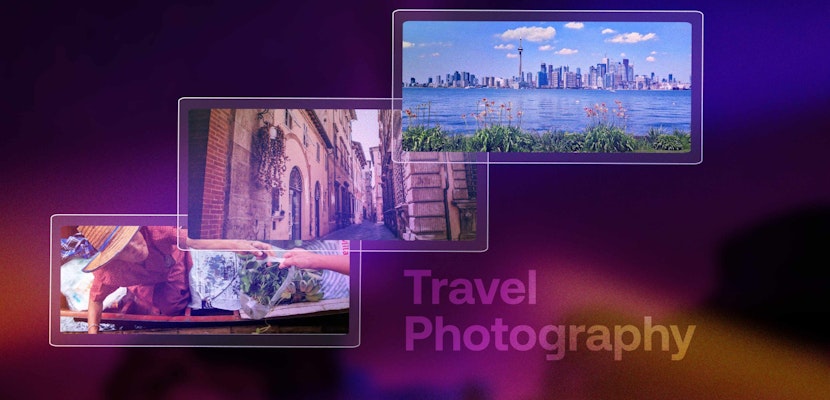
If you’ve tried golden hour photography, you might want to stick around–or get there a little earlier than the golden hour in the morning–and try blue hour photography. It’s a time of day and type of light that can create evocative images that have a unique feel to them.
What is the Blue Hour?
The blue hour is the twilight period of time before the sun appears above the horizon at sunrise, and after it dips below the skyline at sunset when the pinky-red and golden sunrise and sunset colors are mostly not around, and instead the sky is predominantly dark blue. Like the golden hour, it doesn’t last for precisely an hour. Rather, it depends on the time of year, your geographical location, and the weather conditions on the day.
Why are Blue Hour photos so Attractive?
Photos taken during the blue hour will enjoy a blue cast that can be used to prompt an emotional response in your audience. Blue can be calming and soothing, but it can also be slightly melancholy. The light is soft and has a delicate quality to it, which helps you to create sensuous images. There is also a simplicity to blue hour photos. The reduced tones and hues give blue hour images a monotonal feel that drives focus to the story.
It’s also a time of day that isn’t often used for photography, meaning that it gives you the opportunity to capture unusual images and gain a unique perspective on frequently photographed subjects.
Summary
Part 1: 3 Ways to Plan for Blue Hour Photography
If you’ve decided that you want to give blue hour photography a go, it’s advisable to plan ahead because the blue hour doesn’t last that long and the light is constantly changing. You need to be prepared. In addition to making sure that you have appropriate clothing and provisions, have taken the necessary safety precautions, and that you have your tripod with you, think about the following:
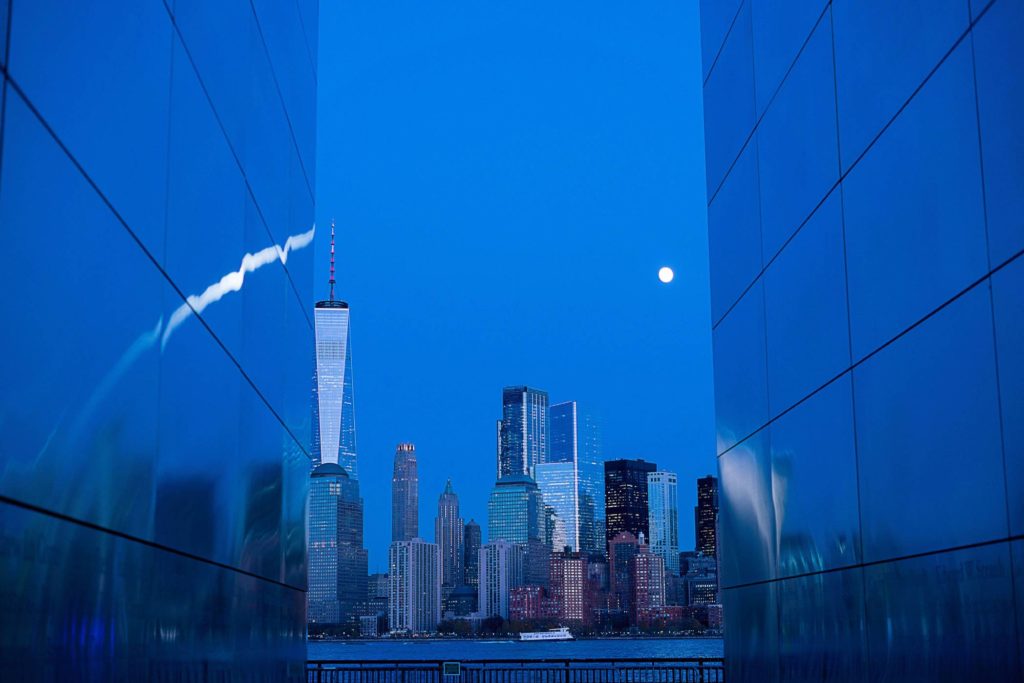
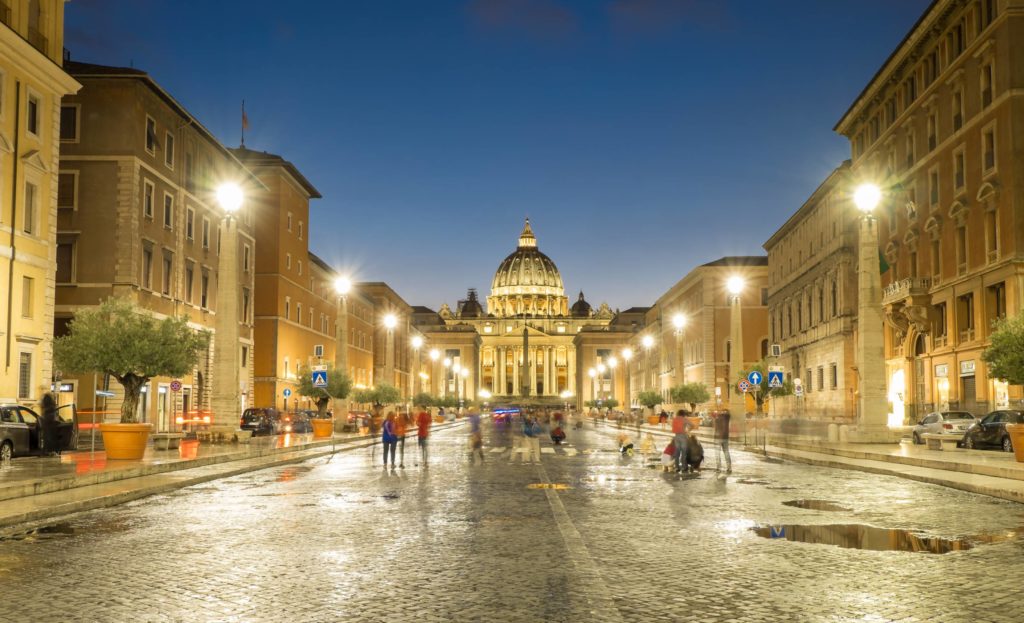
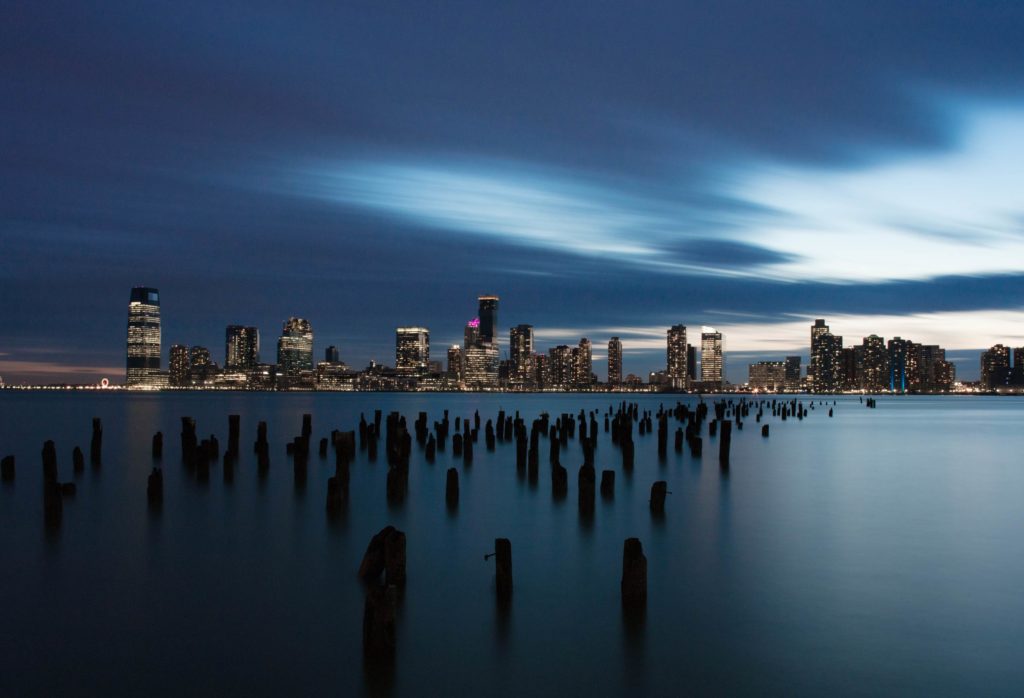
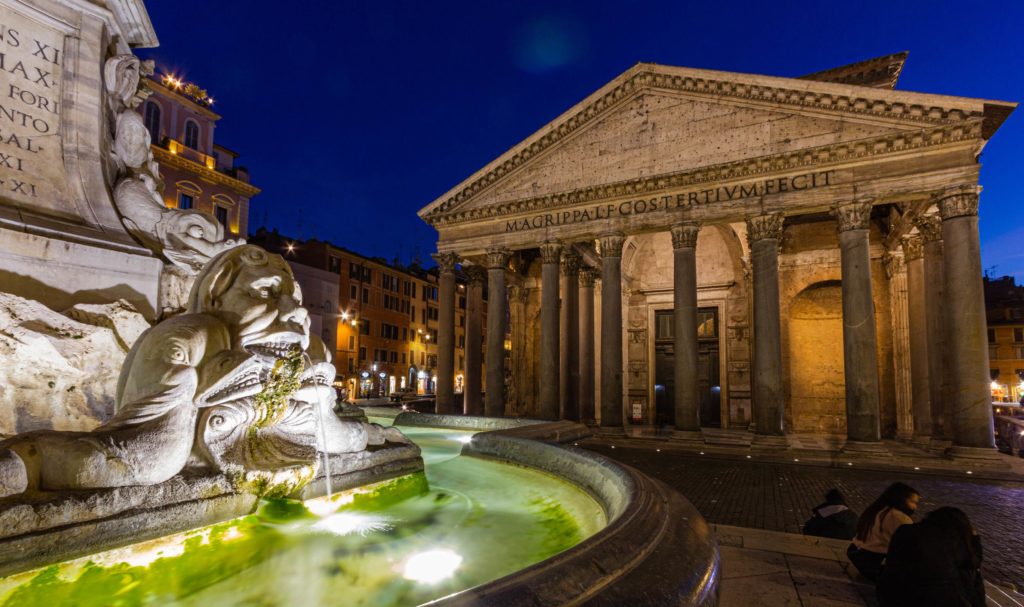
1. Cities Make Great Blue Hour Subjects
The blue hour makes for good photos wherever you are, but especially attractive cityscapes. You will find that the blue tones of the sky form a great contrast to the street lights, neon lights, traffic and vehicle lights, and office and shop lights around you. There’s also movement and activity to tell stories.
2. Have a Torch or Headlamp Handy
While the light might be good when you set out, it will fall away quickly leaving you unable to see what you’re doing clearly. A torch, or even better a headlamp that leaves both of your hands free, is a helpful piece of gear. It is also a great tool to use especially on darker nights to see where you are going.
3. Use a Remote Release
Blue hour photography means long exposures. To prevent your camera from jolting when you depress the shutter release button, which will introduce unwanted camera shake into your image, use a remote release. If you think that you will want to use a shutter speed in excess of 30 seconds, then you will need to use bulb mode as most cameras have a maximum exposure time of 30 seconds. This will also require a remote release. It’s a good idea to have a stopwatch to hand to time your exposures in bulb mode.
Part 2: 10 Tips to Make the Most of Blue Hour Photography
When you’ve found your location and have everything you need, what next?
1. Know your Camera Settings
First, set your camera to manual focus. You will find that your camera will struggle to lock on to a focal point using autofocus, so do it yourself. Zoom in on your LCD screen to ensure that it is sharp.
Next, you will want to be in manual or bulb mode. In both of these cases, you will select your own aperture and ISO as well as shutter speed. A larger aperture will let in more light, but a smaller one will allow you to get more of your scene in focus. Experiment with the shutter speed, but try using an aperture between ƒ/8 and ƒ/11 to start and keep to ISO 100. When it comes to shutter speed: experiment! Find what works best for your shot.
2. Shoot in Raw
By shooting in Raw you will give yourself the most latitude when it comes to editing your images. If you shoot in JPEG, your camera decides on key choices, such as brightness, shadows, contrast, and sharpness. By shooting in Raw, you get to make these changes so your photos look how you want them to. It’s also easier to fix a slight mistake in Raw than JPEG.
3. Use Mirror Lock-Up
When the mirror flips out of the way of the sensor as you release the shutter in a DLSR, it can cause a slight shudder in your camera that translates to camera shake in long exposure images. (It’s not so obvious with faster shutter speeds.) If you lock up the mirror for long exposure images, it helps to prevent this. Alternatively, you can always use the Live View mode.
4. Be Patient (but Move Fast)
Blue hour light doesn’t necessarily appear immediately as the sun goes down, so you will need to be prepared to wait a bit. You will also have to be ready to go as the light changes very quickly and you won’t want to miss it. Remember that the blue hour is usually much shorter than 1 hour and even in some places, it can be over in 15 minutes or barely even noticed at all. Be absolutely prepared to shoot as soon as it begins or by not getting there early and being a little patient, plus prepping your camera settings, you might miss the whole thing!
5. Have Artificial Light in Your Photos
By including electric or neon lights in your blue hour photos, you can add some drama to your images. And as the light fades away in the evening blue hour, including them will help to reduce your exposure time, too. You will also give your photos a wide range of colors, as it provides some contrast with the blue.
Just be careful that you don’t get too close to a light source so that it creates a hotspot of over-exposure in your scene. Also, if you can, aim for shooting from high up, like a hill or mountain, as you can get more light and color from this vantage point.
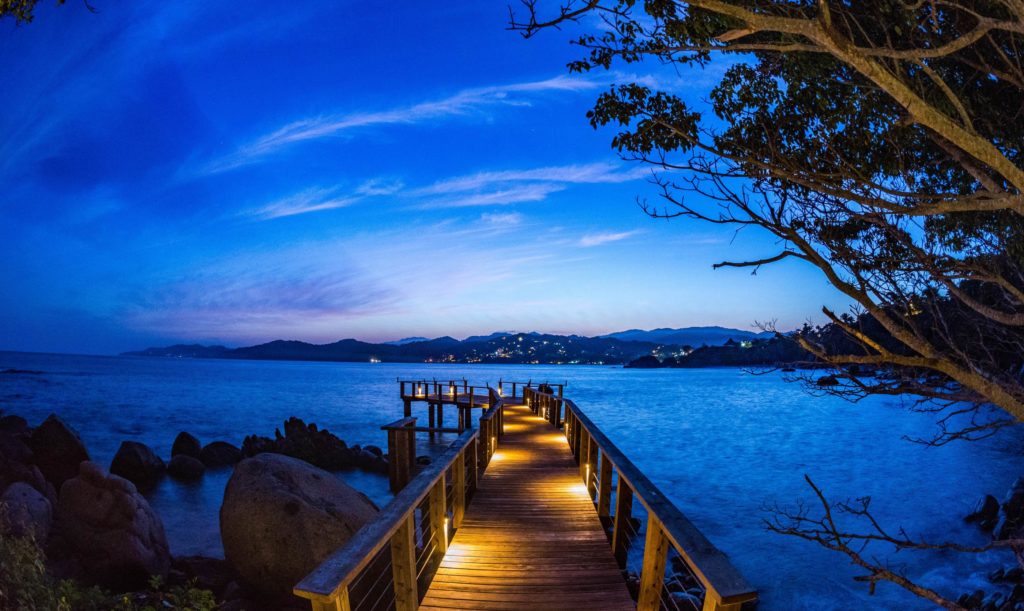
6. Look for Wide Open Spaces
When you’re trying to capture more natural as opposed to urban landscapes in the blue hour, try to look for wide-open spaces and shoot toward where the sun was. This will ensure that you make the most of the available light. In addition, plan your shoot when it is a full moon, as it will provide light and give amazing photographs!
7. Seek Out Reflective Surfaces
Blue hour light reflecting off of water has a soft and luminous quality to it that is worth seeking out for beautiful images. Place your tripod or your camera very low at the end of a pool, lake or ocean and literally use the water as a mirror to create saturated blue tones. Make sure the water is still and smooth for the perfect dynamic reflection shot! An important tip to remember, smaller lakes and shallower water bodies give better reflections.

8. Shoot Silhouettes
Silhouettes work well in rural blue hour images. They provide depth and interest to your photos. Expose the background but focus on your silhouette subject to ensure that you produce a crisp outline. And be quick on your feet, because the moment you spot the perfect silhouette, be quick to capture it in the small window of time before the light changes.
9. Experiment
By experimenting, you can create unique images. Try working with different angles, or introducing light painting into your shots. And experiment with your exposure times, as well. Only by testing different shutter speeds will you be able to see their different impacts on your photos, and find what works (and what doesn’t) in different situations.
10. Make the Most of Post-Production
All photos can benefit from a little post-production help, and blue hour photos are no exception. Always make sure that they are straightened and cropped to suit your story. Adjust the white balance for an alternative look. And play with the contrast to see how it affects your photos and brings out their details.
Blue hour photography is a fantastic opportunity to experiment, to try long exposures, and to try to capture some unusual images. It does require a little preparation and patience, but it’s definitely worth the effort for beautiful blue-toned shots.
If you are interested in also learning about other photography hours and techniques, check out more about Golden hour photography, Night sky photography, and even Motion blur photography.