Video walls are a fantastic option for showing lots of clips simultaneously. Whether you’re looking to showcase your photography talents or create an amazing background for a presentation, video walls are always attention-grabbing and trendy. So, let’s jump into this After Effects video wall tutorial.
Summary
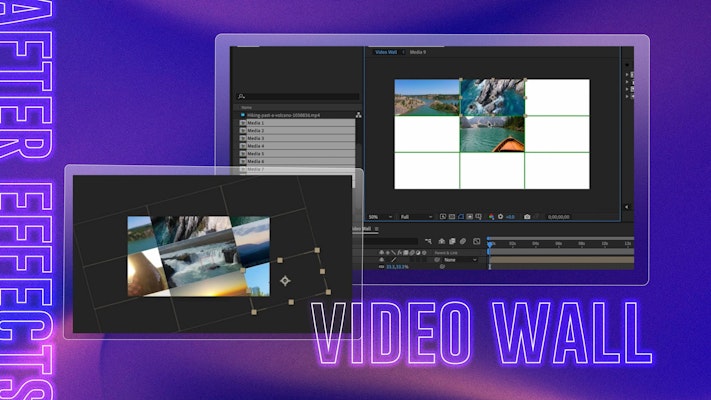
Part 1: Create an Amazing Video Wall in After Effects
The technique for creating a video wall is the same, no matter how many clips you want to use. Whatsmore, with this method, you can create a template that can be used again and again.
Step 1: Format Clips
The first step to creating a video wall is to format your clips to the correct size, allowing you to mix 4K and 1080p footage into the same template. We’re going to use a selection of fabulous landscape clips from Motion Array.
- Import all of your clips into the project.
- Click Cmd+N or Ctrl+N to create a New Comp, then name the comp Media 1 and choose the size you want each video to be – we’re going to use 1080p.
- In the Media Browser, select your Media 1 comp and hit Cmd+C or Ctrl+C followed by Cmd+V or Ctrl+V to create as many copies of the comp as you have clips for your video wall.
- Go through each media comp, open it, and place it in your chosen image – use the Transform settings to resize and position your media to fit the comp.
- When you have placed all of your media, close all of the comps.
Step 2: Create a Grid
Before we add all of the Media Comps to create the video wall effect, it can be super helpful to use a grid to guide you. Let’s look at setting up a grid for your specifications.
- Create a New Comp and call it Video Wall.
- At the bottom of the Media Viewer, click the Proportional Grid option from the guide menu.
- Go to the After Effects Menu > Preferences > Grids and Guides.
- Under the Proportional Grid settings, change the number of Horizontal and Vertical spaces in the grid to match how many videos will be in your grid – we’re using 9 videos in a 3×3 grid.
- Hit OK, and you’ll see a grid added to your media viewer, representing the layout you want in your video wall.
Step 3: Creating the Video Wall
Adding all of your media comps can take a little time, but you can quickly resize and align your clips once you get into the flow.
- Drag Media 1 to the timeline, then hit S on your keyboard and decrease the size to fit one of the grid boxes.
- Drag the Media box to sit in the first space, then you can place each media comp wherever you’d like, but it is much easier to keep them in number order if you want to change your footage later.
- Do this with each media comp, lining them up across the Video Wall comp – as each comp is the same size, you can use the same rescale settings.
- It is often easier to zoom in to line up the clips, so hold Space while dragging around the media viewer to change the area you’re looking at.
Tip: Remember, the more clips you use, the longer it will take After Effects to render your project.
Step 4: Add Movement to Video Wall
The last step is to animate your mosaic video wall with some cool position, scale, and rotation keyframes. This is where you can start having some fun.
- Right-click in the timeline and choose New > Null.
- Select all of the media comps in the Layers panel.
- Grab the Pick Whip and attach them all to the Null layer.
- Lock all of your media comps so they can’t move independently.
- Select the Null layer and while holding Shift, hit P, R, and S on your keyboard to open the settings.
- Increase the Scale and adjust the Position, so your first clip fills the frame.
- Create a keyframe for Scale, Position, and Rotation in the Layers panel.
- Move the playhead along the timeline to where you want the transition to finish. Then, create a keyframe for all settings and adjust the Null position to your second clip.
- Move the playhead to the space between the keyframes, then decrease the Scale, add any position or rotation effects you like. Play around with the keyframes to see what works.
- Highlight all of the keyframes and right-click > Keyframe Assistant > Easy Ease.
- Go through the project, animating the Null Object to move around your video wall.
Troubleshooting Tips: Footage isn’t long enough
Occasionally you’ll find your video clips are not long enough for the sequence that you are creating, and by the time the wall moves to the clip, it is finished. Here are a couple of suggestions for how to fix this.
1. Retiming the Media
Retiming your media is an excellent way of extending the duration, but you should be aware that it will decrease the speed of your clip and can cause a reduction in quality.
- Go into the media comp in question, right-click the clip and choose Time> Retime.
- Drag the end of the clip to meet the end of the timeline.
- Move the keyframe to the new end of the clip.
2. Adjust the Start Point of the Clip
You can move and duplicate the clip to make sure it plays in the correct place in your sequence; you just need to hide the point where the duplicates meet.
- Play through your video wall to the point where the clip in question is the focus.
- Open the media comp and move the clip to start where the playhead sits.
- Select the clip and hit Cmd+D to duplicate it, then fill up the timeline on either side of the first clip with as many duplicates as you need.
Part 2: Top 6 After Effects Video & Photo Wall Templates
1. Video Wall
The Video Wall Project features 25 image placeholders in a modern and sleek design. The subtle 3D style tracking of the video wall offers depth with an excellent gradient background for easy brand customization.
2. Video Walls
The Video Walls template is a fast and flashy composition featuring a massive 80 media placeholders. Ideal for news and vlog intros, the spinning 3D and light effects create an attention-grabbing opener.
3. Grid Wall Gallery
The Grid Wall gallery is a stylish and elegant template with slow, subtle tracking over your images. Ideal for artists and photographers looking to showcase their work, this project can also be used to create fun image typography backgrounds.
Download Grid Wall Gallery Now
4. Media Wall 2
Media Video Wall 2 is a speedy, glitchy composition filled with 3D spin and zoom effects. The project contains 16 photo/video placeholders, 9 editable text layers, and 1 logo placeholder, ideal for use as an opener for your News programs and vlogs.
5. Modern Video Opener
The Modern Video Opener features a gallery of video walls in a 3D, futuristic feeling space. Zipping through corridors and tunnels of video screens, the template feels like a trip down a virtual memory lane.
Download Modern Video Opener Now
6. Photo Wall Opener
The Photo Wall Opener is an awesome template that would suit a range of businesses and uses. The clean and modern video grid includes dynamic tracking and zoom transitions with a trendy parallax feel.
Download Mosaic Photo Wall Opener Now
Creating an After Effect Video Wall can be a bit time-consuming, but once you’ve built it, you’ll have an asset you can use for multiple projects. If you want to learn how to create photo carousel effects, check out this handy guide.