It’s time to shine a spotlight on backgrounds. All too often, creators leave backgrounds as an afterthought or don’t have the time, skills, or funds to create the background of their dreams. A well-designed background is so important, as it really sets the scene for your video and can help create a consistent look and feel across your content. A good background should emphasize your main subject, direct viewers’ attention, and enhance the overall aesthetics of your video.
On the other hand, a poorly designed background can distract viewers, dilute your message, and create a sense of confusion. So whether you’re creating a vlog, a short film, a commercial, or something else, it’s essential to give your background the attention it deserves, and that’s where our handy AI tips come in.
In this blog post, we’ll take you through some of our favorite ways to use the power of AI to create fantastic video backgrounds. Trust us. You’ll wonder why you haven’t tried this sooner! You can also watch our video tutorial.
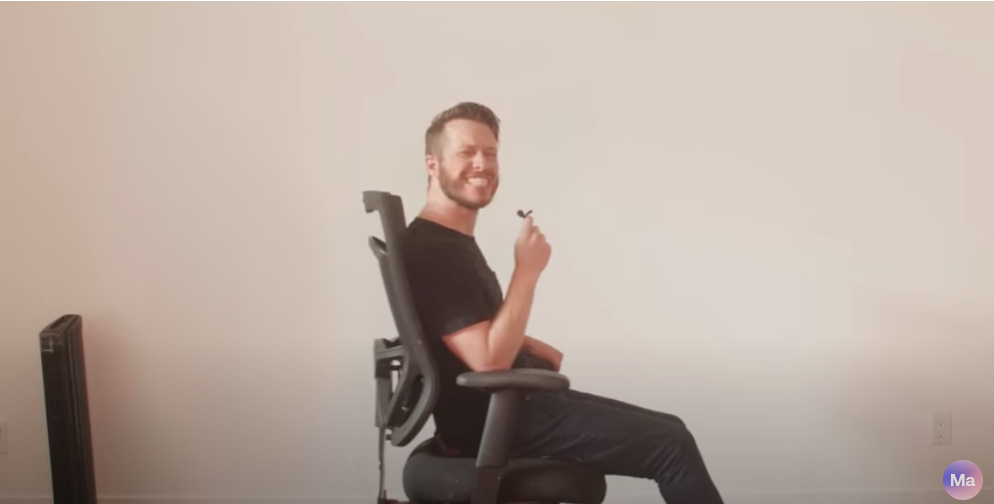
The best part about using AI to design your backgrounds is its simplicity. You don’t have to be a professional designer or even have an eye for design. It’s truly accessible to everyone. You can film yourself in front of a blank setup just like the one below to get started.
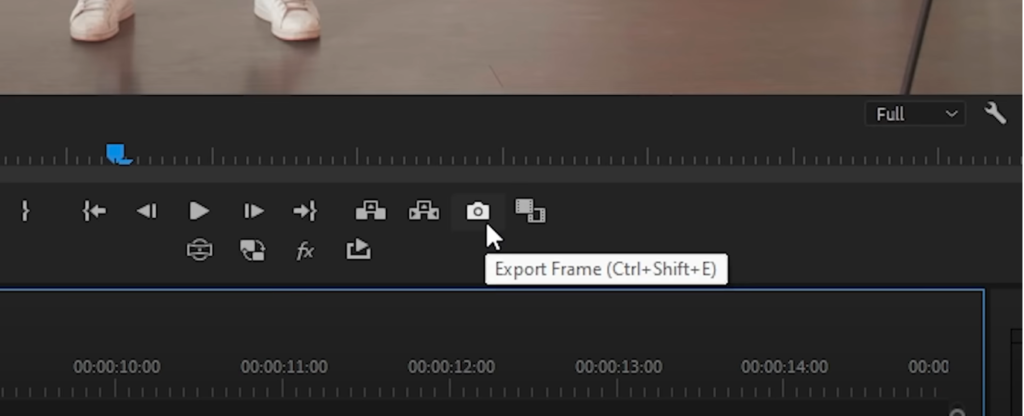
Then add the footage to your editing software of choice. We’re using Premiere Pro. The first thing you need to do is grab a still frame. Now you can move into Photoshop and use other free tools, but we like Photoshop Beta because it has a specific tool that will make the process so much faster and easier for you.
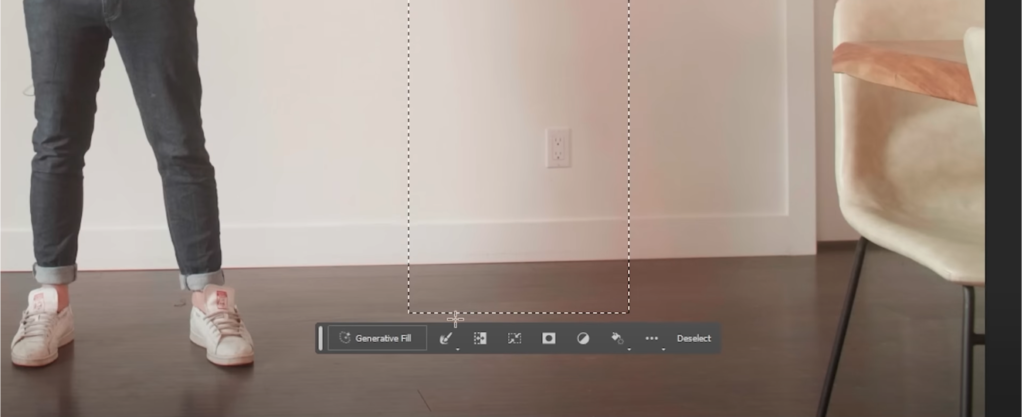
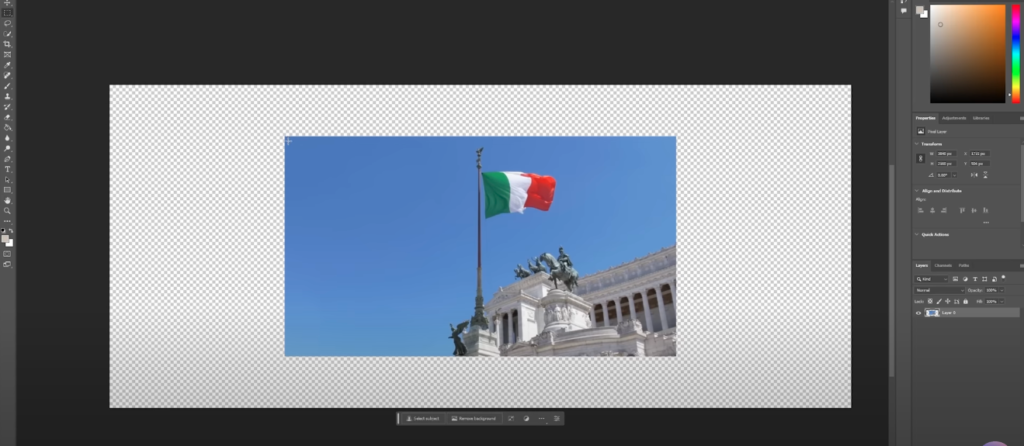
In Photoshop Beta
- Take the video scene you captured in Premier Pro
- Select the area that you want to add something new
- Click “Generative Fill” and type in what you want to add, e.g., plant
- You get three different options for any object you want to add, so play around and see what looks best to you
Your imagination is really the only thing that can limit your here. You can create something super realistic or go way over the top. Ever wanted to present from a gold throne, with 20 cats, on the moon? Well, now it’s possible!
But until this technology is perfected, we have a few tips to help you get the most out of it and keep your videos looking professional.
Tip #1:
Do some research. A lot will be trial and error to see if Photoshop can easily generate an entire background scene or individual elements. You might end up using a mix of both methods.
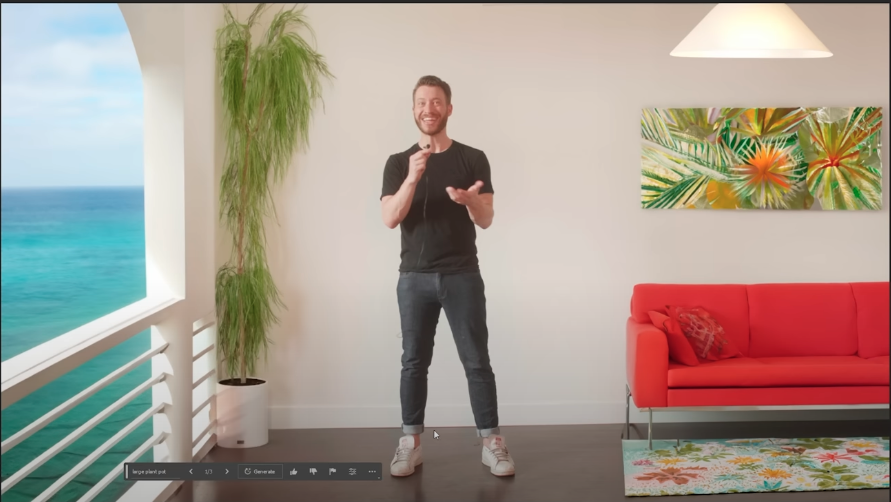
Tip #2:
Once you have your elements in place, you can change parts of them, e.g., in this scene, we like the plant in the corner, but the pot wasn’t quite right. So we selected the pot and asked for a new bigger one.
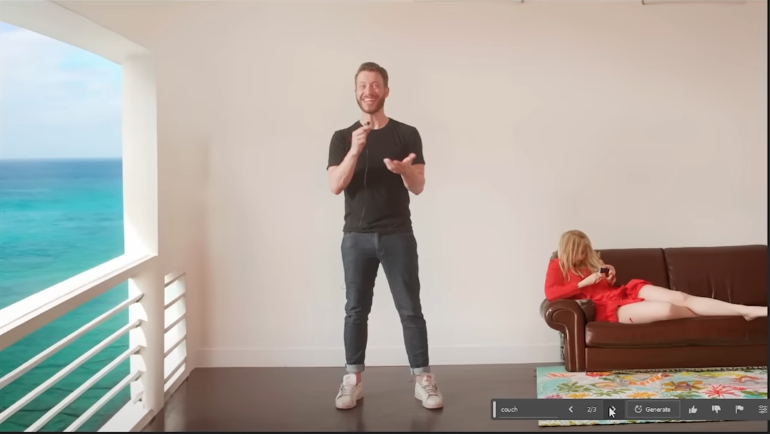
Be patient, and don’t be afraid to generate multiple times because, after all, this is new technology, and something it can give you stuff that isn’t quite right.
Here, for example, it tried to generate a person on the couch when we just wanted an empty one.
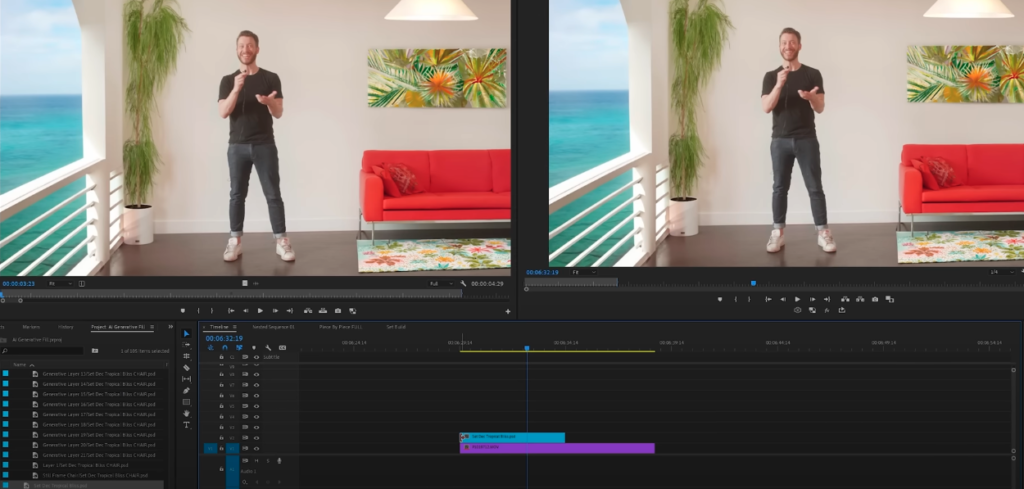
How to integrate the AI background with your footage
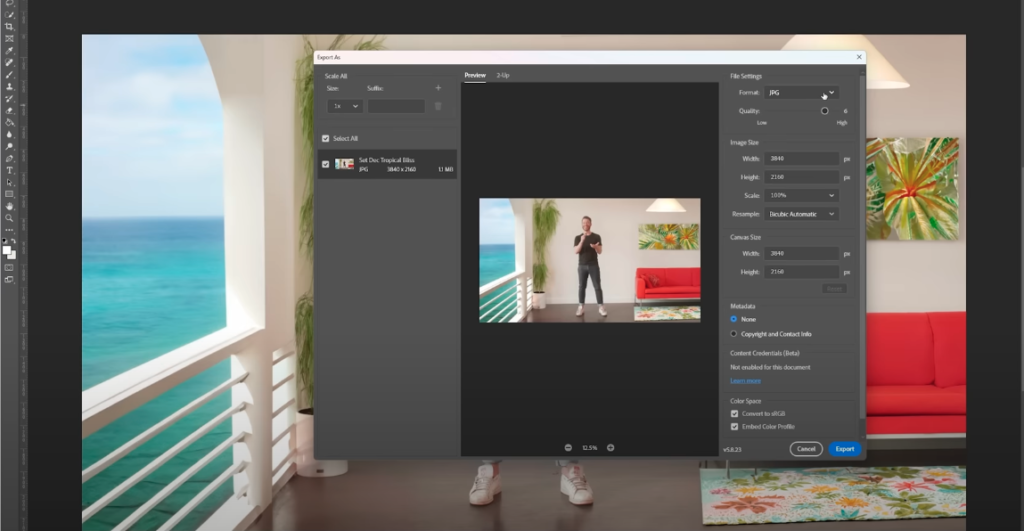
Now we have to export the background image you just created. Here’s how.
- Export the Photoshop image as a jpeg file
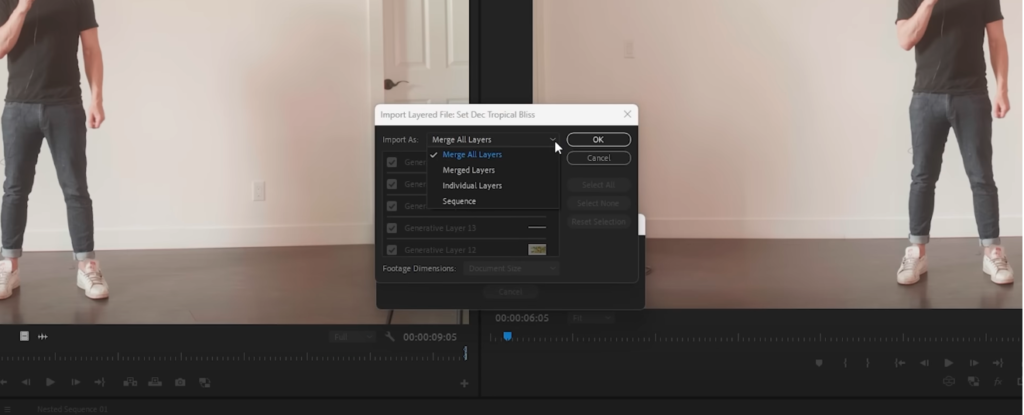
In Premiere Pro
- Set your file up to Merge all Layers. You can keep the layers separate if you want them to appear at different times within your video.
- Drop your image right over the top of your old background in Premier Pro
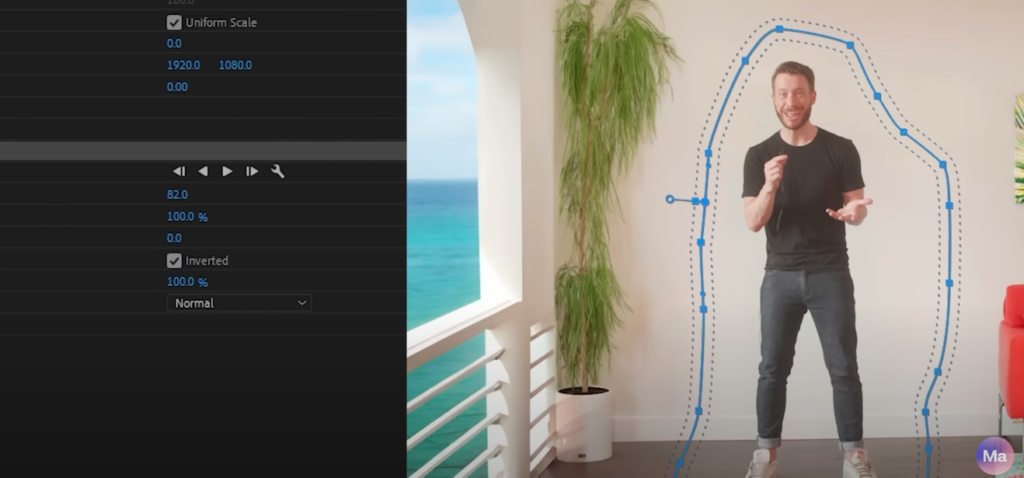
Here’s where the magic trick comes in:
- Mask around yourself or anything moving in your scene
- Set your mask to inverted and feather it, avoiding any areas that you’ve added AI items too
But even after this trick, the background might still look a little off. The reason is that even with real high-quality footage, there’s always a subtle “noise layer”, whereas generative images will look a little too still. You might not be aware of it, but your brain will be used to seeing subtle movement, even on a subconscious level.
To fix this subtle difference and blend your real and generative images together seamlessly, simply add a subtle noise layer on an adjustment later over top of everything. This slight difference will help create a more realistic effect, even if it’s barely visible.
Or, if you want to go super pro, you can download some film overlays from Motion Array, like Film Grain 35mm 4K Collection.
Our final tip to seamlessly blend all your elements together is to color-grade everything.
How to extend your background
Beyond making your background look better, you can also use AI to extend your backdrop. We all dream of getting a super amazing wide-angle establishing shot, or maybe you want to add a subtle zoom into your subject, but you don’t have enough room before it gets really tight.
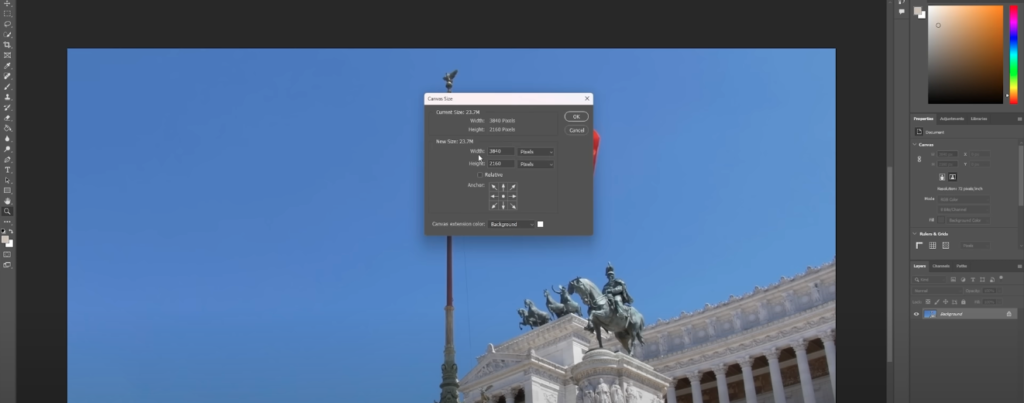
Just like we did in the previous section, grab a screenshot of your real background and upload it in Photoshop.
- Extend the canvas size so that you have something larger than what you started with
- Use the rectangle tool to select just a little bit less than your whole frame
- Right-click and select inverse
When you bring it back into Premiere Pro, just follow the same masking and feathering steps so the edges blend seamlessly. Now you have a wider shot that you can use as an establishing shot, or you can use it to zoom in a longer distance. If you want to know even more ways that you can use AI to spice up your videos, check out this video our Motion Array expert Jordan put together.